B4000 SE Cab Plus 4WD V6-4.0L OHV (1997)

Leaf Spring (2)
1. Check for a squeaking condition at the rear leaf springs. Determine whether the squeak is caused by the spring or the shackle bushings. Replace as
necessary.
2. Install the spring tip liners if the spring is the cause of the squeak.
3. If the original spring clip is damaged during removal, install a new leaf spring service clip.
INSTALLATION
1. Install in the reverse order of removal, referring to the following:
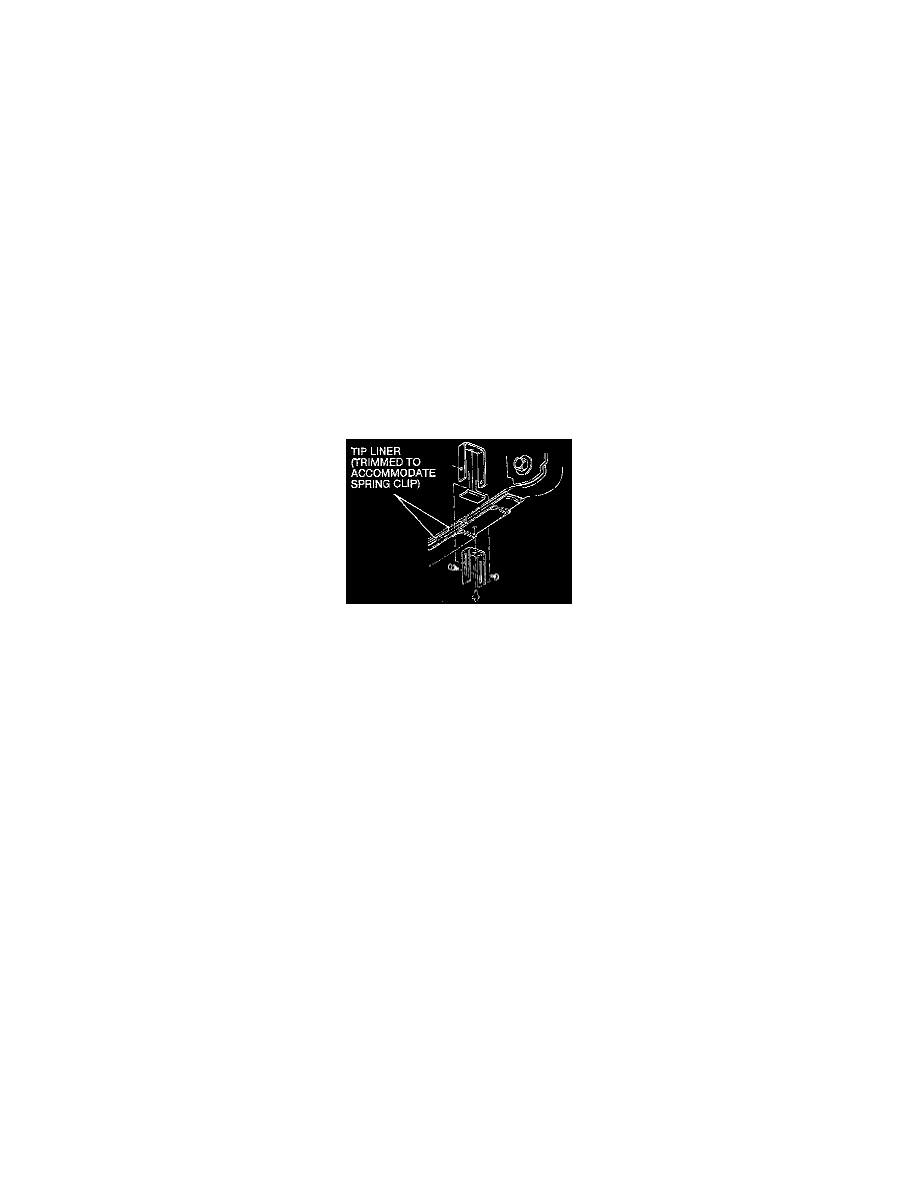
Tip Liner (3)
1. Bend the spring clip to provide clearance between the spring leaves, allowing insertion of the liners. A pry-bar may be used between the leaves
to provide additional clearance for insertion of the liners.
2. Slide the liner between the leaves until the liner extends approximately 6.35 mm (0.25 inch) beyond the tip of the lower leaf.
NOTE: Do not attempt to install the liner between the lowest primary leaf and the short 12.70 mm (0.50 inch) thick secondary leaf, found at
the bottom of the leaf stack on some assemblies.
3. Set the rear axle casing on a stand to load the rear leaf springs. Contact the leaves at the clip locations.
4. Reinstall the production clips or install a replacement service clip.
NOTE: On some tip liners, sections of the edge used to center the liner on the spring leaves may need to be trimmed off to accommodate the
spring clip.
Service Clip (4)
NOTE: The spring leaves should contact at the clip location.
1. Remove the damaged clip by prying back the ends of the clip which are folded across the leaf spring until the clip can be freed from the spring.
On some clips it is necessary to pry the locating pin out of the locating hole.
2. Make sure the locating hole is clean and free of debris.
3. Position the lower part of the service clip across the width of the underside of the spring, so that the clip holes align with the locating holes in
the spring. The legs of the lower half of the clip should extend down from the bottom of the spring.
4. Insert the drive rivet that comes with the clamp through the hole in the lower service clip and the hole in the spring leaf. The flat face of the
rivet flange should rest against the clip lower half.
5. Fully seat the rivet with a hammer.
NOTE: If there is not enough room to hit the rivet directly with a hammer, a punch may be used.
6. The slotted legs of the clip lower half should extend downward, so that the outer surface of the legs is flush with the leaf spring sides.
7. Place the rubber service clip liner across the top of the leaf spring. Align the lower clip with the flat surface against the leaf and the clip
locating edges extending upward.
8. Place the clip upper half between the locating edges of the rubber liner.
9. Align the threaded holes in the clip upper half with the lower clip slots.
10. Hand start the two screws, through the clip lower half slot, into the clip upper half threaded hole.
NOTE: The screw heads will be located under the spring, ultimately pressing against the clip lower half.
11. Squeeze the clip to the spring with one hand while tightening the screws.
Tightening torque: 21 - 27 Nm (15 - 20 ft. lbs.).
Leaf Spring (2)
Install the U-bolts through the plate.
Tightening torque: 88 - 118 Nm (65 - 87 ft. lbs.).
