
B4000 SE Regular Cab 4WD V6-4.0L OHV (1999)
16. Remove the cylinder head gaskets.
17. Remove the exhaust manifolds and the exhaust manifold gaskets.
18. Install in the reverse order of removal.
Cylinder Head Bolt Installation Note
Caution:
^
Do not reuse the cylinder head bolts. They are torque-to-yield. Reuse of the cylinder head bolts may cause damage to the engine.
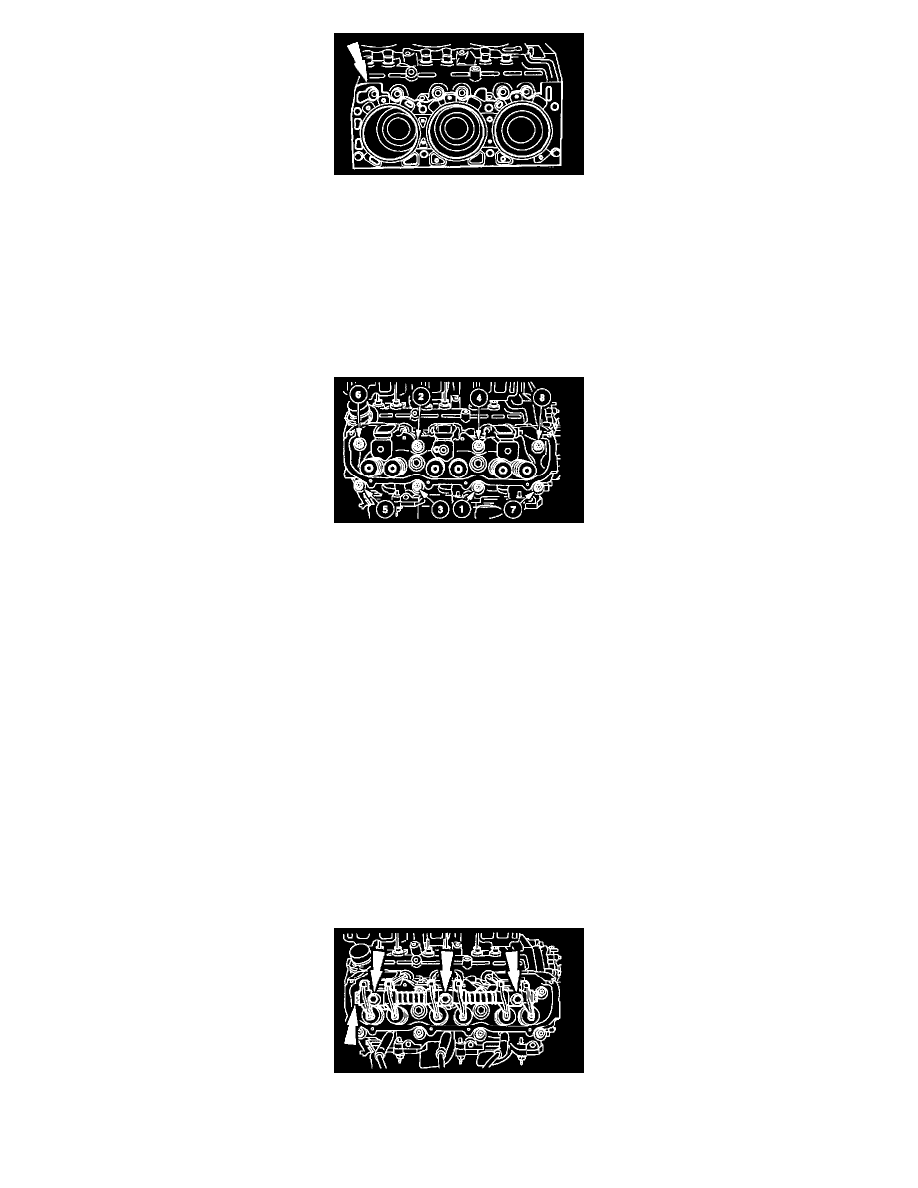
1. Tighten the bolts in sequence in three steps:
1. Tighten to 65 Nm (6.6 kgf.m, 48 ft. lbs.)
2. Tighten to 80 - 85 Nm (8.2 - 8.7 kgf.m, 59 - 62 ft. lbs.)
3. Tighten an additional 80 - 85 degrees.
Spark Plug Wire Installation Note
Caution:
^
Proper Installation of the spark plug wires is critical to vehicle operation. If one spark plug wire Is not properly Installed on the spark plug or the
Ignition coil, both spark plugs connected to that segment of the Ignition call may not fire under load.
Note:
^
Wipe the spark plug wires with a clean, damp cloth prior to inspection.
^
When a spark plug wire is removed for any reason from a spark plug or ignition coil, or a new spark plug wire is installed, dielectric grease must
be applied to the spark plug wire boot prior to installation.
1. Use a small, clean tool to coat the entire interior surface of the boot with dielectric grease.
2. Install the spark plug wires.
Rocker Arm Installation Note
1. Install the push rods.
2. Install the rocker arm and shaft assembly.
3. Tighten the bolts in two steps:
1. Tighten to 30 - 34 Nm (3.1 - 3.5 kgf.m, 23 - 25 ft. lbs.).
2. Tighten an additional 90 degrees.