
B4000 SE Regular Cab 4WD V6-4.0L OHV (1999)
Flywheel: Service and Repair
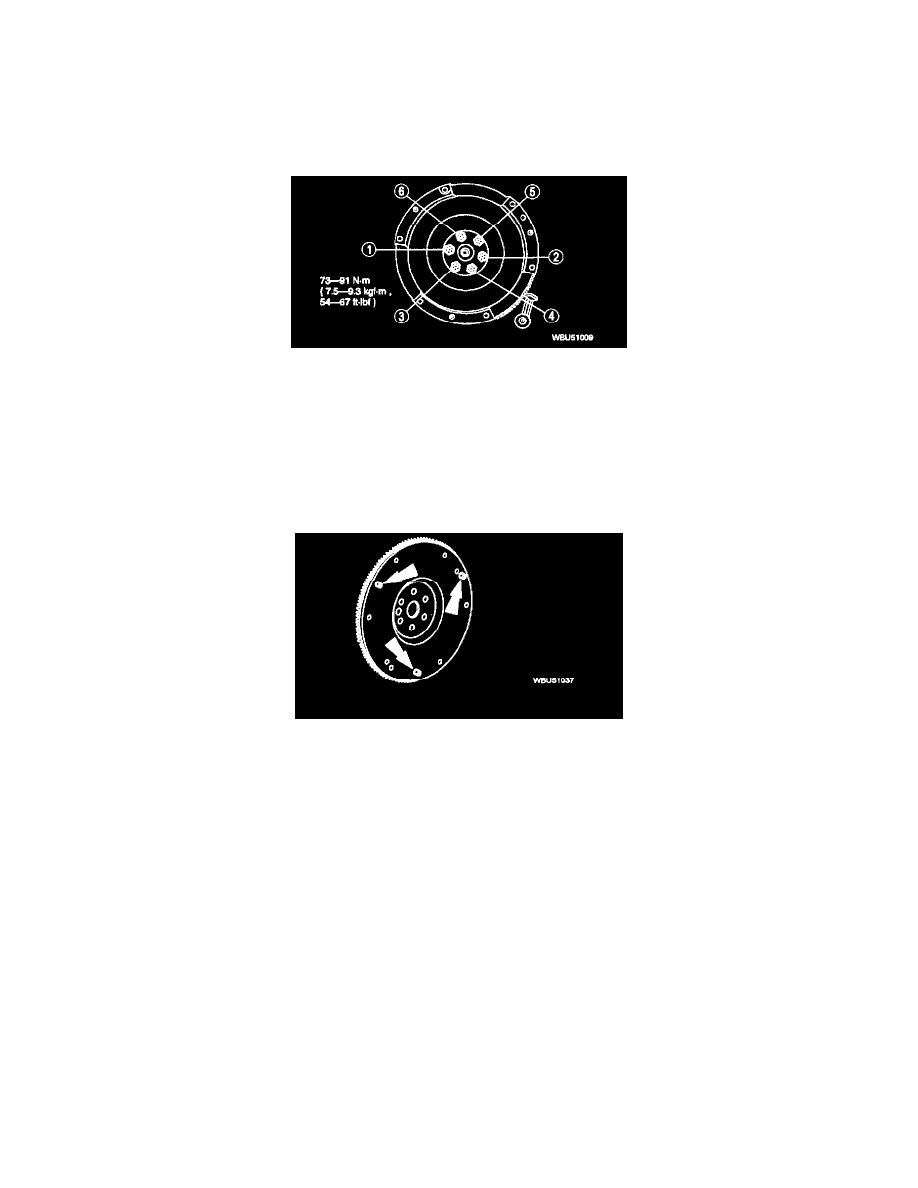
Flywheel Removal/Installation
1. Remove the clutch disc and clutch cover.
2. Install the flywheel holding tool and remove the bolts.
3. Remove the flywheel.
4. Position the flywheel onto the crankshaft and install the bolts. When revising the bolts, clean and apply sealant to the threads. No sealant is needed
when using new bolts.
5. Tighten the bolts in sequence to specification.
6. Install the disc and cover.
Flywheel Dowel Removal/Installation
Note: Take care not to damage the flywheel dowel holes or the surface areas around the flywheel dowel during removal.
1. Remove the flywheel dowels by using a drift pin where the flywheel dowel is installed in an open hole and a pair of locking pliers where the
flywheel dowel is installed in a blind hole.
Note: Care should be taken to drive the flywheel dowel squarely into place until it is fully seated and to not damage the surrounding surface areas.
2. Install all flywheel dowels by driving them into place using a brass or plastic mallet.
Flywheel Housing To Block Dowel Removal/Installation
Note: Take care not to damage the flywheel housing to block dowel holes or the surface areas around the flywheel housing to block dowel hole
during removal.
1. Remove the flywheel housing to block dowels using a drift pin where the flywheel housing to block dowel is installed in an open hole and a pair of
locking pliers where the flywheel housing to block dowel is installed in a blind hole.
Note: Care should be taken to drive the flywheel housing to block dowel squarely into place until it is fully seated without damaging the
surrounding surface areas.
2. Install all flywheel housing to block dowels by driving them into place using a brass or plastic mallet.