
B Series Truck L4-2184cc 2.2L 2200 (1988)
REPAIR PROCEDURES
1.
Remove both right and left windshield wiper arms, taking care not to damage or scratch the wiper blades and arms.
2.
Remove the fasteners from the cowl plate.
3.
Remove the rubber seal and cowl plate.
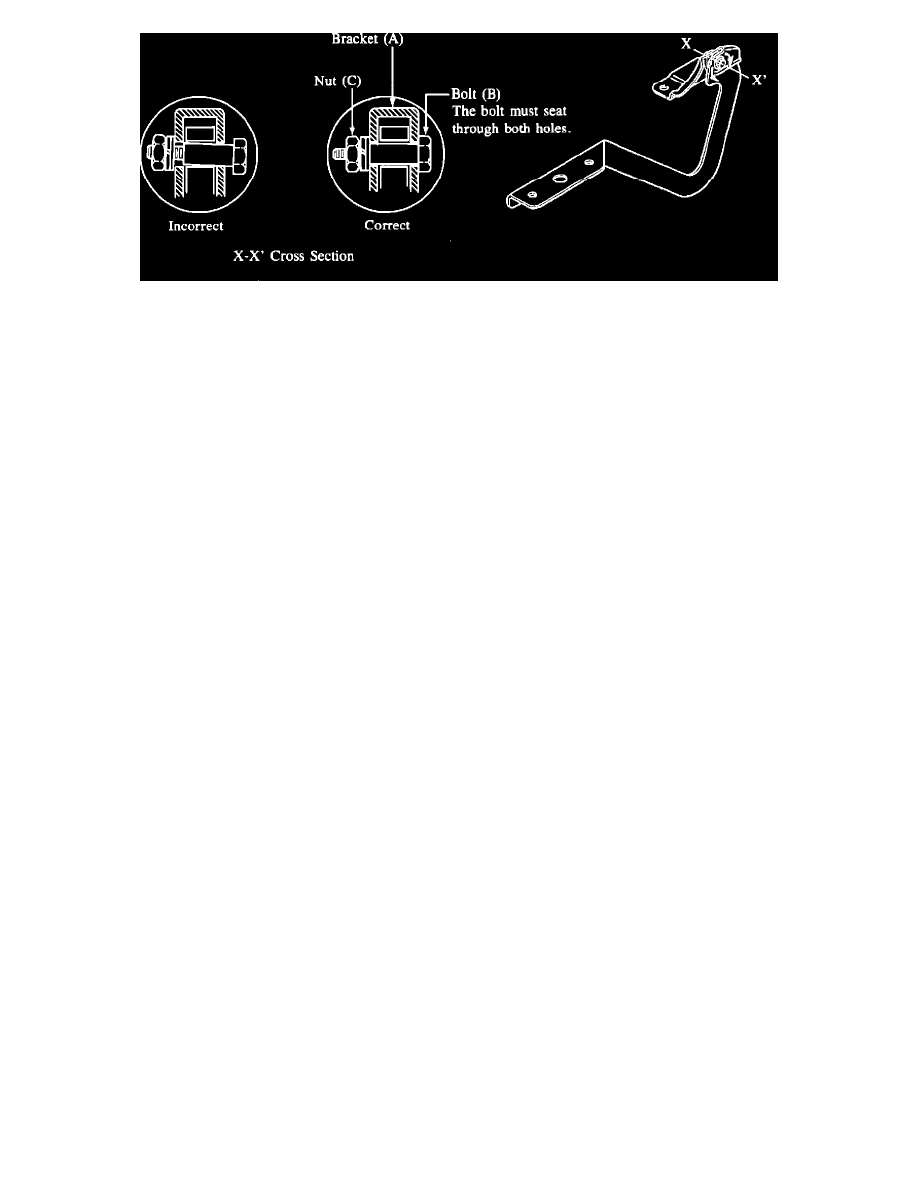
4.
Loosen the nut and rotate the bolt back and forth with wrench so that the bolt head fits the bracket with no gap. This should allow the bolt to
seat through both holes in the bracket.
NOTE:
File the bolt hole with the small round shape file if necessary.
5.
Tighten the bolt at specified torque of 69-95 in.lb. (80-110 cm-kg).
6.
Reinstall the cowl plate using care not to scratch paint or bend washer nozzle.
7.
Reinstall the cowl plate rubber seal.
8.
Close the hood.
9.
Reinstall the wiper arms and tighten their retaining nuts at specified torque of 87 - 121 in.lb. (100 - 140cm-kg).
10.
Check the operation of the windshield wipers and windshield washer.
11.
Check that the windshield wiper blades are located in the proper place.
NOTE:
The wiper blade should be positioned at 0.6 - 1.5 in. (15 - 40 mm) from the bottom of the windshield glass.
WARRANTY INFORMATION
Customer Comment Code:
99
Damage Code:
99
Part Number of Main Cause:
3874 52 215
Part Quantity:
None
Authorization No:
B 8049 A
Operation No:
XX0284 RX (Inspection) XX0281 RX (Inspection & Repair)
Labor Hour:
0.2 Hr. (Inspection) 0.3 Hr. (Inspection & Repair)