
B Series Truck L4-2209cc DSL (1982)
Brake Rotor/Disc: Service and Repair
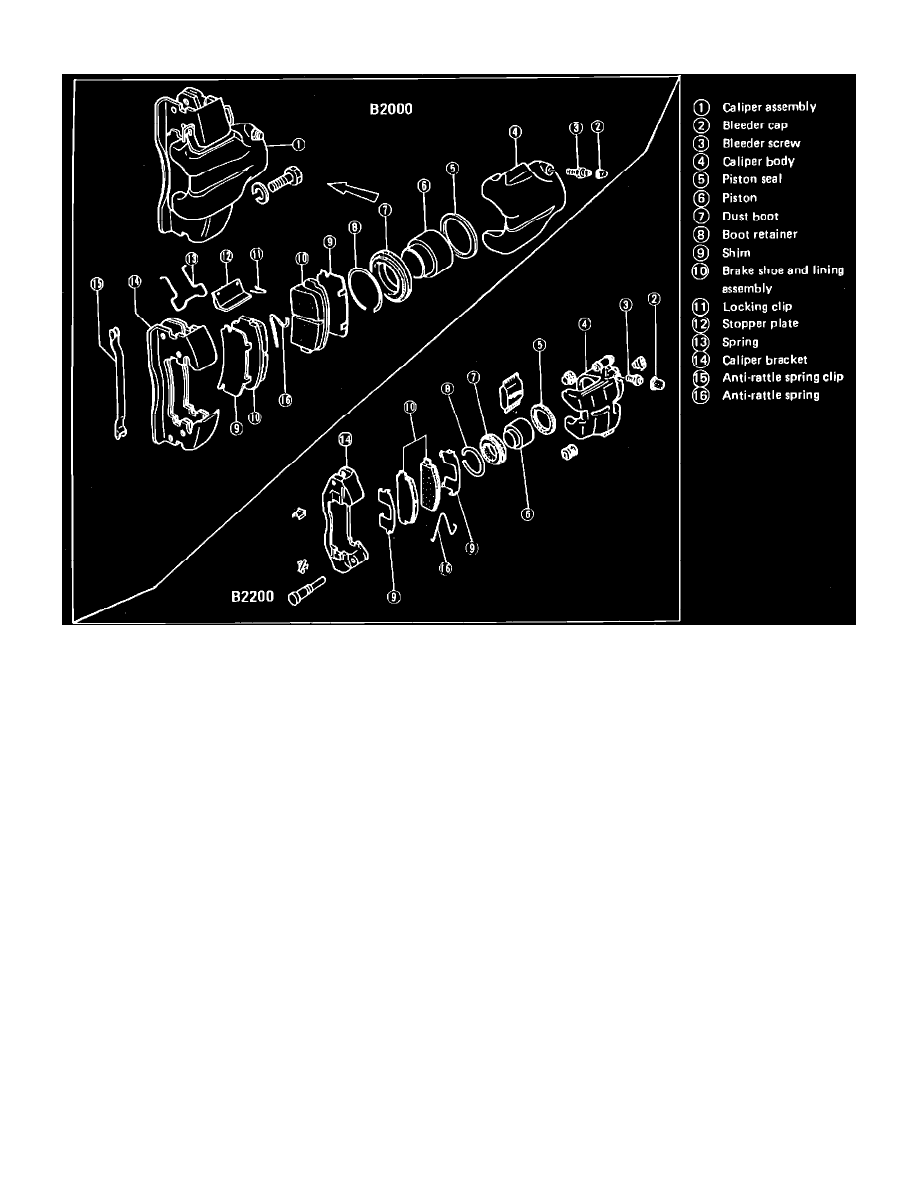
Fig. 1 Front disc brake assembly.
Brake Pads, Replace
1.
Raise and support front of vehicle, then remove the front wheel.
2.
On B2000, remove locking clips and stopper plates, Figs. 1.
3.
On B2200 models, remove the sliding pins, Fig. 1.
4.
On all models, remove the caliper and anti-rattle spring, then pull out the brake shoes and shims.
5.
Remove the rubber cap from the bleeder screw, and connect a drain tube onto the bleeder screw. Submerge the other end of the tube into a suitable
container.
6.
Open the bleeder screw and press the piston into the cylinder.
7.
Tighten the bleeder screw and remove the tube and retracting tool.
8.
Install new brake pads and shims on the caliper.
9.
On B2000 models, install the anti-rattle spring, caliper, stopper plates and locking pins. On B2200 models, install the anti-rattle spring and the
sliding pins.
10.
Install the front wheel and lower the vehicle.
Caliper, Replace
1.
Raise and support the front end of the vehicle.
2.
Remove the front wheel.
3.
Remove the pad and lining assembly as described previously.
4.
Disconnect the brake fluid pipe from the caliper and plug the end of the fluid pipe to prevent entrance of dirt and loss of fluid.
5.
Remove the caliper.
6.
If necessary, remove the caliper bracket by removing the two bolts.