
CX-7 AWD L4-2.3L Turbo (2008)
Air Bag: Service and Repair
Passenger-Side Air Bag Module Removal/Installation
PASSENGER-SIDE AIR BAG MODULE REMOVAL/INSTALLATION
WARNING:
-
Handling the air bag module improperly can accidentally deploy the air bag module, which may seriously injure you. Read the air bag
system service warnings and cautions before handling the air bag module. (See AIR BAG SYSTEM SERVICE WARNINGS.) (See
AIR BAG SYSTEM SERVICE CAUTIONS.)
-
Due to the adoption of 2-step deployment control in the passenger-side air bag module, depending on the impact force, it is possible
that inflator No.2 might not deploy. In such cases, before disposing of the air bag module, make sure to follow the inflator deployment
procedures and verify complete deployment of inflators No.1 and 2.
1. Turn the ignition switch to the LOCK position.
2. Disconnect the negative battery cable and wait for 1 min or more.
3. Remove the following parts:
1. Front scuff plate inner (passenger's side)
2. Front side trim (passenger's side)
3. Console panel
4. Console
5. Glove compartment
6. Hood release
7. Lower panel
8. Center panel
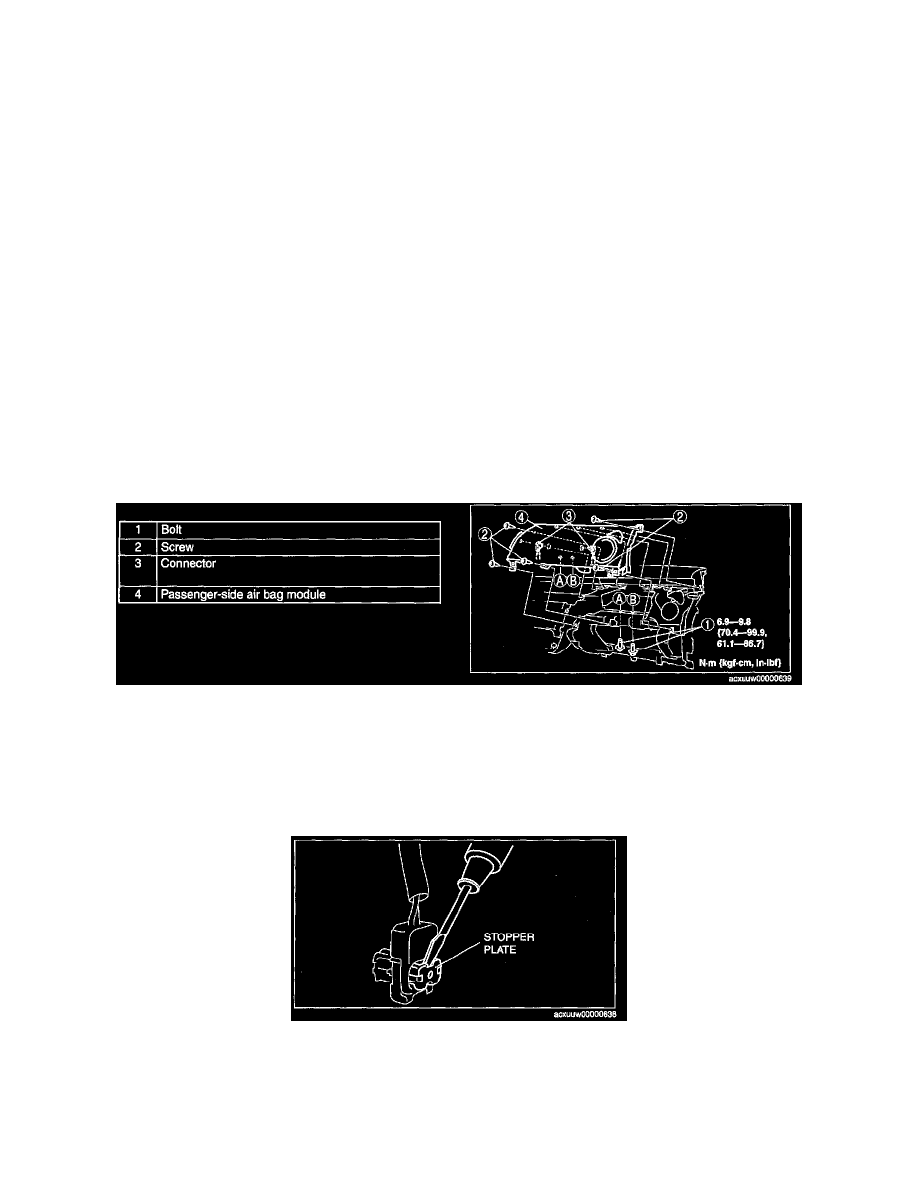
4. Remove in the order indicated in the table.
5. Install in the reverse order of removal.
6. Turn the ignition switch to the ON position.
7. Verify that the air bag system warning light illuminates for approx. 6 s and goes out.
-
If the air bag system warning light does not operate, refer to the on-board diagnostic system (air bag system) and perform inspection of the
system.
Connector Removal Note
1. Using a flathead screwdriver, pry out the connector stopper plate.
2. Disconnect the connector.