
CX-7 AWD L4-2.3L Turbo (2008)
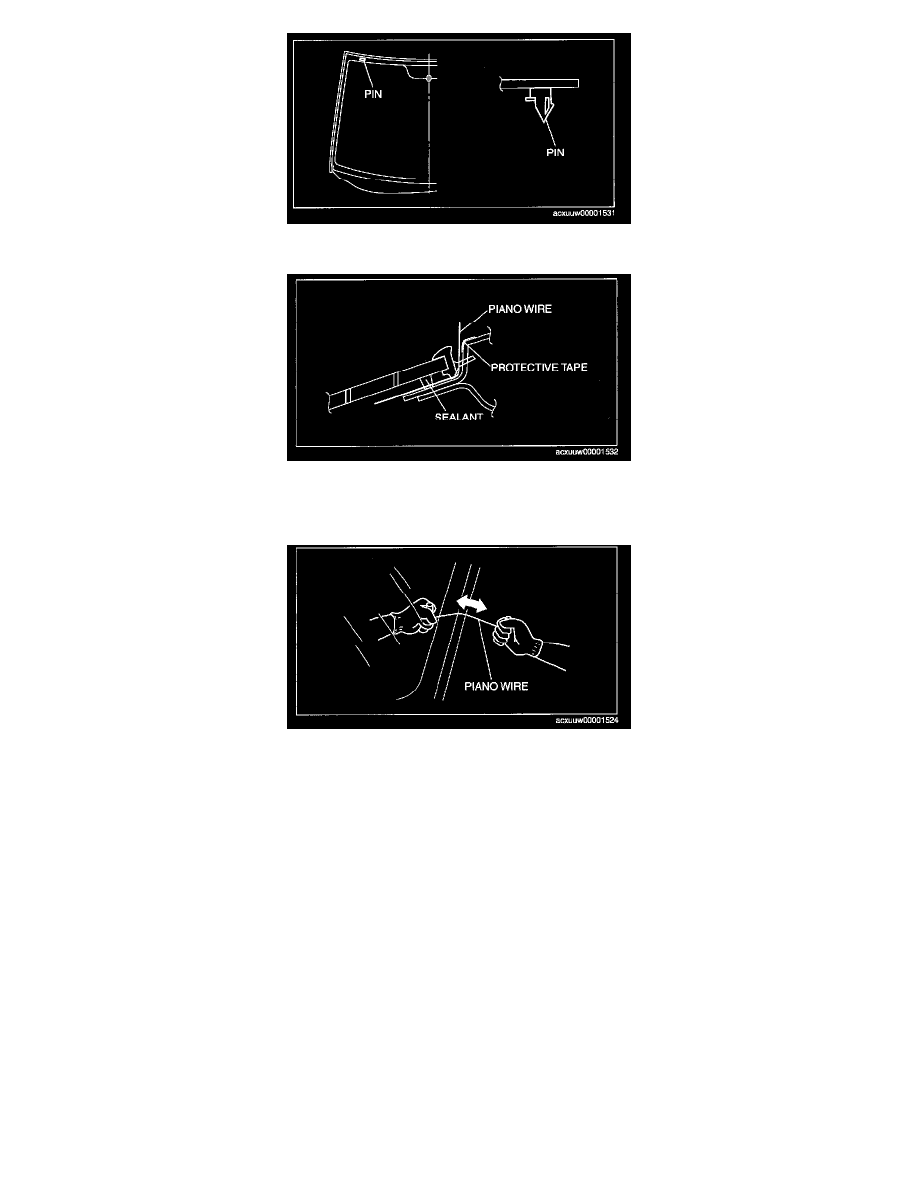
1. Avoiding the pin on the inside of the vehicle, insert the piano wire which has been cut to sufficient length.
2. Wind each end of the piano wire around a bar.
NOTE: Use a long sawing action to spread the work over the whole length of the piano wire to prevent it from breaking due to localized heating.
3. Secure one end of the piano wire, and while pulling the other end, cut the sealant around the windshield.
4. Pinch the pin from the inside of the vehicle and detach it.
5. Remove the windshield.
6. If the pin is damaged, remove the pin.
NOTE: Before removing the pin from the windshield glass, place an alignment mark on the windshield.
Installation
WARNING: Using a razor with bare hands can cause injury. Always wear gloves when using a razor.
CAUTION: If a door is opened or closed when all the window glass is closed, the resulting change in air pressure could cause the sealant to
crack preventing the proper installation of the glass. Keep the door glass opened until the windshield installation is completed.
1. Remove the sealant along the perimeter to the glass using a cutting a razor. (When reusing the glass)
2. Clean and degrease an approx. 50 mm (1.97 in) wide strip along the perimeter of the windshield.
3. Inspect the glass for cracks. If it is cracked. chamfer it using sandpaper.