
CX-7 FWD L4-2.3L Turbo (2010)
Front Door Window Motor: Testing and Inspection
POWER WINDOW MOTOR INSPECTION
Front Power Window Motor
1. Disconnect the negative battery cable.
2. Remove the following parts:
a. Inner garnish See: Front Door Panel/Service and Repair/Removal and Replacement/Inner Garnish Removal/Installation
b. Front door trim See: Front Door Panel/Service and Repair/Removal and Replacement/Front Door Trim Removal/Installation
3. Disconnect the front power window motor connector.
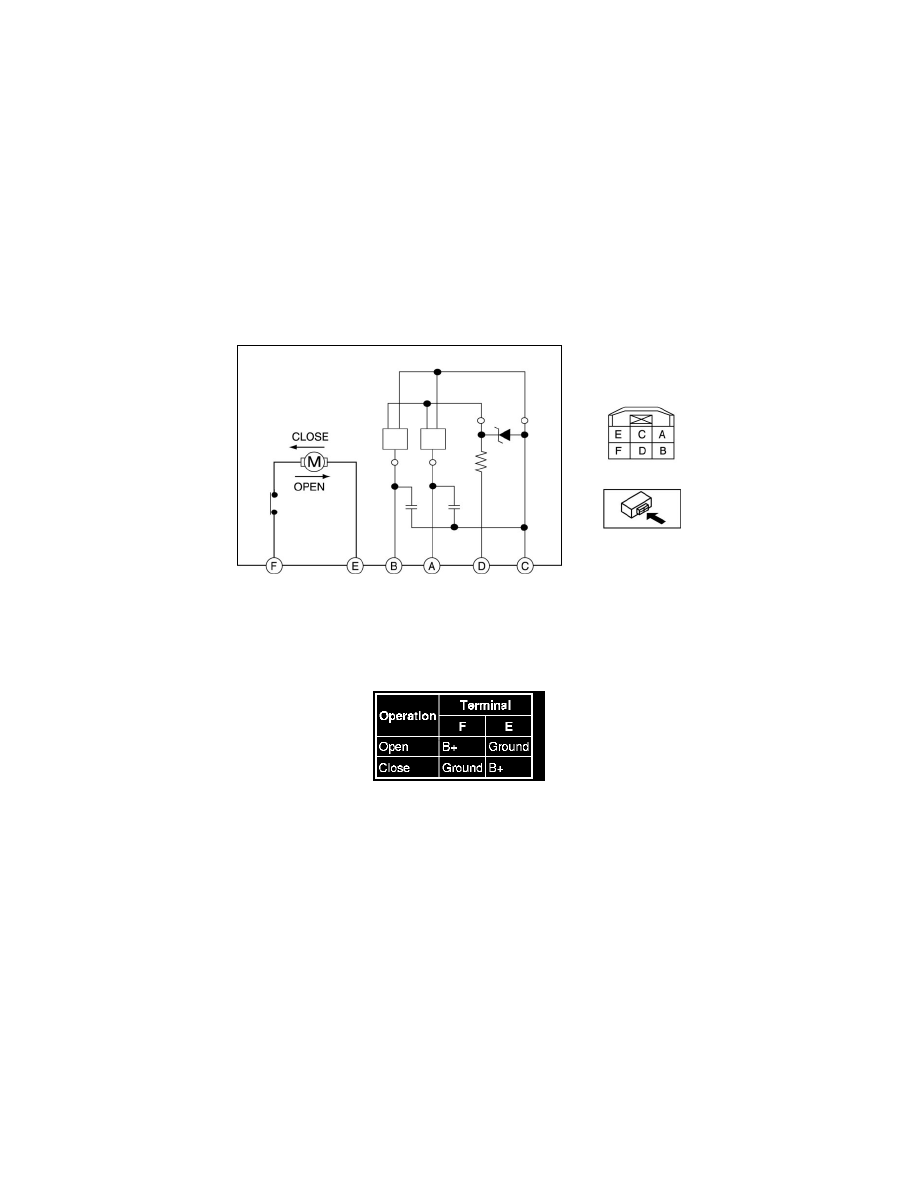
4. Apply battery positive voltage and connect the ground to power window motor terminals E and F, and then inspect the front power window motor
operation.
-
If the front power window motor does not operate as indicated in the table, replace it.
CAUTION:
-
If the front power window motor temperature is high, the motor may not rotate due to the motor internal bimetal function. Leave it
untouched for about 3 min to cool it down, then reinspect.
5. Connect the battery positive voltage to front power window motor terminal D and connect terminal C to ground.
6. Operate the front power window motor and measure the voltage at terminals A and B.
-
If there is any malfunction, replace the front power window motor.
Voltage
-
Pulse: max. 12 V/min. 0 V
Rear Power Window Motor
1. Disconnect the negative battery cable.
2. Remove the following parts:
a. Sail garnish See: Interior Moulding / Trim/Trim Panel/Service and Repair/Sail Garnish Removal/Installation
b. Rear door trim See: Rear Door/Rear Door Panel/Service and Repair/Removal and Replacement
3. Disconnect the rear power window motor connector.