
CX-7 FWD L4-2.3L Turbo (2010)
Front Cross-Member: Service and Repair
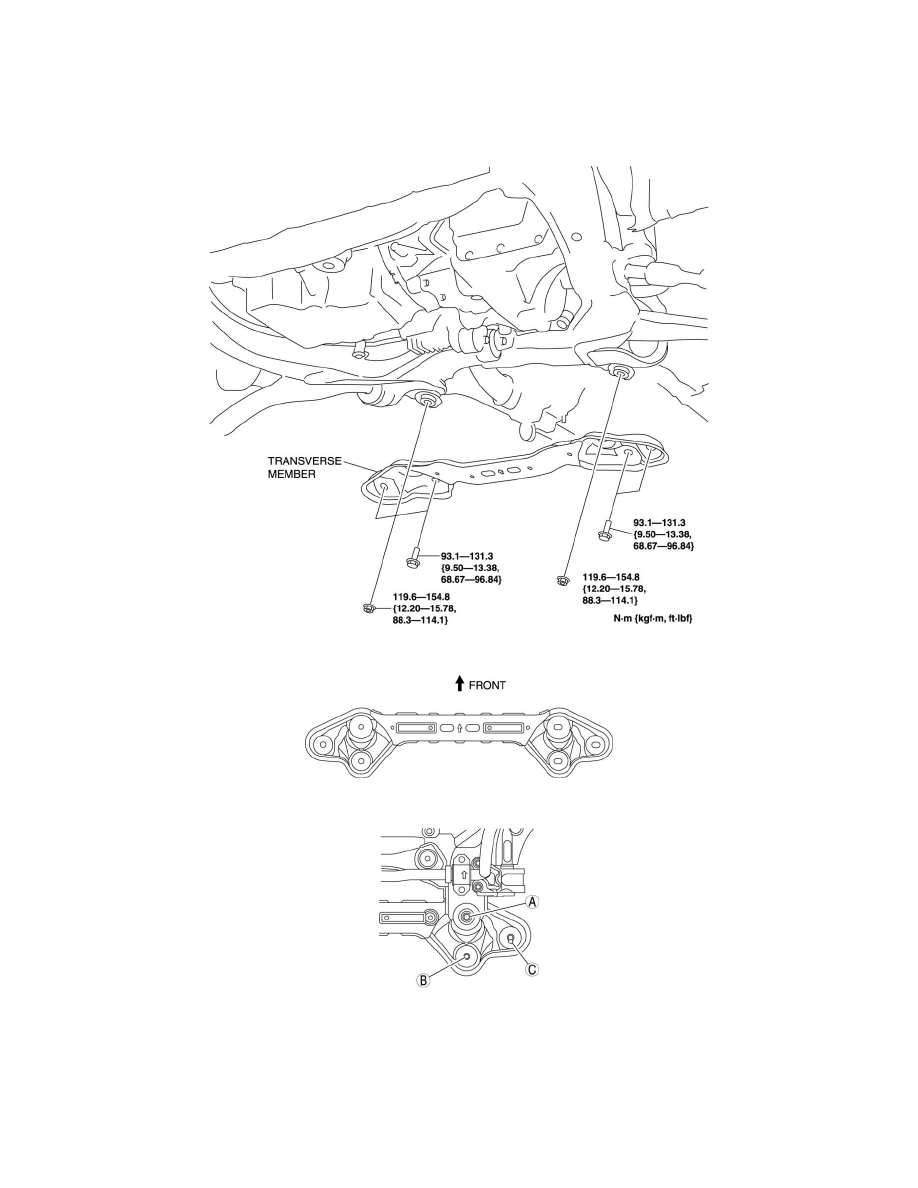
Transverse Member Removal/Installation
TRANSVERSE MEMBER REMOVAL/INSTALLATION
1. Remove the transverse member.
2. Install the transverse member so that the arrow is pointing to the front of the vehicle.
3. Tighten the nut A, then tighten the bolts in the order of B, C to the specified torque.
Tightening torque
-
Nut A: 119.6-154.8 Nm {12.20-15.78 kgf-m, 88.3-114.1 ft-lbf}
-
Bolts B and C: 93.1-131.3 Nm {9.50-13.38 kgf-m, 68.67-96.84 ft-lbf}