
CX-7 FWD L4-2.3L Turbo (2010)
Trim Panel: Service and Repair
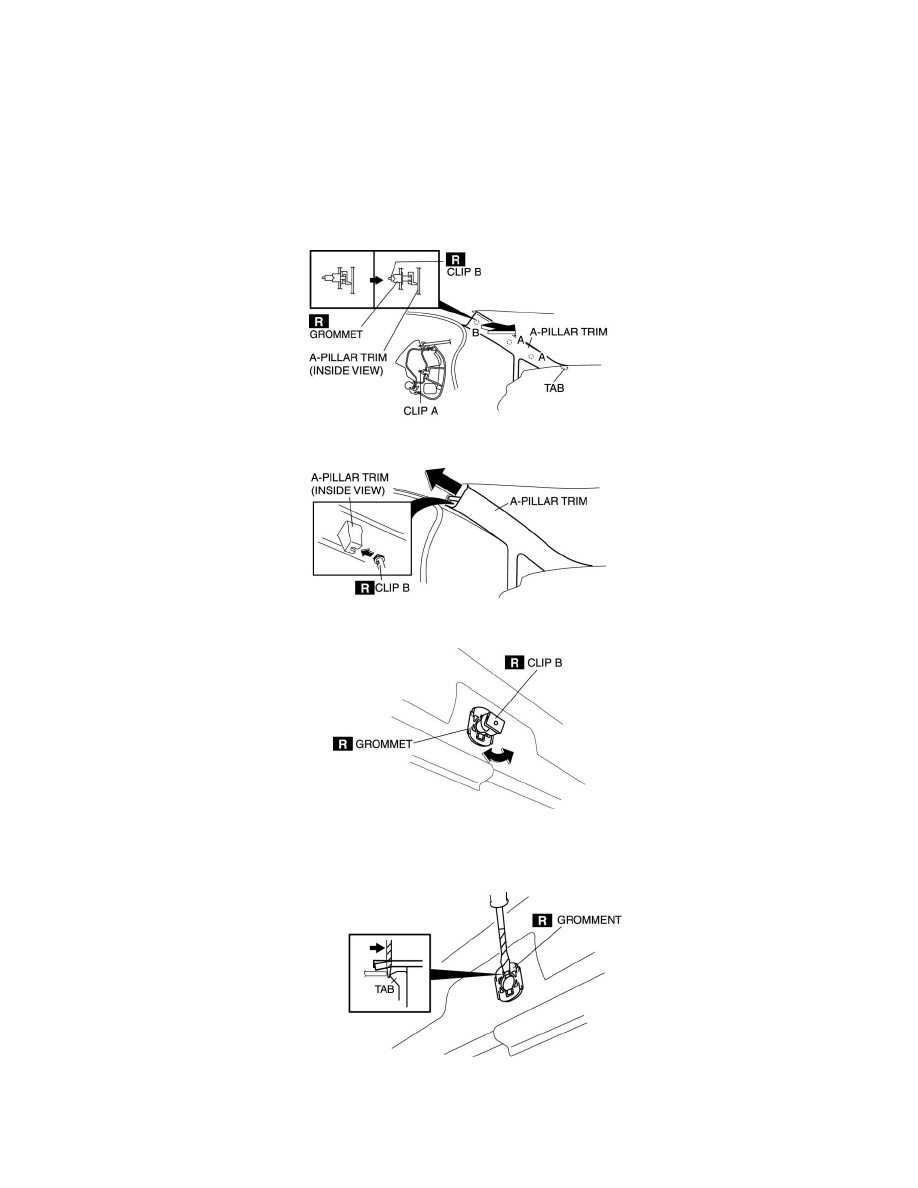
A-Pillar Trim Removal/Installation
A-PILLAR TRIM REMOVAL/INSTALLATION
1. Remove the A-pillar lower trim. (See See: A-Pillar Lower Trim Removal/Installation)
2. Partially peel back the seaming welt.
3. Pull the A-pillar trim shown in the figure in the direction of the arrow, raise clip B from its grommet together with the A-pillar trim, and remove
clips A at the same time.
4. Slide the A-pillar trim in the direction of the arrow shown in the figure and remove the A-pillar trim from clip B.
5. Rotate and pull clip B in the direction of the arrow shown in the figure until it is no longer loose, and feels tight.
6. Pull clip B and remove it from the grommet.
7. Insert a tape-wrapped flathead screwdriver between the body and the grommet.
8. Press the tabs and remove the grommet.
9. Install the new grommet to the body.