
CX-7 FWD L4-2.3L Turbo (2010)
Engine Control Module: Component Tests and General Diagnostics
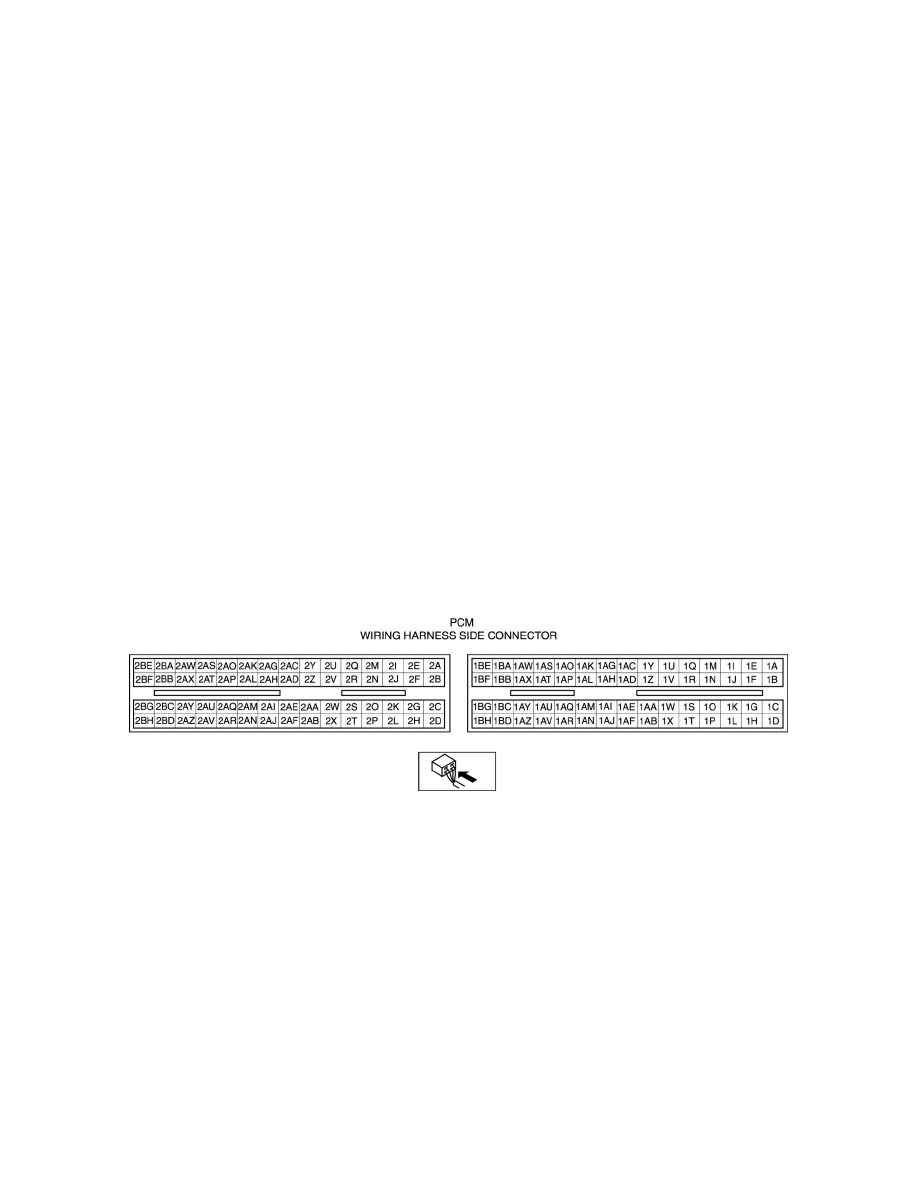
PCM INSPECTION [L3 WITH TC]
Without Using the M-MDS
NOTE:
-
The PCM terminal voltage can vary with the conditions when measuring and changes due to aged deterioration on the vehicle, causing false
diagnosis. Therefore determine comprehensively where the malfunction occurs among the input systems, output systems, and the PCM.
PCM inspection preparation
1. Disconnect the negative battery cable.
2. Remove the battery and battery tray. See: Starting and Charging/Battery/Service and Repair/Removal and Replacement
3. Remove the windshield wiper arm and blade. (See See: Wiper and Washer Systems/Wiper Arm/Service and Repair/Windshield Wiper Arm and
Blade Removal/Installation.)
4. Remove the cowl grille. (See See: Body and Frame/Cowl/Cowl Moulding / Trim/Service and Repair/Cowl Grille Removal/Installation.)
5. Remove the windshield wiper motor. (See See: Wiper and Washer Systems/Windshield Washer Motor/Service and Repair/Windshield Washer
Motor Removal/Installation.)
6. Remove the cowl panel. (See See: Body and Frame/Cowl/Cowl Moulding / Trim/Service and Repair/Cowl Panel Removal/Installation.)
7. Remove the PCM bracket with the PCM connector still connected. (See See: Service and Repair/Removal and Replacement.)
8. Install the battery and battery tray. See: Starting and Charging/Battery/Service and Repair/Removal and Replacement
9. Connect the negative battery cable.
PCM terminal voltage table (Reference)