
CX-7 FWD L4-2.3L Turbo (2010)
Shift Solenoid: Service and Repair
SOLENOID VALVE REMOVAL/INSTALLATION [FS5A-EL]
WARNING:
-
A hot transaxle and ATF can cause severe burns. Turn off the engine and wait until they are cool.
Primary Control Valve Body
1. Remove the primary control valve body.
a. Disconnect the negative battery cable.
b. Remove the under cover.
c. Clean the transaxle exterior throughout with a steam cleaner or cleaning solvents.
d. Drain the ATF. See: Transmission and Drivetrain/Automatic Transmission/Transaxle/Service and Repair/Procedures
e. Remove the oil pan. See: Transmission and Drivetrain/Automatic Transmission/Transaxle/Valve Body/Service and Repair/Removal and
Replacement/Control Valve Body Removal/Installation - FS5A-EL
f.
Remove the primary control valve body. See: Transmission and Drivetrain/Automatic Transmission/Transaxle/Valve Body/Service and
Repair/Removal and Replacement/Control Valve Body Removal/Installation - FS5A-EL
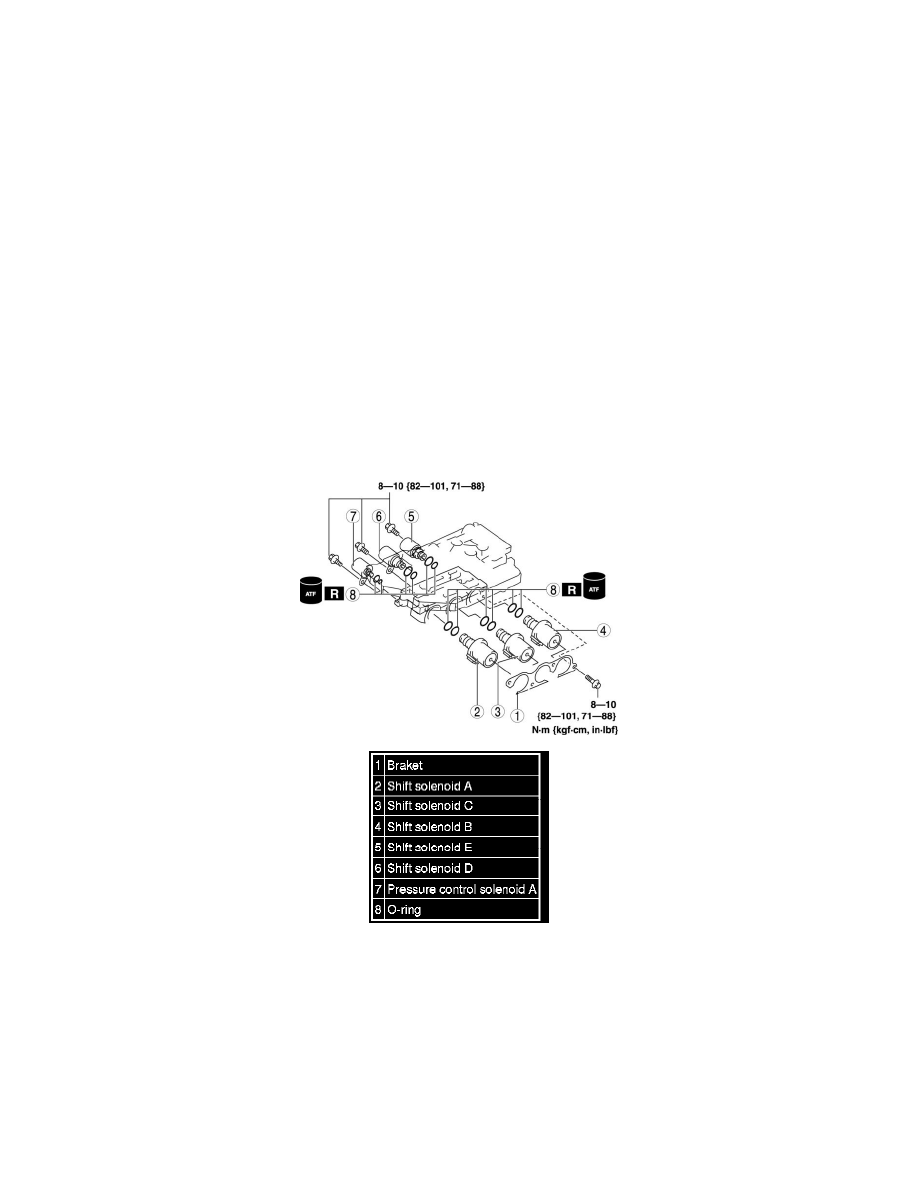
2. Remove in the order indicated in the table.
3. Install in the reverse order of removal.
4. Add ATF. See: Transmission and Drivetrain/Automatic Transmission/Transaxle/Service and Repair/Procedures
5. Perform the "Mechanical System Test". See: Testing and Inspection/Initial Inspection and Diagnostic Overview/Mechanical System Test
6. Perform the "Road Test". See: Testing and Inspection/Initial Inspection and Diagnostic Overview/Road Test
Secondary Control Valve Body
1. Remove the secondary control valve body.
a. Disconnect the negative battery cable.