
CX-7 FWD L4-2.3L Turbo (2010)
h. Rear seat See: Body and Frame/Seats/Service and Repair/Removal and Replacement/Rear Seat Removal/Installation
i.
Sub trunk box See: Body and Frame/Doors, Hood and Trunk/Trunk / Liftgate/Trunk / Liftgate Interior Trim Panel/Service and Repair
j.
Trunk end trim See: Body and Frame/Interior Moulding / Trim/Scuff Plate/Service and Repair/Trunk End Trim Removal/Installation
k. Trunk side trim
l.
C-pillar trim See: Body and Frame/Interior Moulding / Trim/Trim Panel/Service and Repair/C-Pillar Trim Removal/Installation
m. D-pillar trim See: Body and Frame/Interior Moulding / Trim/Trim Panel/Service and Repair/D-Pillar Trim Removal/Installation
n. Map light See: Lighting and Horns/Map Light/Service and Repair
o. Sunvisor See: Body and Frame/Interior Moulding / Trim/Sun Visor/Service and Repair
p. Assist handle See: Body and Frame/Interior Moulding / Trim/Passenger Assist Handle/Service and Repair
q. Headliner See: Body and Frame/Interior Moulding / Trim/Headliner/Service and Repair
r.
Rear speaker See: Accessories and Optional Equipment/Radio, Stereo, and Compact Disc/Speaker/Service and Repair/Rear Speaker
Removal/Installation
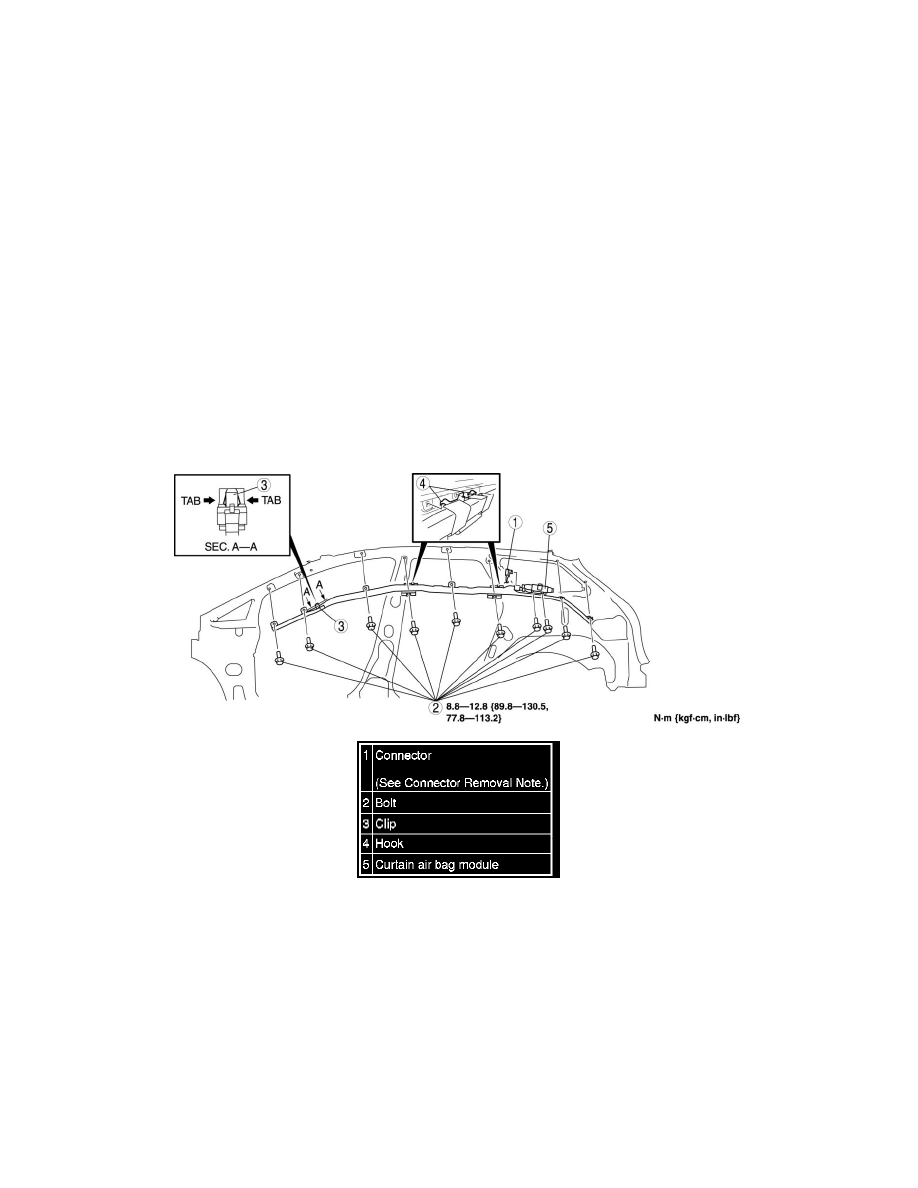
4. Remove in the order indicated in the table.
5. Install in the reverse order of removal.
6. When the ignition switch is turned to the ON position verify that the air bag system warning light illuminates for approx. 6 s and goes out.
-
If the air bag system warning light does not operate normally, refer to the on-board diagnostic system (air bag system) and perform inspection
of the system. See: Testing and Inspection/Initial Inspection and Diagnostic Overview/Flowchart
Connector Removal Note
1. Using a flathead screwdriver, lift the locking device carefully, however do not remove it.