
CX-7 FWD L4-2.3L Turbo (2010)
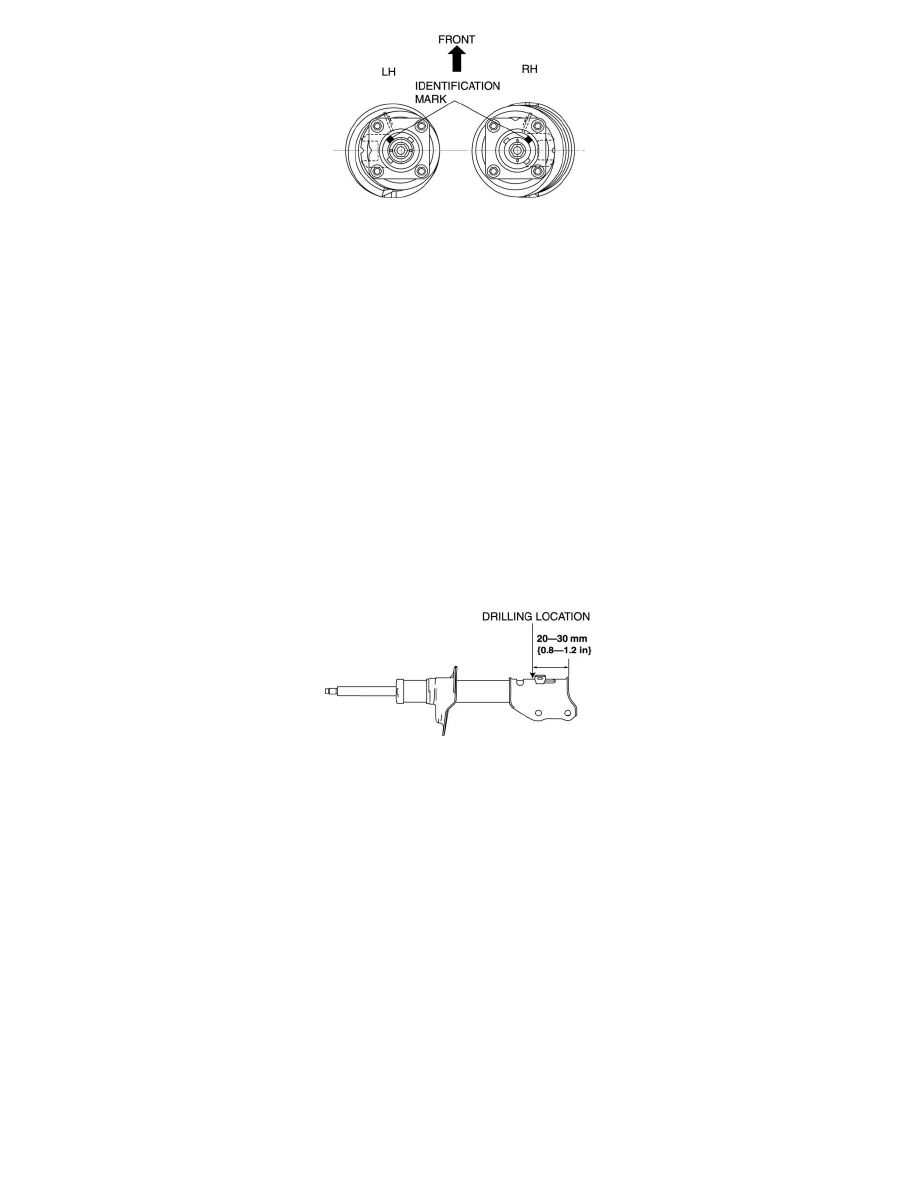
2. Install the steering knuckle to the shock absorber, insert the bolts from the direction shown as follows, then tighten them to the specified torque.
-
Vehicle left side: Insert the bolts from the vehicle rear.
-
Vehicle right side: Insert the bolts from the vehicle front.
Cap Installation Note
CAUTION:
-
If the pad in the strut mount area is removed, clean the attachment surface and install the cap. If the cap is not installed, the front shock absorber
may corrode due to water penetration and cause a malfunction.
Front Shock Absorber Disposal
FRONT SHOCK ABSORBER DISPOSAL
WARNING:
-
Whenever drilling into a shock absorber, wear protective eye wear. The gas in the shock absorber is pressurized, and could spray metal chips into
the eyes and face when drilling.
1. Clamp a shock absorber on a flat surface or with the piston pointing downwards.
2. Drill a 2-3 mm {0.08-0.12 in} hole at a point 20-30 mm {0.8-1.2 in} from the bottom of the tube, so that the gas can escape.
3. Turn the hole downwards.
4. The oil can be collected by moving the piston rod several times up and down and cutting the tube at the end.
5. Dispose of waste oil according to the waste disposal law.
NOTE:
-
Shock absorber gas is nitrogen gas.
-
Shock absorber oil is mineral oil.
Rear Shock Absorber Removal/Installation
REAR SHOCK ABSORBER REMOVAL/INSTALLATION
1. Remove in the order indicated in the table.
2. Install in the reverse order of removal.