
CX-7 FWD L4-2.3L Turbo (2010)
3. Remove the bead from one side of the wheel.
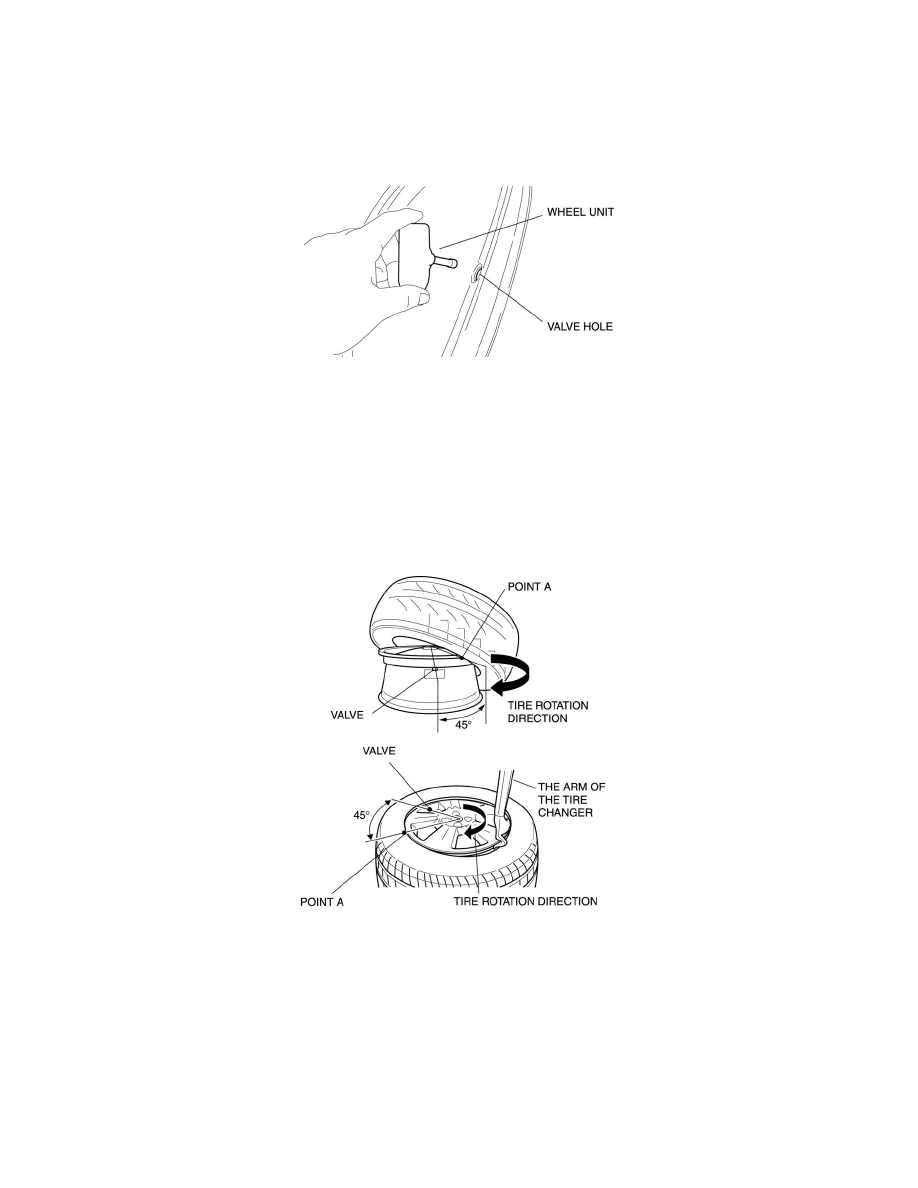
4. Remove the wheel unit.
Wheel Unit Installation Note
1. Insert the wheel unit valve into the valve hole so that the polyurethane foam side faces the rim.
NOTE:
-
Maintain the wheel unit in contact with the rim, then start manually to screw the valve nut for a few turns.
2. Install the nut from the outer side of the wheel.
3. Tighten the valve nut slowly (15 rpm max.) to 8.0 Nm {82 kgf-cm, 71 in-lbf} in one rotation.
CAUTION:
-
Do not retighten the valve nut after the initial operation.
4. Set the tire changer so that it is 45° away (point A) from the valve hole.
CAUTION:
-
Do not position the tire changer near the tire valve to avoid any damage to the wheel unit.
5. Fill the tire with air and verify the valve nut tightening torque.