
CX-7 FWD L4-2.3L Turbo (2010)
Transmission Cooler: Procedures
Oil Cooler Flushing - AW6A-EL, AW6AX-EL
OIL COOLER FLUSHING [AW6A-EL, AW6AX-EL]
NOTE:
-
If the automatic transaxle is replaced, flush and inspect the oil cooler.
-
When replacing the automatic transaxle, inspect the oil cooler together with flushing it using the following procedure, and with the oil cooler hose
removed.
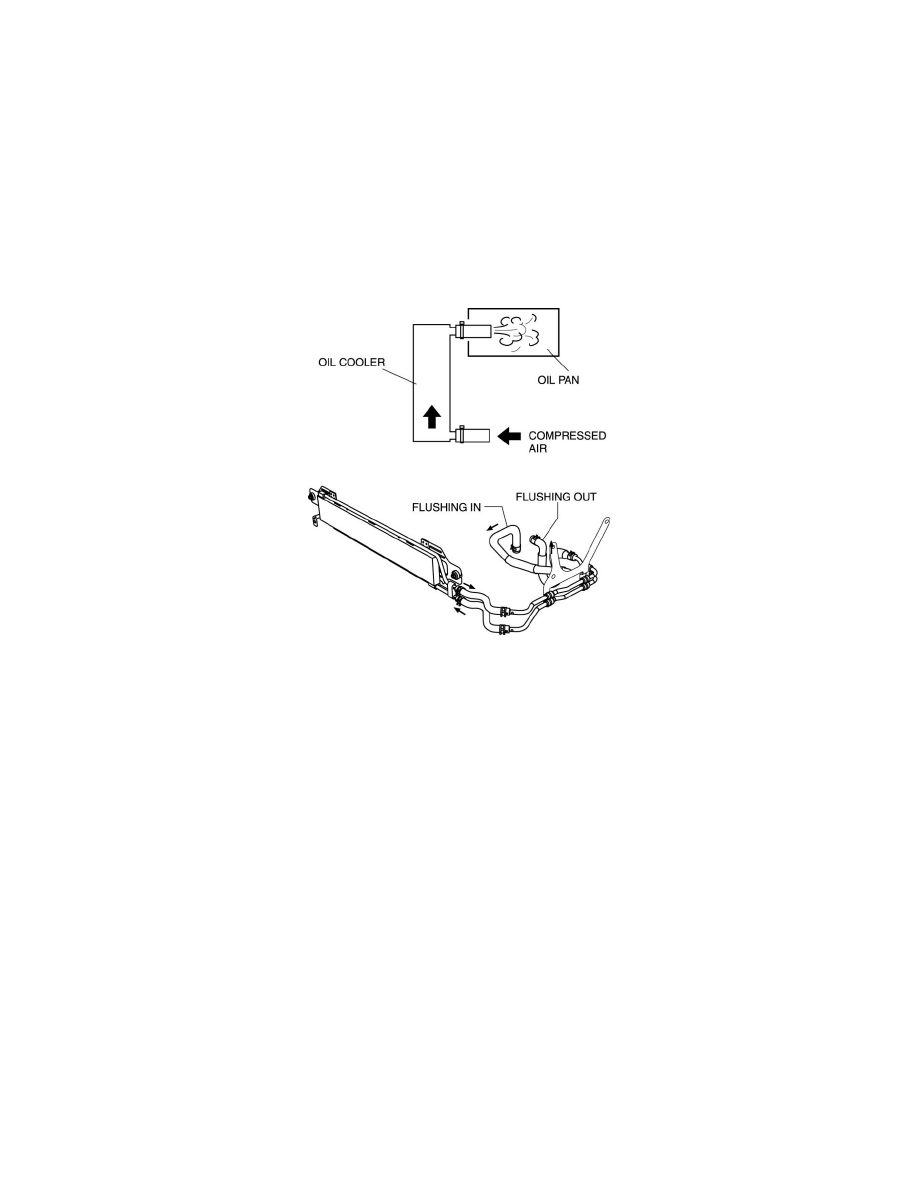
1. Disconnect the oil cooler hose.
2. Set a clean oil pan up to the oil cooler hose inlet.
3. Blow 491-882 kPa {5-9 kgf/cm2, 72-127 psi} of compressed air from the oil cooler hose outlet to drain remaining oil.
4. Add new ATF from the oil cooler hose outlet and blow 491-882 kPa {5-9 kgf/cm2, 72-127 psi} of compressed air to flush. (Repeat 2 or 3 times)
5. Verify that none of the following foreign material is mixed in with the drained ATF:
-
Large metal fragments of diameter 0.5 mm {0.02 in} or more that cannot pass through the oil strainer
-
Fibrous clutch facing
6. Repeat the procedures from Step 1 to 2 and flush the inside of the oil cooler.
7. If foreign material such as metal fragments or clutch facing remains even after the oil cooler is flushed repeatedly, replace the oil cooler. See:
Removal and Replacement/Oil Cooler Removal/Installation
Oil Cooler Flushing - FS5A-EL
OIL COOLER FLUSHING [FS5A-EL]
NOTE:
-
If the automatic transaxle is replaced, flush and inspect the oil cooler.
-
When replacing the automatic transaxle, inspect the oil cooler together with flushing it using the following procedure, and with the oil cooler hose
removed.
1. Disconnect the oil hose.
2. Set a clean oil pan up to the oil hose inlet.