
CX-9 AWD V6-3.7L (2008)
Air Duct: Service and Repair
Rear Heat Duct Component
REAR HEAT DUCT COMPONENT REMOVAL/INSTALLATION
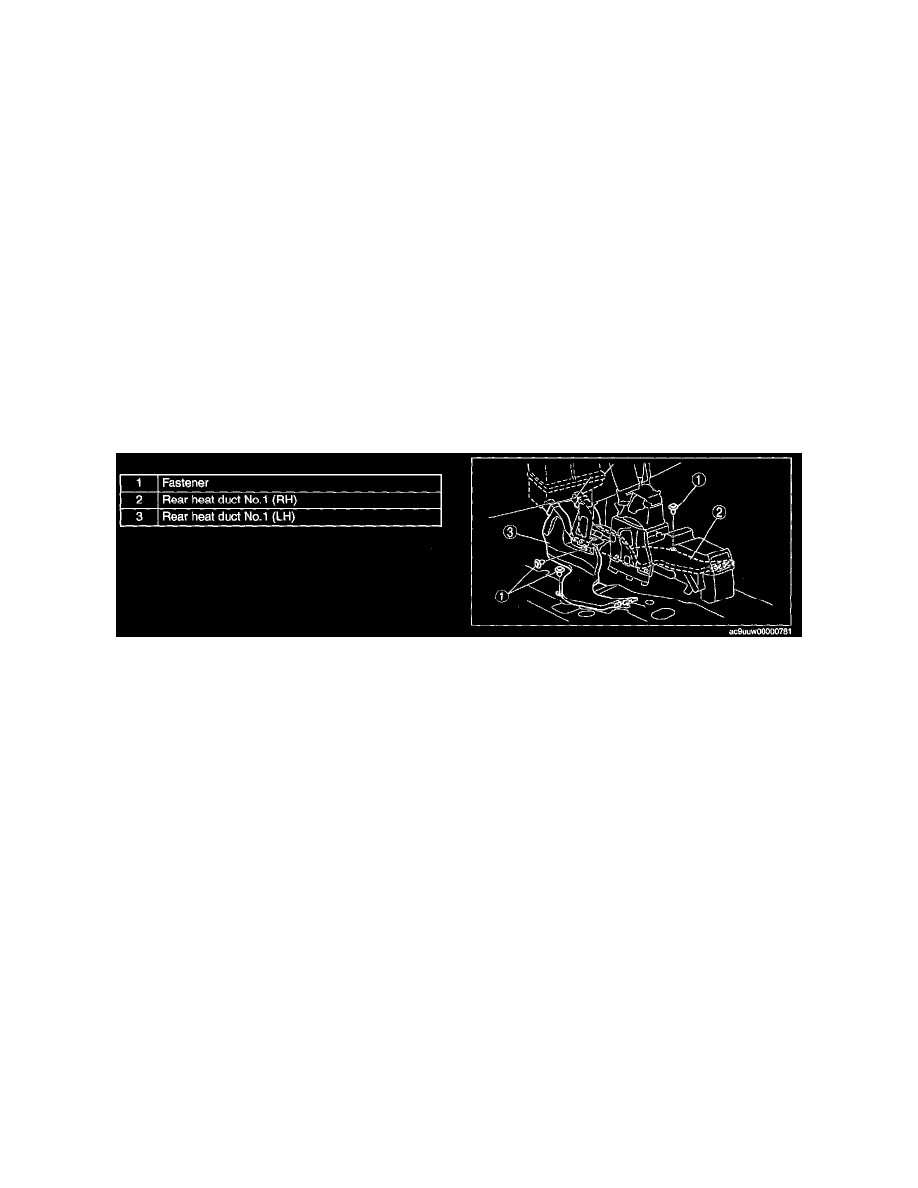
Rear Heat Duct No.1
1. Disconnect the negative battery cable.
2. Remove the following parts:
1. Front seat.
2. Front scuff plate inner.
3. Front side trim.
4. Decoration panel.
5. Front console box mat.
6. Indicator panel.
7. Front console box.
8. Dashboard under cover.
9. Side wall.
10. Console panel.
11. Console cover.
12. Console.
13. Dust cover.
3. Turn floor covering over.
4. Remove in the order indicated in the table.
5. Install in the reverse order of removal.
Rear heat duct No.2 , No.3 and No.4
1. Disconnect the negative battery cable.
2. Remove the following parts:
1. Decoration panel.
2. Front console box mat.
3. Indicator panel.
4. Front console box.
5. Dashboard under cover.
6. Side wall.
7. Console panel.
8. Console cover.
9. Console.
10. Second-row seat.
11. Edge cover.
12. Long slider cover.
13. Third-row seat.
14. Trunk box
15. Seat side box.
16. Trunk end trim.
17. Third-row seat.
18. Rear scuff plate inner.
19. Third-row seat belt lower anchor installation bolt.
20. Trunk side trim.
3. Remove the two rear A/C unit retaining bolts on the rear side.
4. Turn floor covering over.