
CX-9 AWD V6-3.7L (2008)
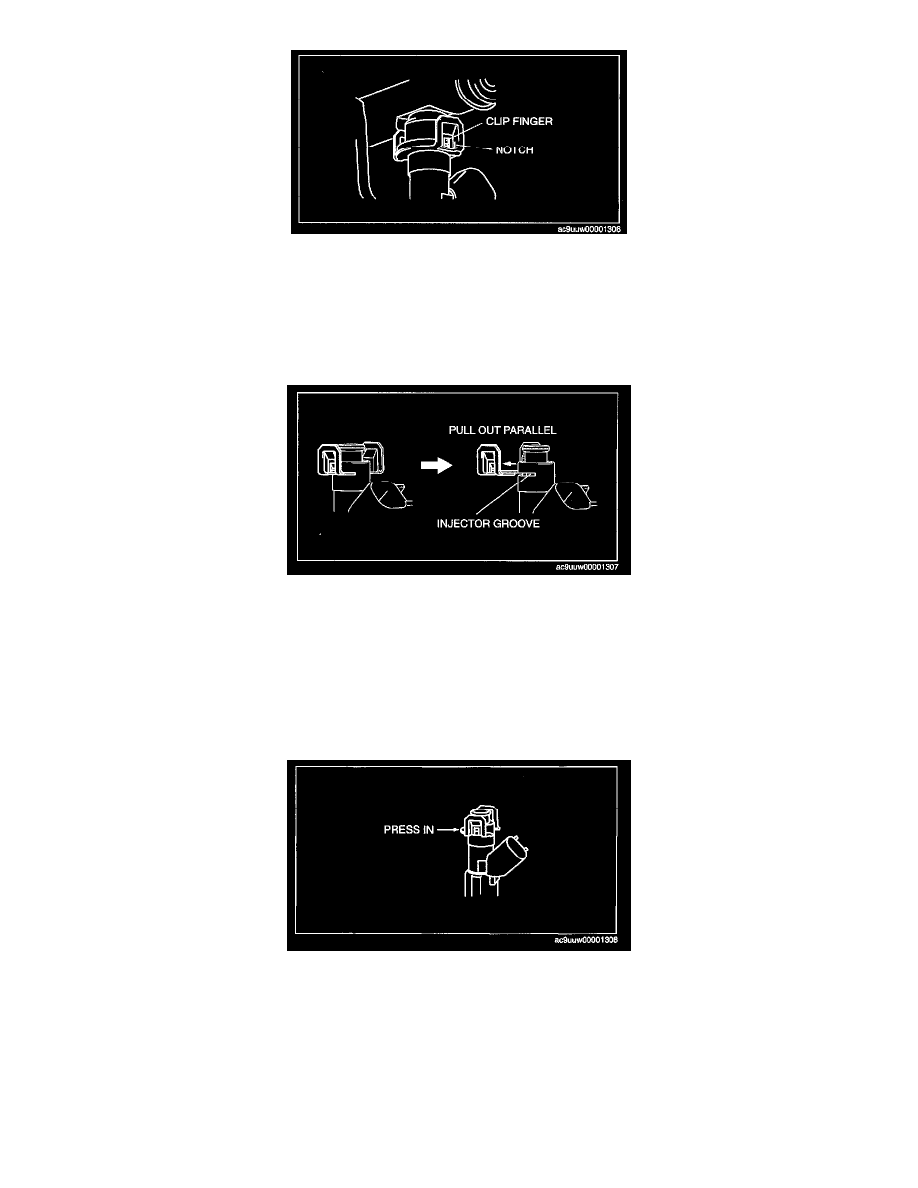
NOTE: When rotating the screwdriver to spread the clip fingers, deform them sufficiently to make sure they release from the notched edge of the
injector cup.
2. Rotate the screwdriver to spread the clip fingers and remove them from the injector cup.
3. Pull the injector and clip out of the rail.
4. Remove the clip from the injector according to the following:
1. Grasp the clip with a pair of pliers.
2. Pull the clip parallel to the injector groove, and remove it from the injector.
3. Discard the clip.
Fuel Injector Installation note
1. Install the new O-ring.
2. Lightly lubricate the injector groove and O-ring.
3. Pre-attach a new clip in the injector groove.
NOTE: When the clip is attached correctly, the central area of the injector and the clip finger positions are aligned.
4. Hold the injector firmly, push the clip into the injector until the clip stops sliding.
5. Verify that the injector connector position is correct, and press the injector and clip into the injector cup. Continue pressing until the clip contacts
the lower surface of the injector cup.
6. Verify that the injector and clip are correctly attached with the clip locked onto the injector cup notch.