
CX-9 AWD V6-3.7L (2008)
Seat Belt: Service and Repair
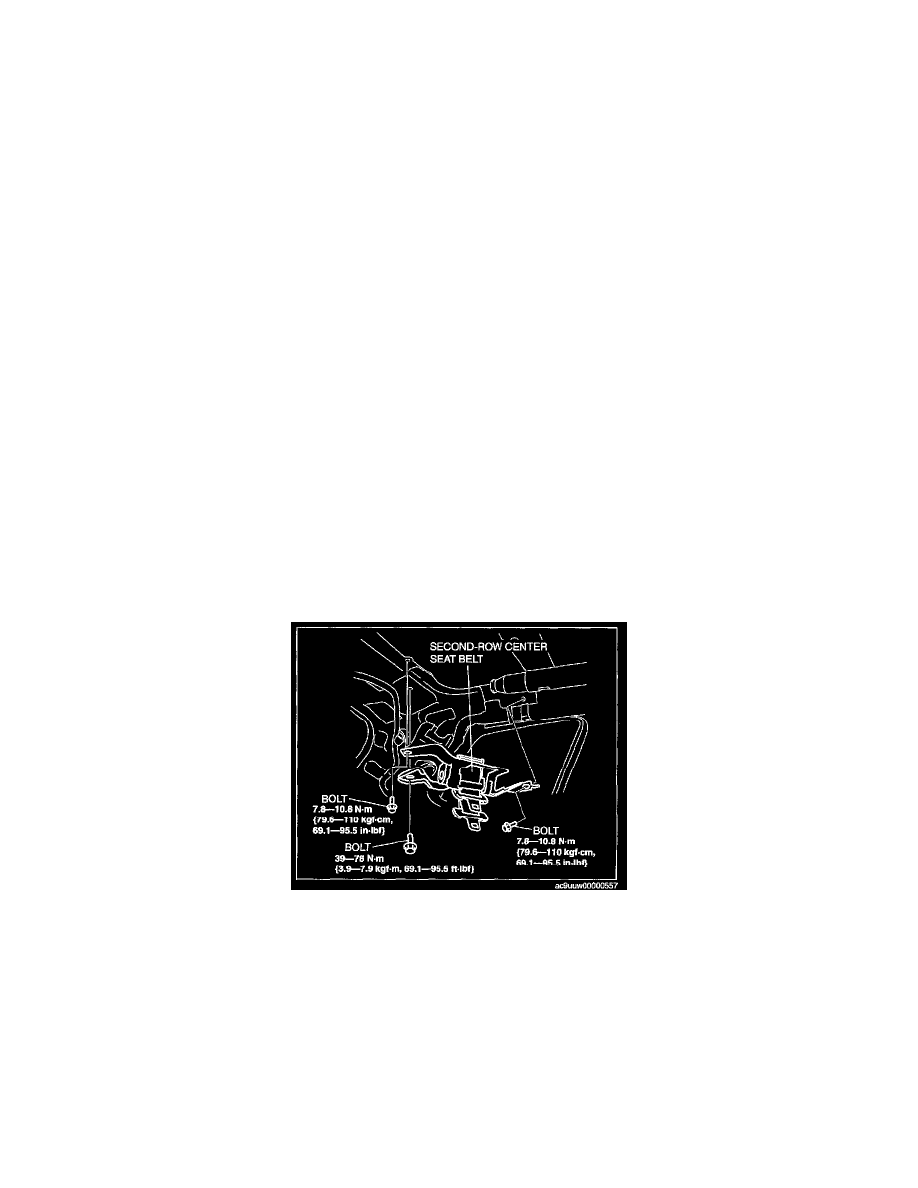
Second-Row Center Seat Belt
SECOND-ROW CENTER SEAT BELT REMOVAL/INSTALLATION
CAUTION: The ELR (emergency locking retractor) has a spring that will unwind if the retractor cover is removed. The spring cannot be
rewound by hand. If this occurs, the ELR will not work properly. Therefore, do not disassemble the retractor.
1. Turn the ignition switch to the LOCK position.
2. Disconnect the negative battery cable.
3. Remove the following parts:
1. A-pillar trim.
2. Front scuff plate inner.
3. Rear scuff plate inner.
4. Front seat belt lower anchor installation bolt.
5. B-pillar lower trim.
6. Front seat belt upper anchor installation bolt.
7. B-pillar upper trim.
8. Trunk box
9. Seat side box.
10. Trunk end trim.
11. Third-row seat.
12. Third-row seat belt lower anchor installation bolt.
13. Trunk side trim.
14. Roof side trim.
15. Second-row seat belt upper anchor installation bolt.
16. C-pillar trim.
17. Third-row seat belt upper anchor installation bolt.
18. D-pillar trim.
19. Front map light.
20. Sunvisor.
21. Assist handle.
22. RES unit cover (Vehicles with RES).
23. Headliner.
4. Remove the bolt.
5. Remove the second-row center seat belt.
6. Install in the reverse order of removal.