
CX-9 AWD V6-3.7L (2008)
13. Secure one end of the piano wire, and while pulling the other end, cut the sealant around the rear window glass.
14. Remove the rear window glass.
15. Remove the fasteners from the rear window glass.
NOTE: Place alignment marks on the rear window glass before removing the fasteners from the rear window glass.
Installation
WARNING: Using a razor with bare hands can cause injury. Always wear gloves when using a razor.
CAUTION:
-
If a door is opened or closed when all the window glass is closed, the resulting change in air pressure could cause the sealant to crack
preventing the proper installation of the glass. Keep the door glass open until the rear window glass installation is completed.
-
Leave the power liftgate (PLG) unoperated for two days after the rear window glass installation. If the power liftgate (PLG) is operated
automatically with the sealant not hardened after the rear window glass installation, the liftgate may deform. It Is recommended that you
refrain from operating the power liftgate (PLG) for seven days after the rear window glass installation. Manual opening/closing will not
cause liftgate deformation.
1. Remove the sealant along the perimeter of the glass using a razor or scraper. (when reusing the glass)
2. Clean and degrease an approx. 50 mm (1.97 in) wide strip along the perimeter of the glass.
3. Inspect the glass for cracks. If it is cracked, chamfer it using sandpaper.
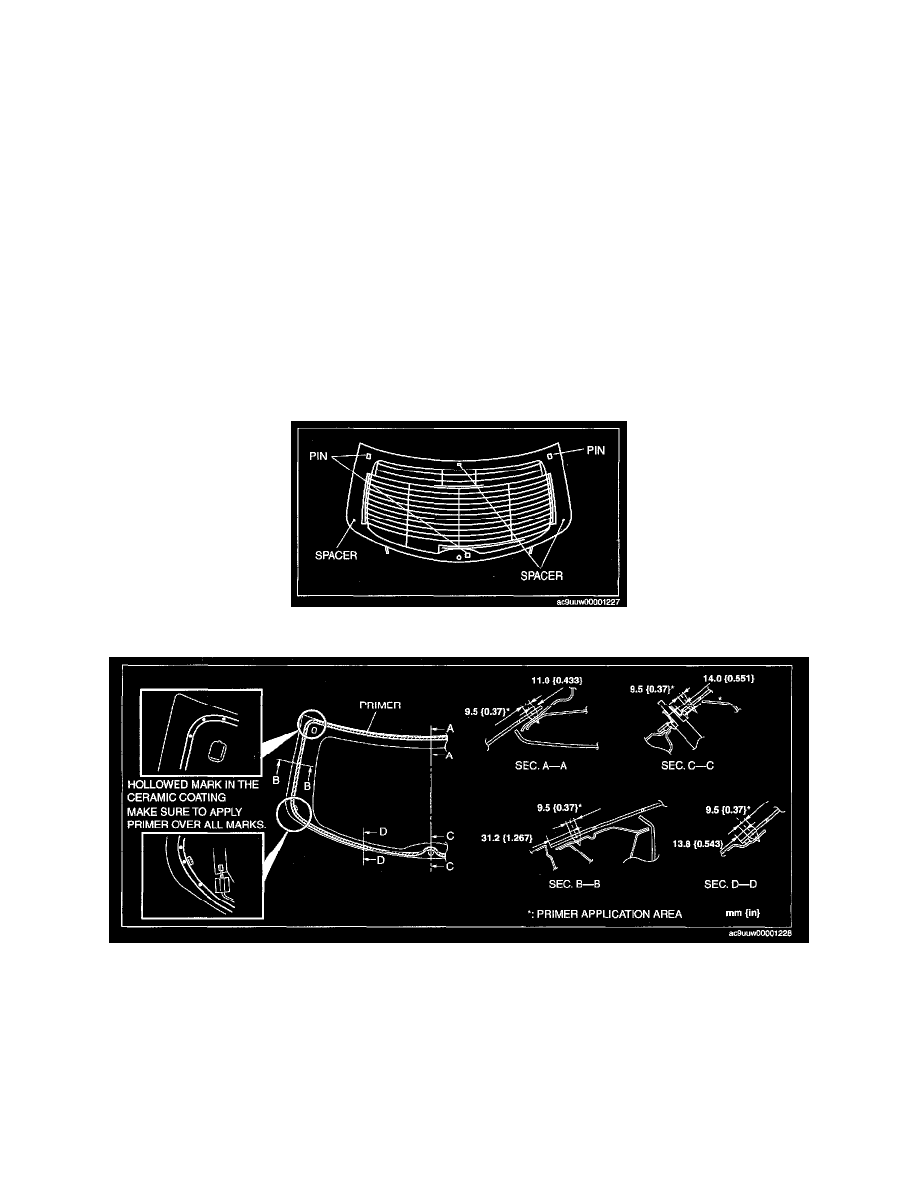
4. Install the spacers and pin to the glass as shown in the figure. When reusing the glass, align with the alignment mark marked before removing.
5. Apply glass primer on the glass as shown in the figure then allow it to dry for approx. 30 min.
CAUTION: To prevent weakening of the primer adhesion, keep the bonding surface free of dirt, moisture, and grease. Do not touch the
surface with your hand.
NOTE: Apply primer to the hollowed marks in the ceramic coating.
6. Cut away the old sealant using a razor or scraper so that 1-2 mm (0.04-0.07 in) thickness of sealant remains along the perimeter of the frame.
7. Clean and degrease the bonding area along the perimeter of the body.
8. When reusing the liftgate, apply primer to the area where the sealant has come off completely and allow it to dry for approx. 30 min.