
Mazdaspeed6 L4-2.3L Turbo (2006)
Front Cross-Member: Service and Repair
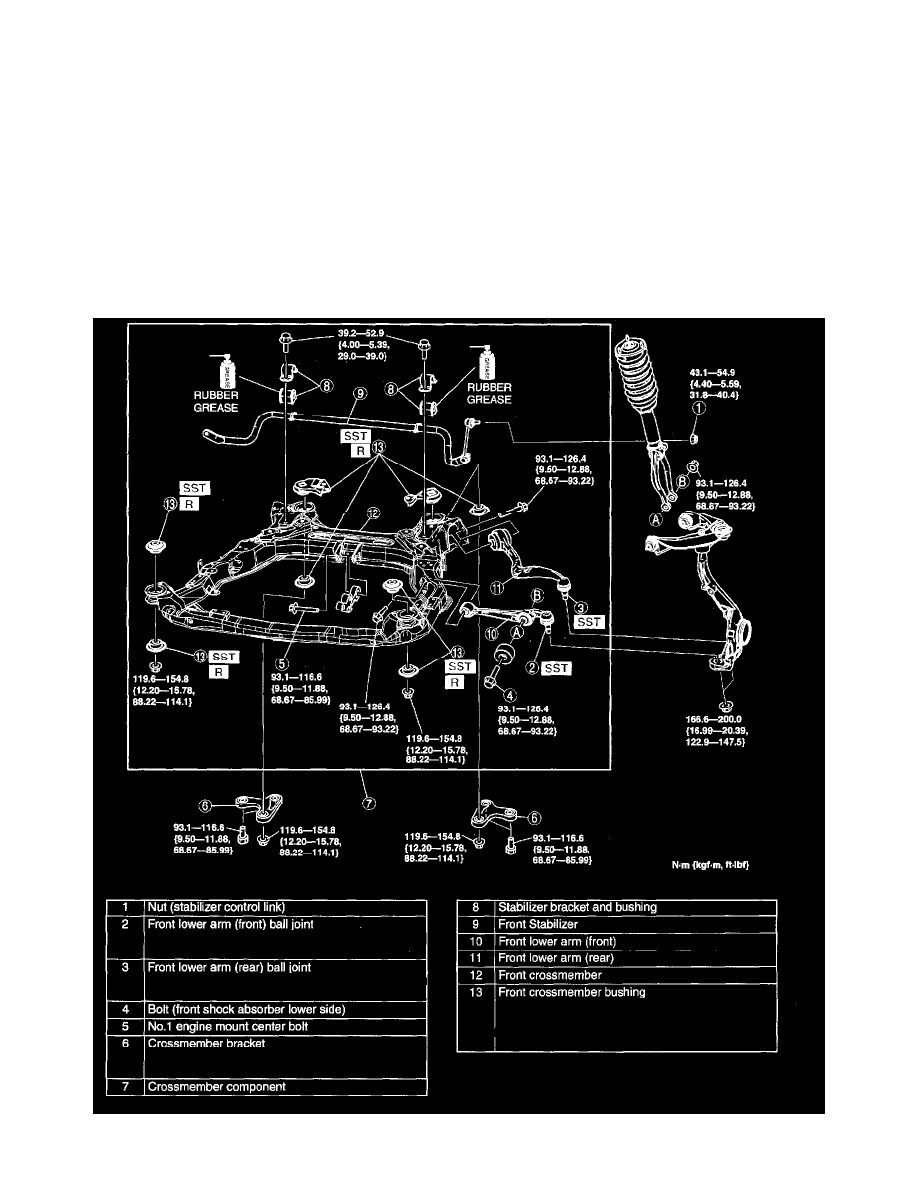
Front Crossmember Removal/Installation
FRONT CROSSMEMBER REMOVAL/INSTALLATION
1. Remove the under cover.
2. Remove the splash shield.
3. Remove the transverse member.
4. Remove the steering gear and linkage, and pipe component installation bolts from the front crossmember, then suspend the steering gear and
linkage with a cable.
Tightening torque
^
Steering gear and linkage: 74.4 - 104.8 Nm (7.857 - 10.68 kgf-m, 54.88 - 77.29 ft. lbs.)
^
Pipe component: 7.8 - 10.8 Nm (79.6 - 110.0 kgf-cm, 69.1 - 95.5 inch lbs.)
5. Remove in the order indicated in the table.
6. Install in the reverse order of removal.
7. Inspect the front wheel alignment.
Crossmember Bracket Removal Note