
Mazdaspeed6 L4-2.3L Turbo (2006)
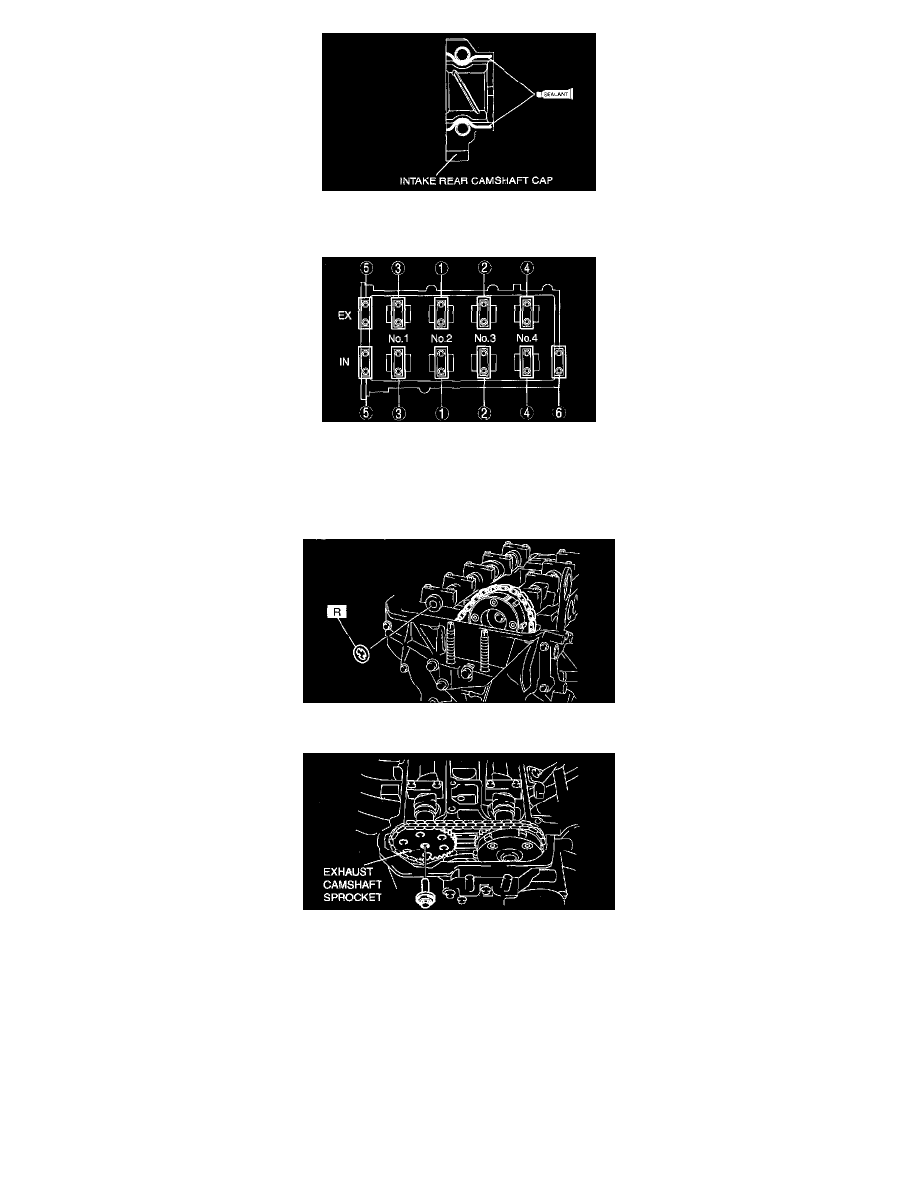
27. Carefully apply adhesive agent to the area indicated in the figure so that it does not leak into the sliding part.
Thickness 1.0 mm (0.039 inch)
28. Install the camshaft caps and temporarily tighten the camshaft cap bolts evenly in two or three passes, and then tighten the camshaft cap bolts in
two passes, using the following two steps and in the order shown in the figure.
Tightening procedure
(1) 5.0 - 9.0 Nm (51.0 - 91.7 kgf-cm, 44.3 - 79.6 inch lbs.)
(2) 14.0 - 17.0 Nm (1.5 - 1.7 kgf-m, 10.4 - 12.5 ft. lbs.)
29. Install a new washer.
30. Install the exhaust camshaft sprocket.
Caution:
-
Do not tighten the camshaft sprocket installation bolt at this stage. Verify the valve timing before performing the bolt tightening.