
Mazdaspeed6 L4-2.3L Turbo (2006)
4. Compress the coil spring using the SSTs.
5. Install the shock absorber so that the lower end of the coil spring is seated on the step of the lower spring seat.
6. Make sure that the marks on the shock absorber and dust boot are aligned.
7. Install the mounting rubber an4,piston rod nut, then remove the SSTs.
Piston rod nut tightening torque 39.2 - 52.9 Nm (4.00 - 5.39 kgf-m, 29.0 - 39.0 ft. lbs.)
Front Shock Absorber and Coil Spring Installation Note
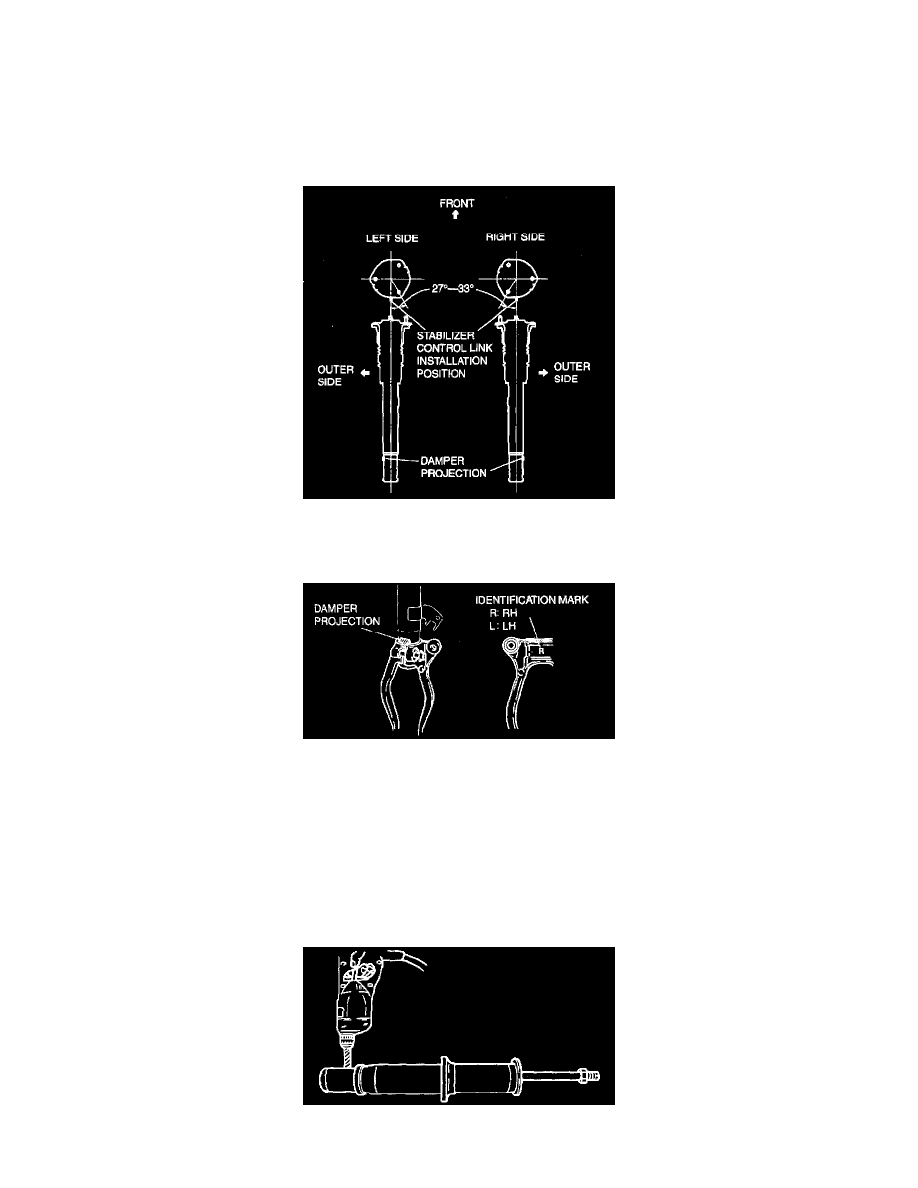
1. Install the stud bolts at a 27° - 33° angle from where the stabilizer control link is installed (center line), towards the inner side of the vehicle.
Damper Fork Installation Note
1. Align the gap of the damper fork with the projections of the damper
2. Tighten the bolt.
Front Shock Absorber Disposal
FRONT SHOCK ABSORBER DISPOSAL
Warning: Whenever drilling into a shock absorber, wear protective eye wear. The gas in the shock absorber is pressurized, and could
spray metal chips into the eyes and face when drilling.
1. Clamp a shock absorber on a flat surface or with the piston pointing downwards.
2. Drill a 2 - 3 mm (0.08 - 0.12 inch) hole at a point 20 - 30 mm (0.8 - 1.2 inch) from the bottom of the tube, so that the gas can escape.