
Millenia L V6-2.5L DOHC (1997)
^
If clips become difficult to remove, use a box knife or equivalent cutter to remove a small portion of the interfering material.
C.
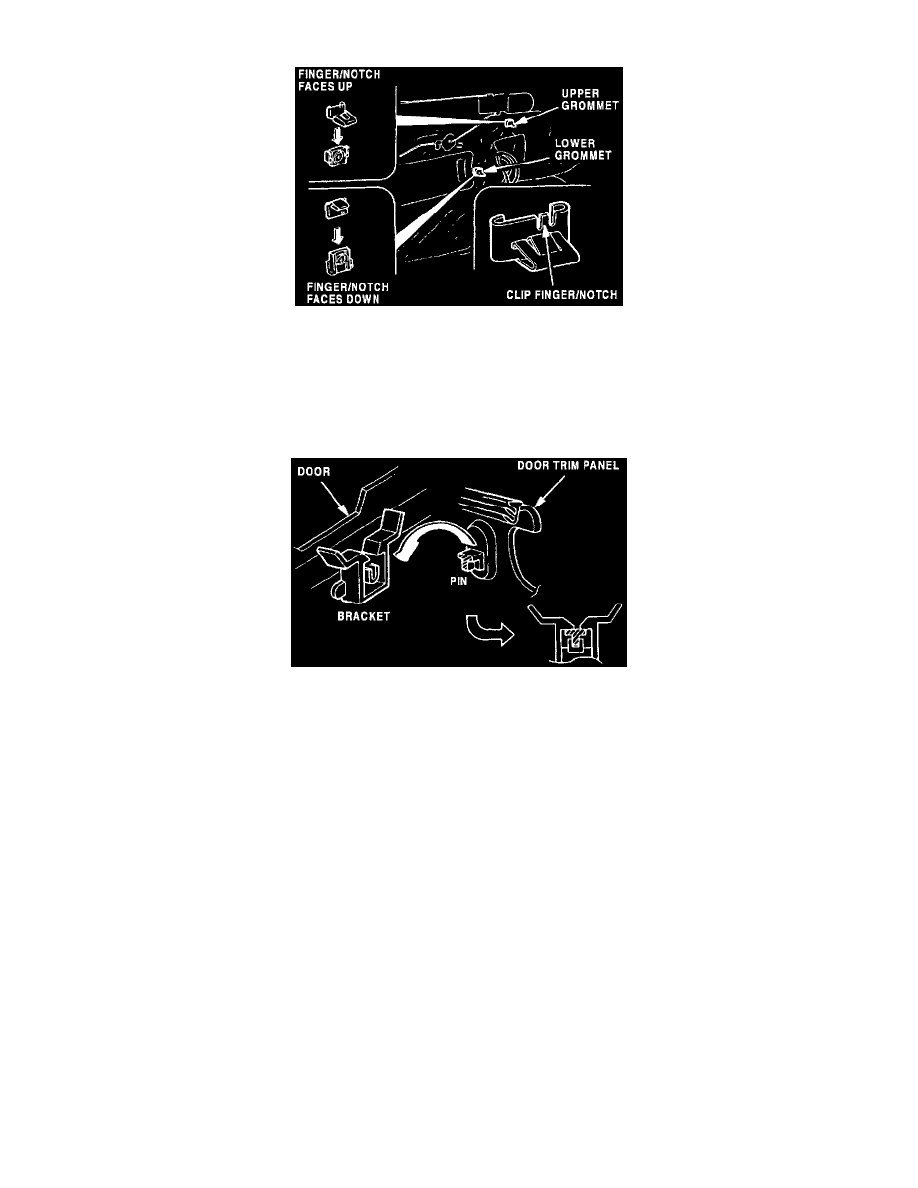
Install the clips to the grommets as shown.
Caution
^
Make sure the upper clip finger/notch is pointing upward and the lower clip finger is pointed downward when reinstalling. Failure to
reinstall the clips in the correct positions will make it impossible to remove the door trim panel again without damage.
D.
Connect wiring harness.
E.
Hook the door trim weather-strip over the body and lower pin into the bracket point as shown.
Note
^
Look through the door handle opening to verify the proper positions of the pin and bracket and the "B" clips with their holes in the
door.
F.
Apply pressure to the door panel to seat the pin and clips into installed positions.
G.
Connect negative battery terminal to verify power window, locks and mirror operation.
H.
Install:
^
Screws
^
Caps
^
Inner door handle cover
^
Inner sail garnish
I.
Reset the preset stations of the vehicle's audio system preset stations (see STEP 2A).
5.
Verify repair.