
Millenia L V6-2.5L DOHC (1997)
5. Install and hand-tighten the bolts shown in the illustration on the left. Each type of bolt has a different letter on its head. Match the bolt letter with
the letter stamped next to its installation hole on the valve body.
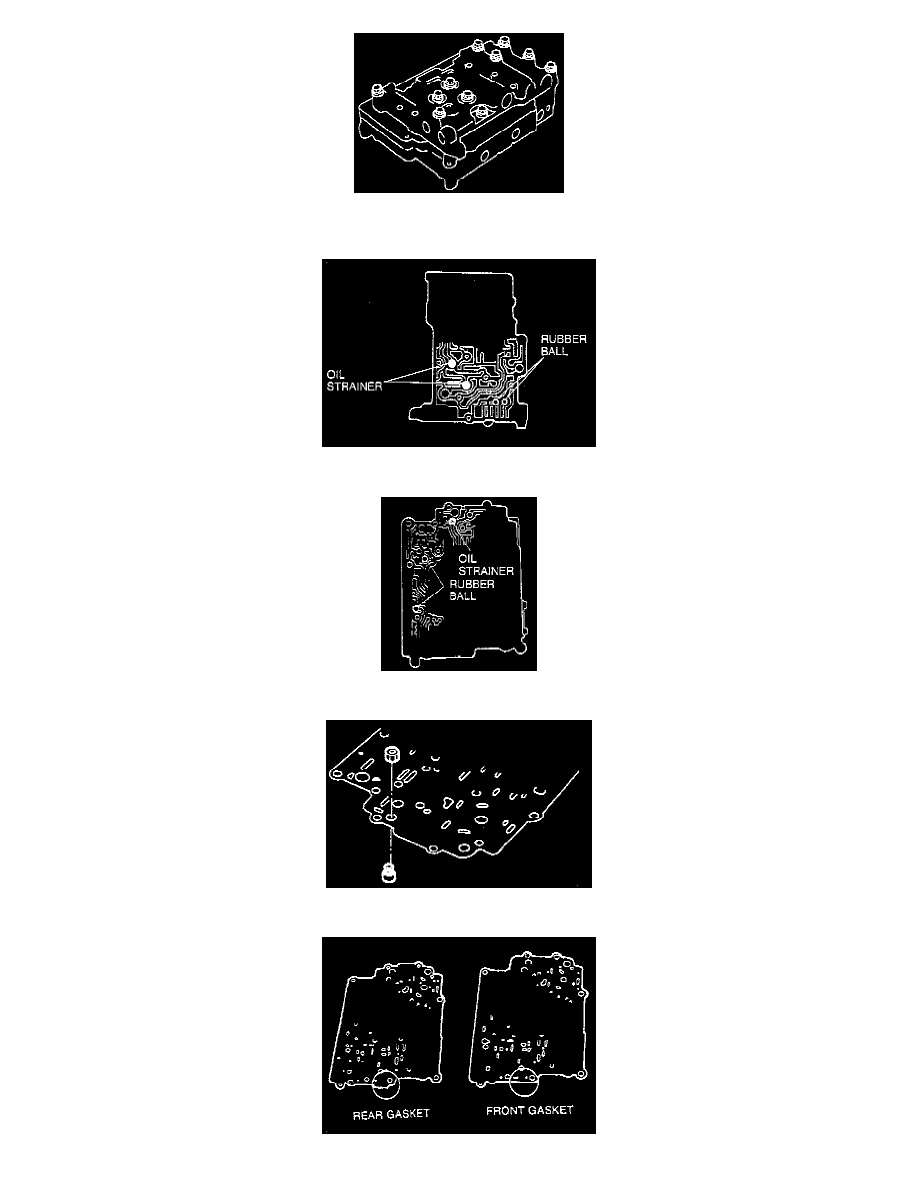
6. Install the oil strainer and rubber balls into the main control valve body.
7. Install the oil strainer and rubber balls into the premain control valve body.
8. Install the jet orifices and nuts to the main separator plate. Tighten to 1.7 - 2.2 Nm (15 - 19 inch lbs.).