
MPV 4WD V6-180 2954cc 3.0L FI (1989)
5.
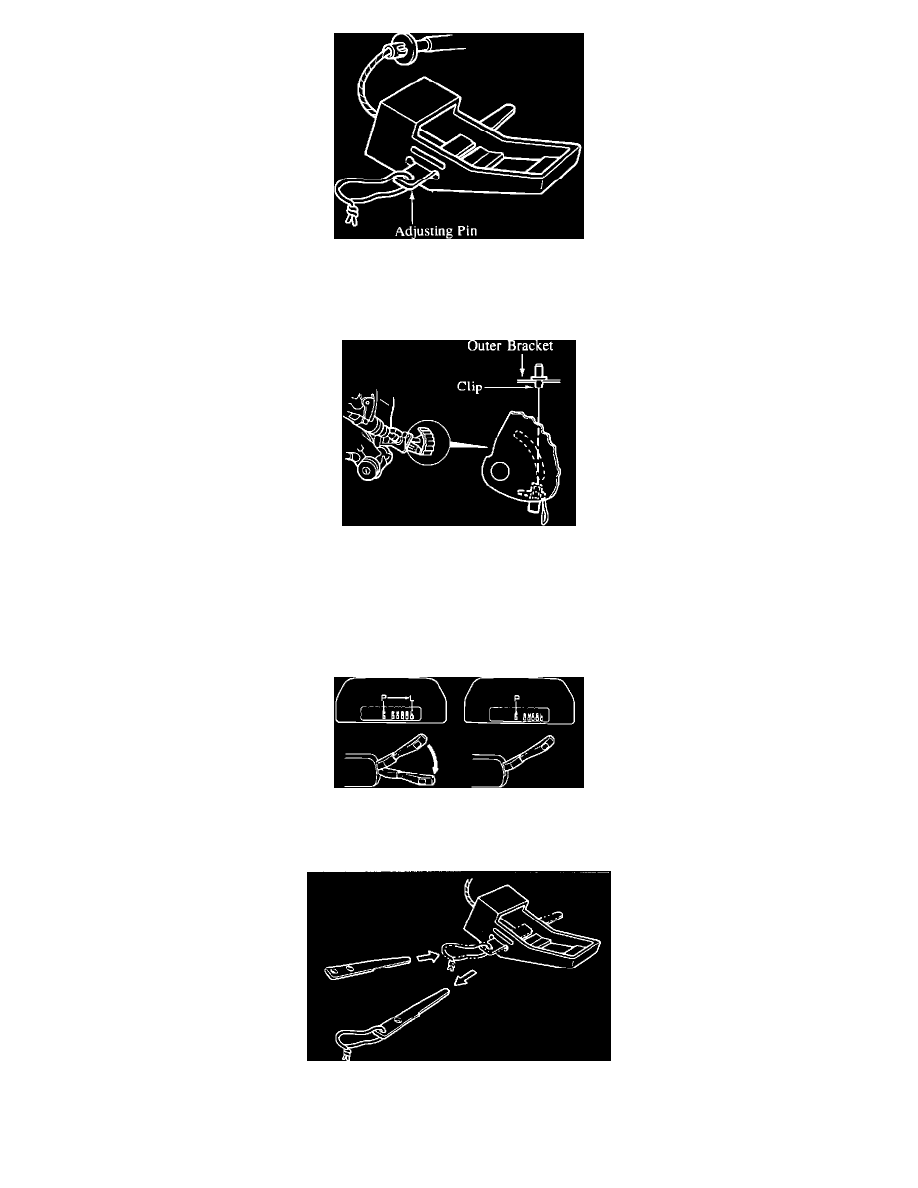
Install the adjusting pin into the position indicator wire end as shown in the figure.
NOTE:
Be sure to install the adjusting pin in the correct position.
6.
Install the instrument cluster.
7.
Verify that the selector lever is in P range.
8.
Mount the A/T position indicator wire housing onto the outer bracket using the clip.
9.
Hook the position indicator wire onto the selector.
10.
Turn the ignition switch to ACC.
11.
Move the selector lever from P to L and then to P again. Verify that the position indicator indicates the correct positions.
For the vehicles which have a lock pin:
12.
Remove the adjusting pin and install the lock pin.