
MPV 4WD V6-3.0L SOHC (1990)
Fuel Vapor Separator
1.
Pull back the right rear side trim.
2.
Remove the cover.
3.
Visually check the separator for cracks or leakage.
4.
Replace the separator if necessary.
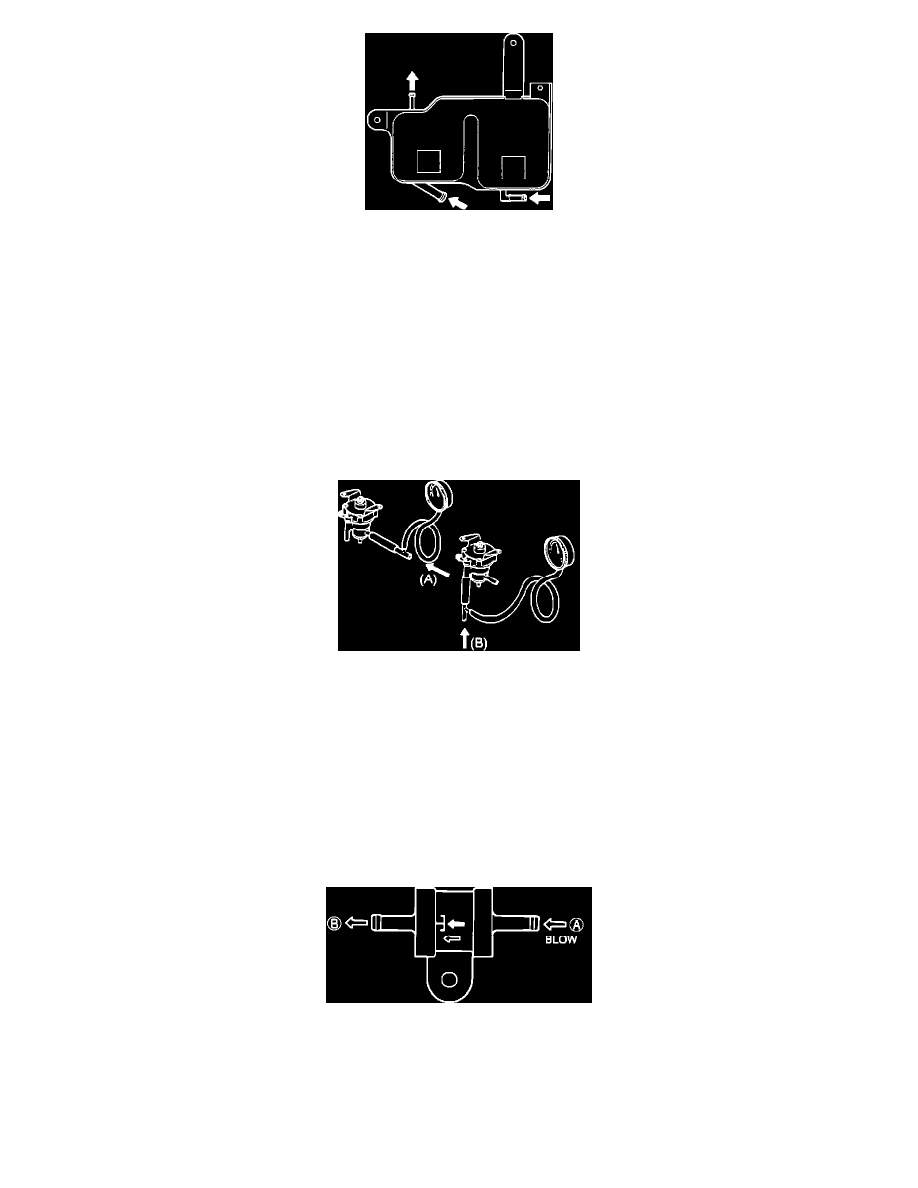
CHECK AND CUT VALVE
1.
Remove the check and cut valve as follows:
a.
Pull back the right rear side trim.
b.
Remove the cover.
c.
Disconnect the evaporative gas hoses.
d.
Remove the check and cut valve.
Check And Cut Valve Testing
2.
Connect a pressure gauge to the passage from the fuel tank.
3.
Blow through the valve from "A", and check to see that it opens at a pressure of 5.39-6.87 kPa (0.055-0.07 kg/cm2, 0.78-1.00 psi).
4.
Remove the pressure gauge, and connect it to the passage to atmosphere.
5.
Blow through the valve from "B", and check to see that the valve opens at a pressure of 0.98-4.9 kPa (0.01 -0.05 kg/cm2, 0.14-0.71 psi).
NOTE: This test should be performed with the valve held horizontally. Otherwise, the check balls in the valve will close the passages.
TWO WAY CHECK VALVE
1.
Remove the valve.
Two Way Check Valve Inspection
2.
Blow through the valve from "A" and check that air flows.
3.
Blow through the valve from "B" and check that air does not flow.