
MPV ES V6-2.5L DOHC (2001)
^
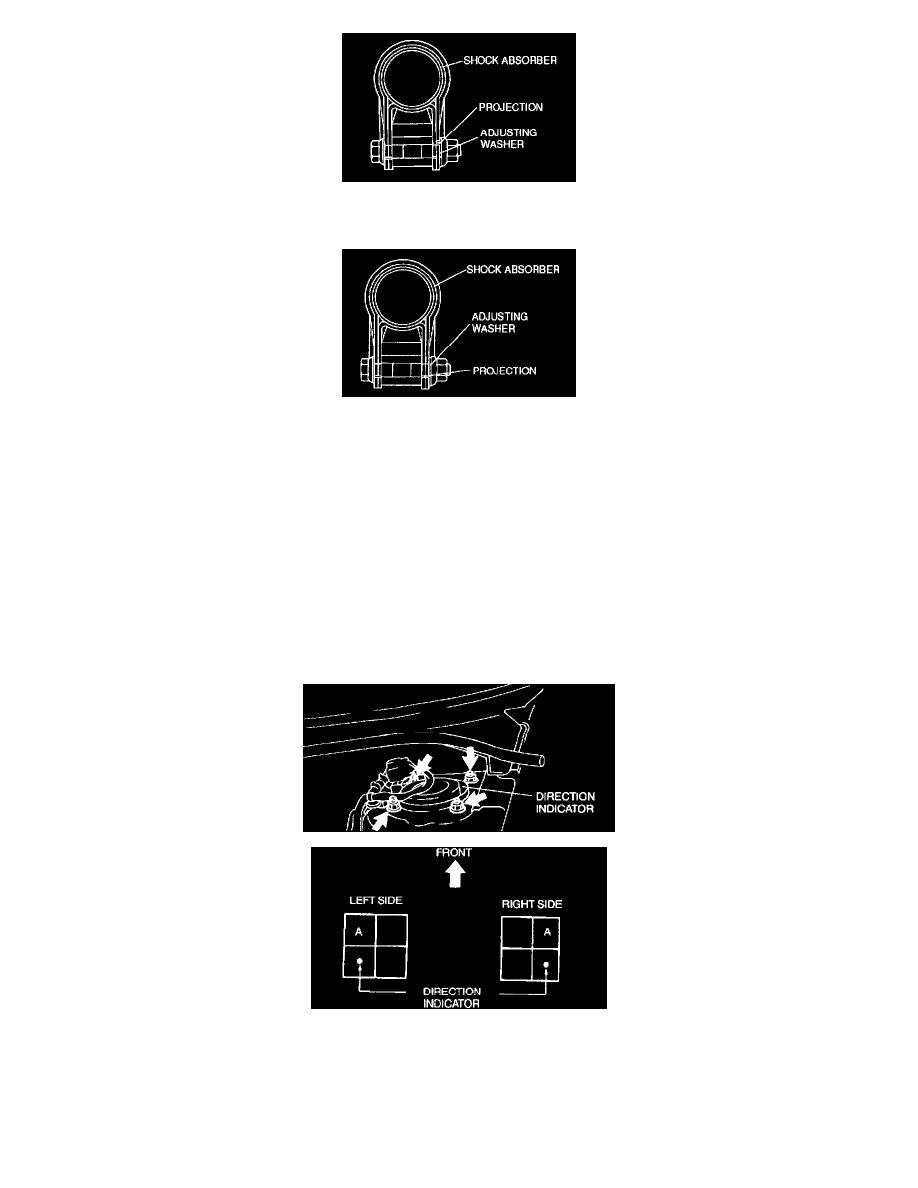
In case of adjusting to + (positive) side, install the adjusting bolt and washer so that the projection of the washer faces inside (shock absorber
side) as shown.
^
In case of adjusting to - (negative) side, install the adjusting bolt and washer so that the projection of the washer faces outside (steering knuckle
side) as shown.
4. Tighten the nut to the specified torque.
Tightening torque 103 - 122 Nm (10.5 - 12.5 kgf-m, 76.0 - 90.4 ft. lbs.)
5. Install the wheel and tire, then jack down the vehicle.
6. Shake the vehicle to settle the suspension.
7. Inspect the camber and readjust it if necessary.
Caster Adjustment
1. Jack up the front of the vehicle and support it on safety stands.
2. Remove the mounting block nuts.
Caution:
^
Use only position A to adjust. If other positions are used, the camber and caster will be out of the specifications.
3. Push the mounting block downward, and turn it to position A.
Adjustable value -30'
4. Install and tighten the mounting nuts to the specified torque.
Tightening torque 47 - 62 Nm (4.7 - 6.4 kgf.m, 34 - 46 ft. lbs.)
Total Toe-in Adjustment
1. Center the steering wheel and confirm that the vehicle wheels/tires are pointing straight.