
MPV ES 4WD V6-3.0L SOHC (1997)
NOTE:
If the HLAs fail any of the following three (3) inspections as shown in Fig. 4, Fig. 5 and Fig. 6, replacement is necessary.
1.
Remove the rocker arm and rocker arm shaft.
2.
Remove the HLAs according to the instruction in section B of the workshop manual.
3.
Hold the HLA between your fingers and compress. Refer to Fig. 4
^
If you are able to compress the HLA, replacement is necessary.
^
If you are not able to compress the HLA, proceed to step 4.
4.
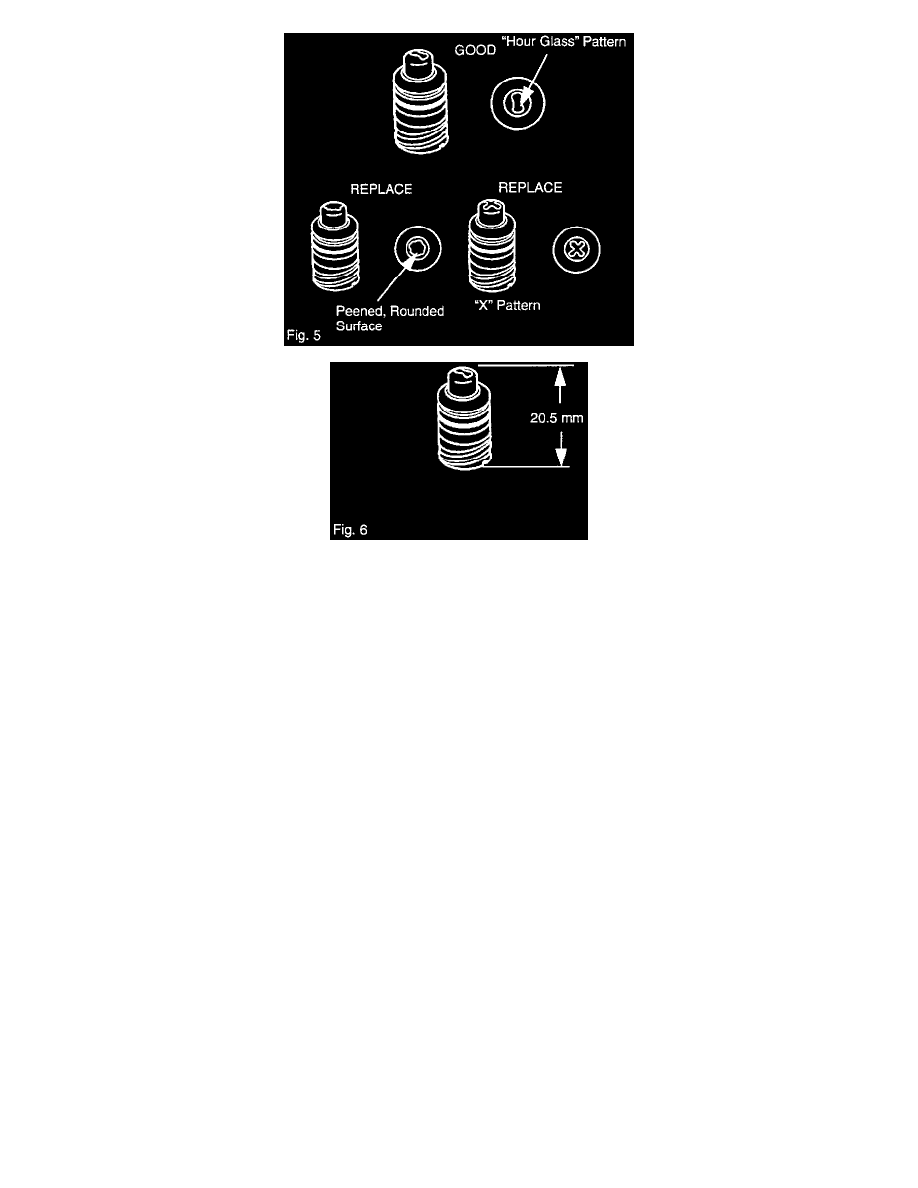
Inspect the HLA contact tip (the surface that rides on the valve stem) for an "X" shaped pattern or round peened surface. Refer to Fig. 5
^
If the contact tip has an "X" shaped pattern or has a round peened surface, replace the HLA.
^
If the contact tip does not have the above description, proceed to step 5.
5.
Measure the overall length of the HLA using a micrometer or calipers. Refer to Fig. 6
^
If the length is less than 20.5 mm, replace the HLA.
^
If the length is 20.5 mm or more and it does not have any of the characteristics described in steps 3 or 4, the HLA is good and does not require
replacement. Proceed to step 6.
6.
Add one washer to each rocker arm and install HLA.
NOTE:
If the HLA is not replaced, it is not necessary to apply engine oil to the HLA. Add a washer ONLY if the rocker arm is the old style. Refer to Fig. 3.