
MPV LX 4WD V6-3.0L SOHC (1997)
Liftgate Window Glass: Service and Repair
Installation
1. Cut away the old sealant by using a razor knife so that 1-2 mm thickness of sealant remains around the circumference of the frame. If all the
sealant has come off in any one place, apply some primer after degreasing, and allow it 30 minutes to dry. Then put on new sealant to create a 2
mm layer.
2. Carefully clean the bonding area on the body.
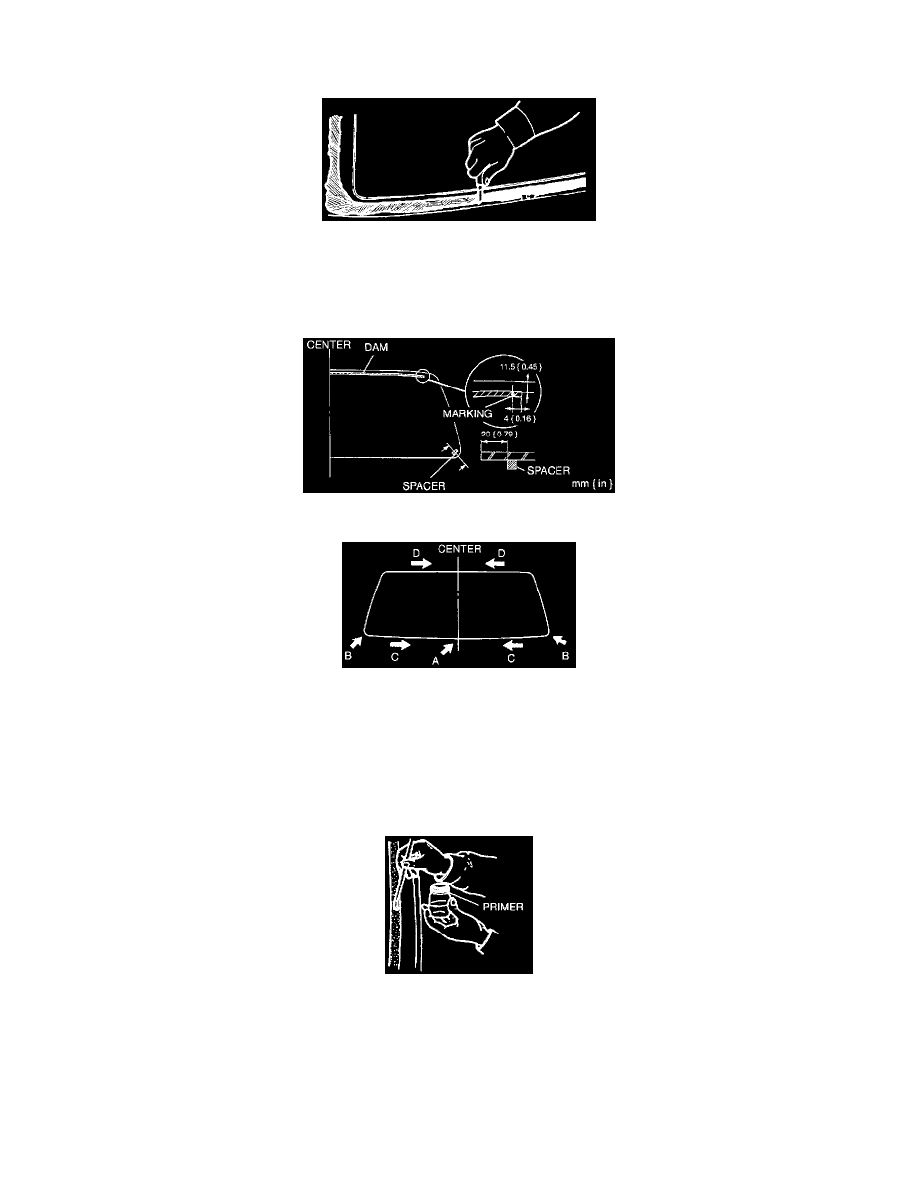
3. Securely bond a dam to the glass 11.5 mm from the edge. Allow it dry completely.
4. Securely bond spacers to the glass as shown.
5. Install the rear window molding to the glass.
1. Align the molding to the center of the lower edge of the glass. (A)
2. Align the molding to the lower corners. (B)
3. Install the molding from outside to inside. (C)
4. Install the molding from sides to the top. (D)
CAUTION: Keep the area free of dirt and grease, and do not touch the surface or the primer and sealant will not properly bond to the glass
and body, causing leaks to occur.
6. Use a brush to apply primer to the bonding area of the glass and the body. Allow it to dry for approximately 30 minutes.