
MX-5 Miata L4-1.8L DOHC (1996)
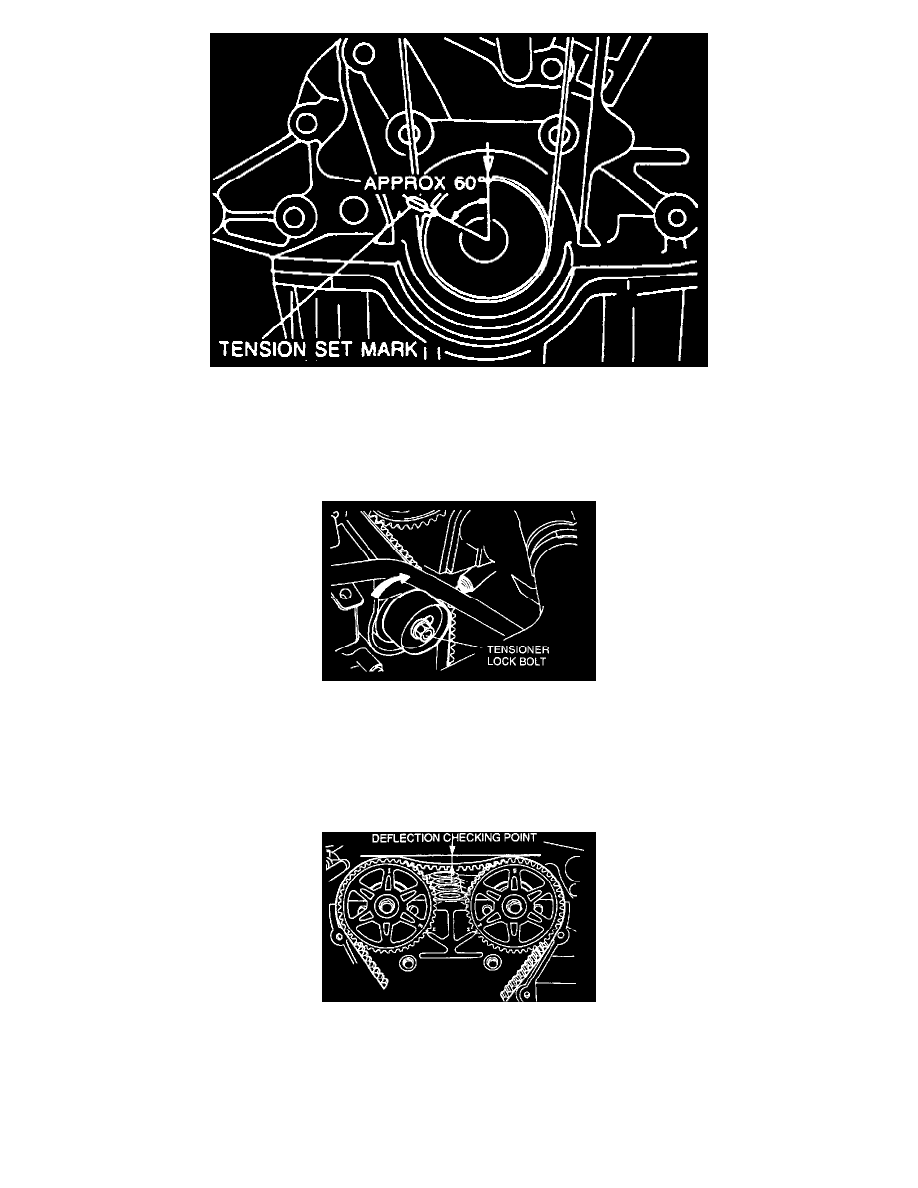
Fig. 71 Tension Set Mark Alignment
(7) Turn the crankshaft 1 and 5/6 turns clockwise and align the timing belt pulley mark with the tension set mark for proper timing belt tension
adjustment.
(8) Using the SST 49 D011 102, loosen the pulley lock bolt and remove the bolt and pulley boss. Do not turn the crankshaft.
(9) Verify that the timing belt pulley mark is aligned with the tension set mark.
(10) Loosen the tensioner lock bolt to apply spring tension to the timing belt. Be sure not to apply tension other than that of the tensioner spring.
(11) Tighten the tensioner lock bolt.
Tightening torque: 38 - 51 N.m (28 - 38 ft.lbf)
(12) Install the pulley boss and pulley lock bolt.
(13) Turn the crankshaft 2 and 1/6 turns clockwise and verify that the timing marks are correctly aligned.
(14) Measure the timing belt deflection by applying moderate pressure 98 N (22 lbf) midway between the camshaft pulleys. If the deflection is not
correct, repeat from step 10 above.
Deflection: 9.0 - 11.5 mm (0.36 - 0.45 in)
3. Install the lower timing belt cover.
4. Install the middle and upper timing belt cover.