MX-5 Miata L4-1597cc 1.6L DOHC (1992)

Control Arm: Service and Repair
Upper Arm
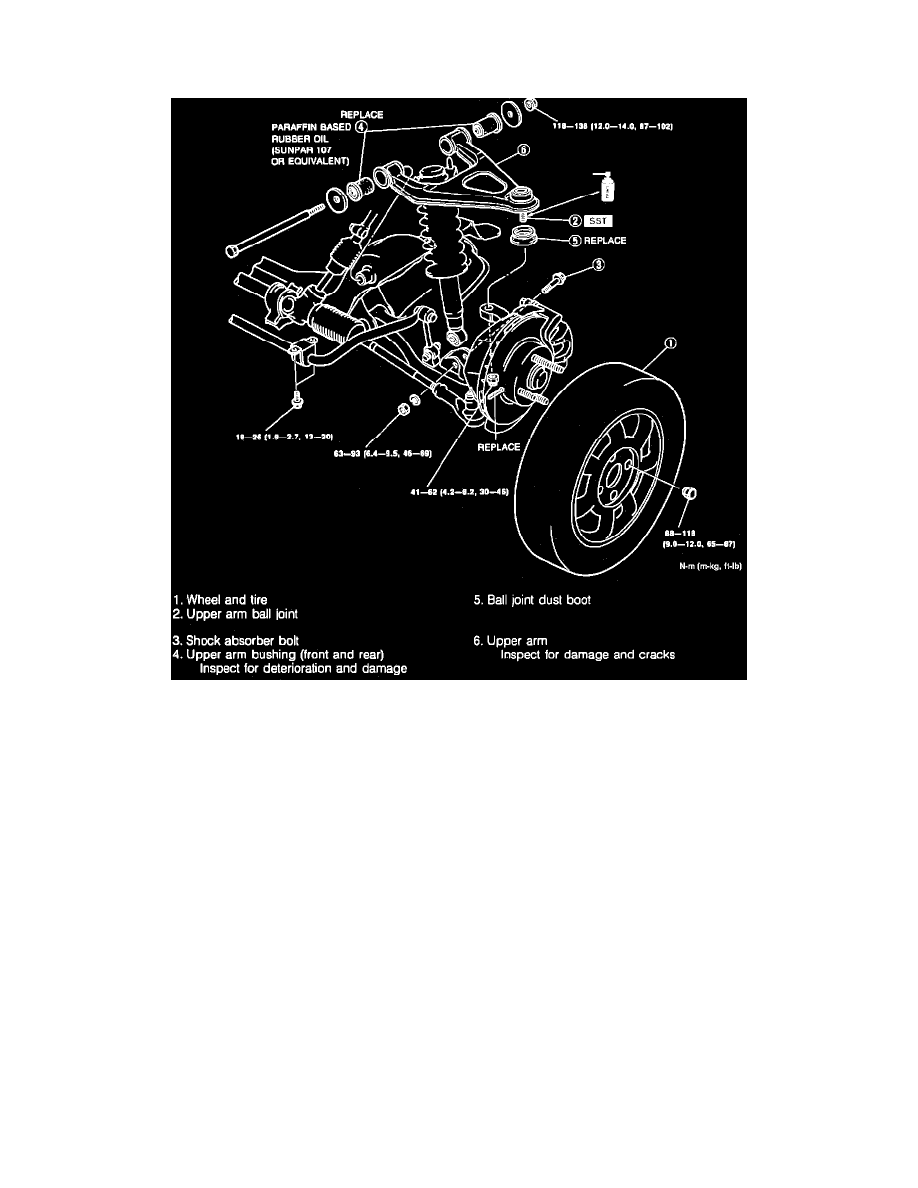
Fig. 4 Upper Arm & Related Components
1.
Raise and support vehicle.
2.
Remove wheel and tire.
3.
Remove components in numerical sequence shown, Fig. 4.
4.
Reverse procedure to install, noting the following:
a. When installing loosely tighten lower arm, shock absorber, and stabilizer control link bolts.
b. Using puller tool No. 490118850C or equivalent, separate ball joint from knuckle.
