
MX-5 Miata L4-2.0L (2008)
Crankshaft Position Sensor: Component Tests and General Diagnostics
CRANKSHAFT POSITION (CKP) SENSOR INSPECTION [LF]
NOTE: Before performing the following inspection, make sure to follow the procedure as indicated in the troubleshooting flowchart. (See HOW TO
USE THIS MANUAL.) See: Description and Operation
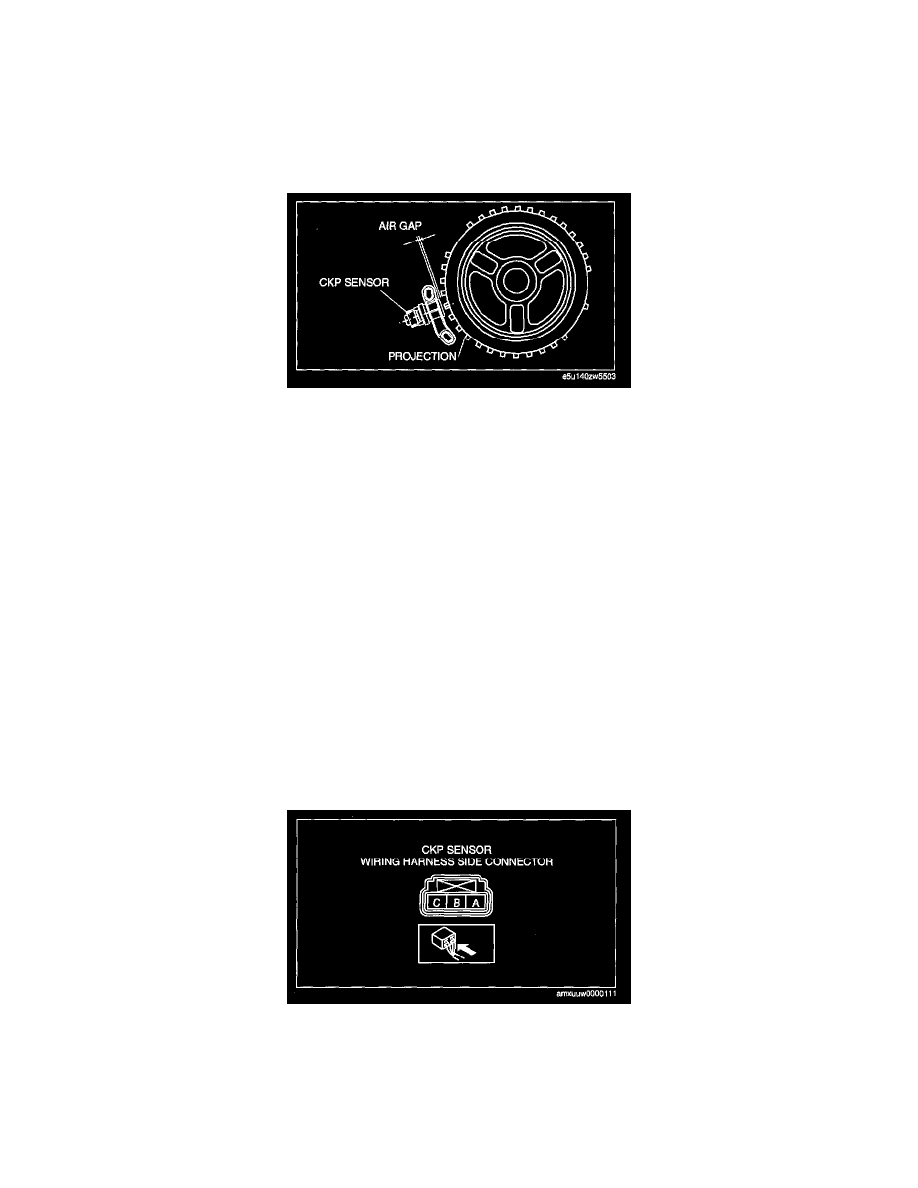
Air Gap Inspection
1. Verify that the CKP sensor is securely installed.
2. Using a thickness gauge, measure the air gap between the plate projections at the back of crankshaft pulley and the CKP sensor.
-
If not within the specification, inspect the plate projections for cracks or bending.
-
If there is any malfunction, replace the crankshaft pulley.
-
If the monitor item condition/specification (reference) is not within the specification, even though there is no malfunction, carry out the
"Circuit Open/Short Inspection".
Air gap
0.5-1.5 mm {0.02-0.05 in}
Visual inspection
1. Remove the battery cover.
2. Disconnect the negative battery cable.
3. Remove the CKP sensor.
4. Verify that there are no metal shavings on the sensor.
-
If the monitor item condition/specification (reference) is without the specification even though there is no malfunction, carry out the "Circuit
Open/Short Inspection".
Voltage Inspection
1. Install all removed parts.
2. Idle the engine.
CAUTION: Water penetrating the connector will cause sensor malfunction. To prevent this, be careful not to damage the wiring
harnesses or the waterproof connector so as to cause water penetration.
3. Measure the output voltage using an oscilloscope.
-
If not within the specification, replace the CKP sensor.
-
If the monitor item condition/specification (reference) is without the specification, even though the voltage is within the specification, carry out
the "Circuit Open/Short Inspection".