MX-5 Miata L4-2.0L (2008)

Shifter A/T: Service and Repair
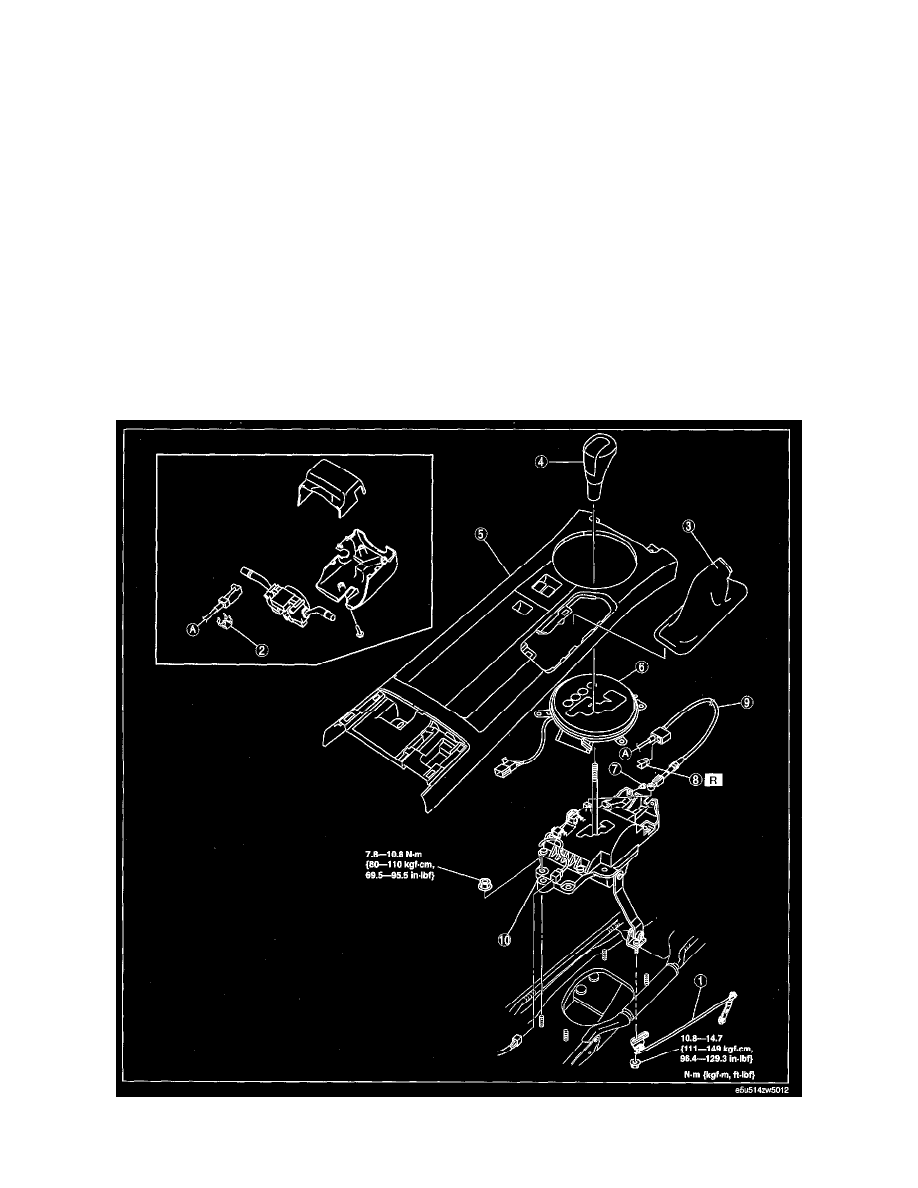
Selector Lever Removal/Installation
SELECTOR LEVER REMOVAL/INSTALLATION
1. Remove the battery cover.
2. Disconnect the negative battery cable.
3. Remove the following parts.
1) Side wall.
2) Column cover.
3) Driver-side air bag module.
4) Steering shaft.
5) Audio unit.
6) SAS control module.
7) Tunnel member component.
8) Middle pipe.
9) Insulator.
4. Shift the selector lever to the P position.
5. Remove in the order indicated in the table.
6. Install in the reverse order of removal.
7. After installation, perform the shift lock inspection and key interlock inspection. (See SHIFT LOCK INSPECTION.) See: Shift Interlock/Testing
and Inspection/Shift Lock Inspection (See KEY INTERLOCK INSPECTION.) See: Shift Interlock/Testing and Inspection/Key Interlock
Inspection
