
MX-5 Miata L4-2.0L (2008)
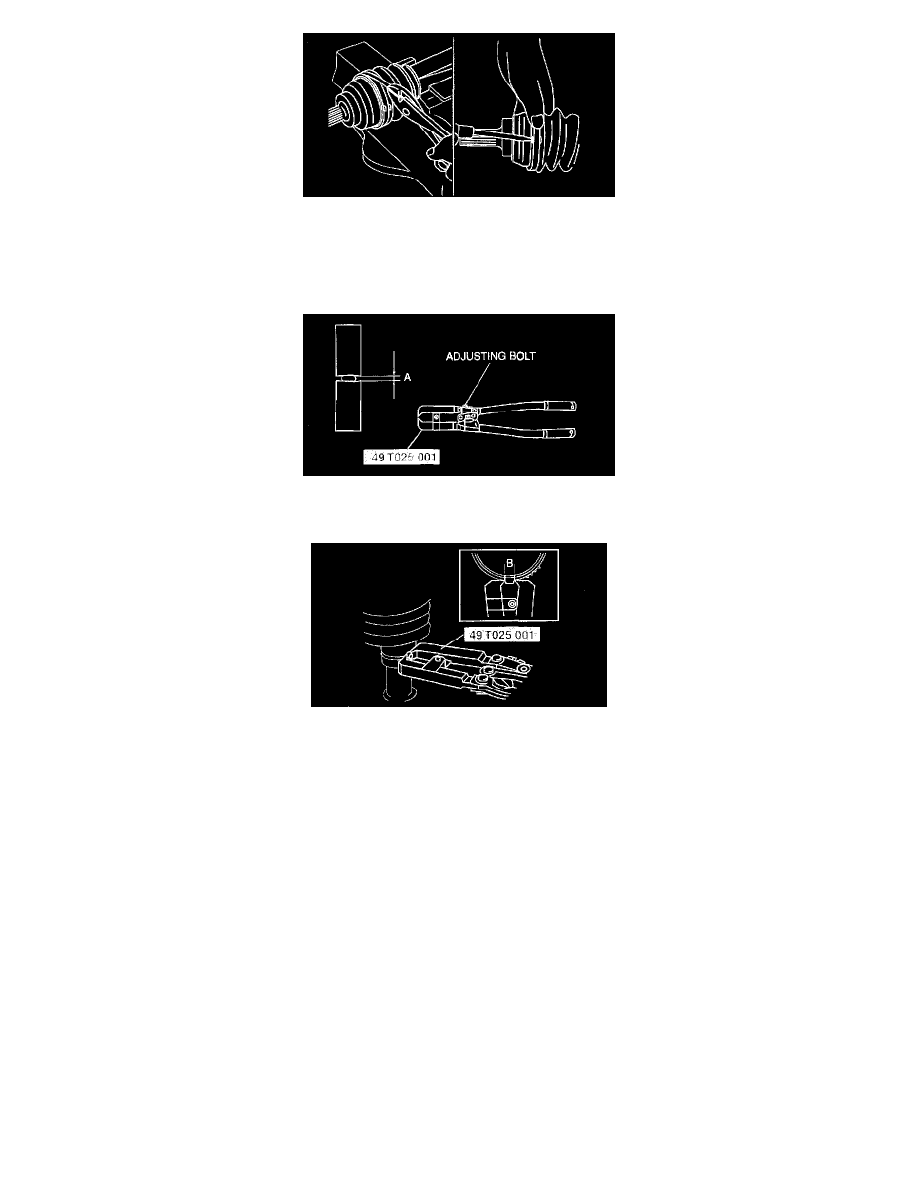
1. Using pliers, pull the boot band around the boot slot in opposite direction of drive shaft forward rotation direction and tighten.
2. Insert the end of the boot band between the boot band clip and fold back the clip tabs using a flathead screwdriver to secure the boot band.
3. Verify that the boot band is installed to the boot slot securely.
Boot Band (Axle Side) Assembly Note
1. Turn the adjusting bolt of the SST and adjust the opening size to the specification A.
Specification A 2.9 mm (0.11 inch)
2. Crimp the boot band (small-size) using the SST.
3. Verify that the crimp value B is within the specification.
^
If the crimp value B exceeds the specification, reduce opening length A of the SST and recrimp the boot band.
^
If the crimp value B is less than the specification, increase opening length A of the SST and crimp the new boot band.
Specification B 2.4 - 2.8 mm (0.095 - 0.110 inch)
4. Verify that the boot band does not protrude from the boot band installation area. If the boot band protrudes from the installation area, replace it
with a new band and repeat Step 2-4.
5. Fill the boot with the repair kit grease.
6. Adjust opening length A of the SST to the specification.
Specification A 3.2 mm (0.13 inch)
7. Crimp the boot band (large-size) using the SST.
8. Verify that the boot band crimp value B is within the specification.
^
If crimp value B exceeds the specification, reduce opening length A of the SST and recrimp the boot band.
^
If the crimp value B is less than the specification, replace the boot band, increase opening length A of the SST, and then recrimp the new boot
band.
Specification B 2.4 - 2.8 mm (0.095 - 0.110 inch)
9. Verify that the boot band does not protrude from the boot band installation area.
^
If the boot band protrudes from the installation area, replace it with a new band and repeat Step 7-9.