
MX-5 Miata LS L4-1.8L DOHC (2001)
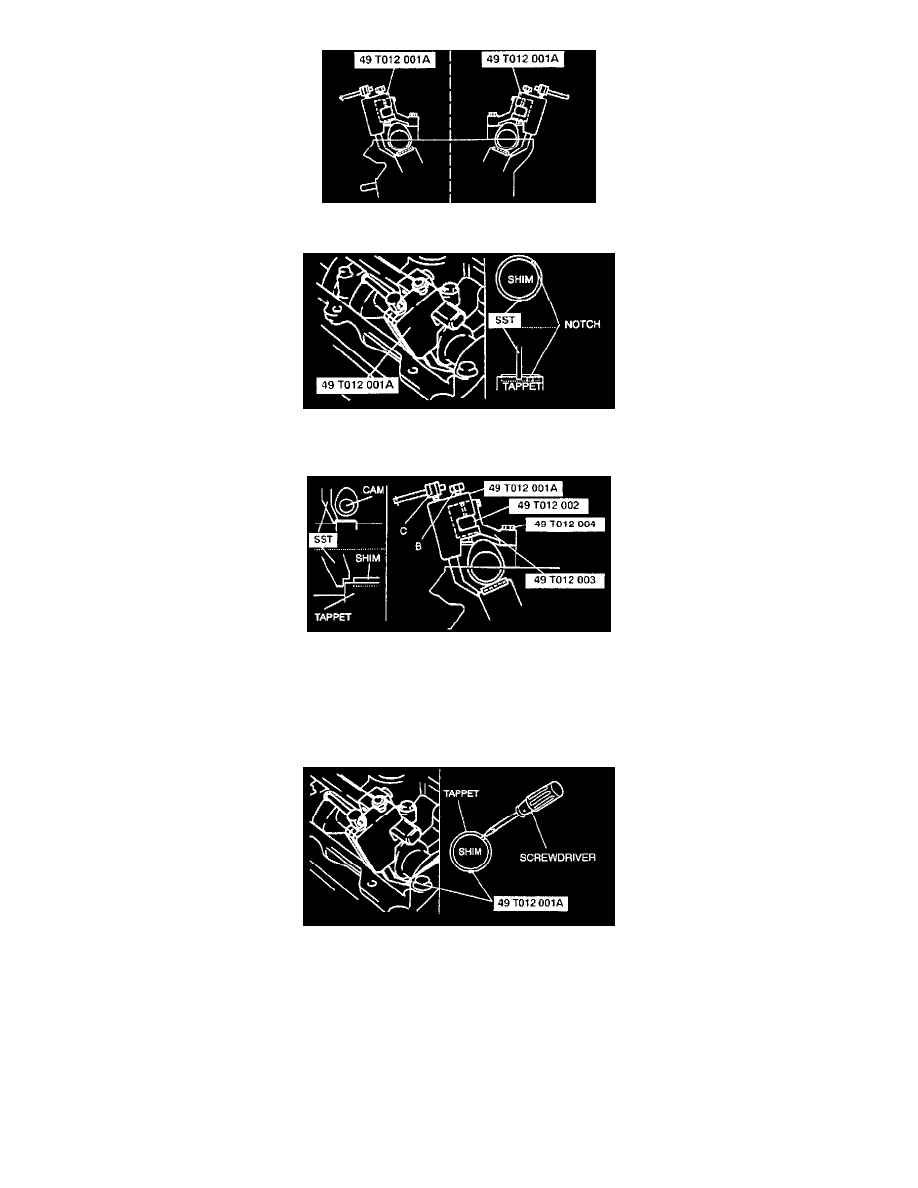
6. Face the SST (body) outside of the cylinder head, and mount it on the SST (shaft) at the point of the adjustment shim to be replaced.
7. Face the notch of the tappet so that a small screwdriver can be inserted.
8. Set the SST on the tappet by its notch.
9. Tighten bolt B to secure the SST (body).
Caution:
-
Cylinder head can be damaged when the tappet is pressed down.
10. Tighten bolt C, and press down the tappet.
11. Using a fine screwdriver, pry up the adjustment shim through the notch on the tappet.
12. Remove the shim using a magnet.
13. Select a proper adjustment shim.
New adjustment shim
= Removed shim thickness + Measured valve clearance - Standard valve clearance (IN: 0.21 mm (0.008 inch), EX: 0.31 mm (0.012 inch))
14. Push the selected shim into the tappet.
15. Loosen bolt C to allow the tappet to move up.
16. Loosen bolt B and remove the SST (body).
17. Remove the SSTs and tighten the camshaft cap bolts.
Tightening torque 11.3 - 14.2 Nm (115 - 145 kgf-cm, 100 - 125 inch lbs.)