
MX-5 Miata LS L4-1.8L DOHC (2001)
Shift Solenoid: Service and Repair
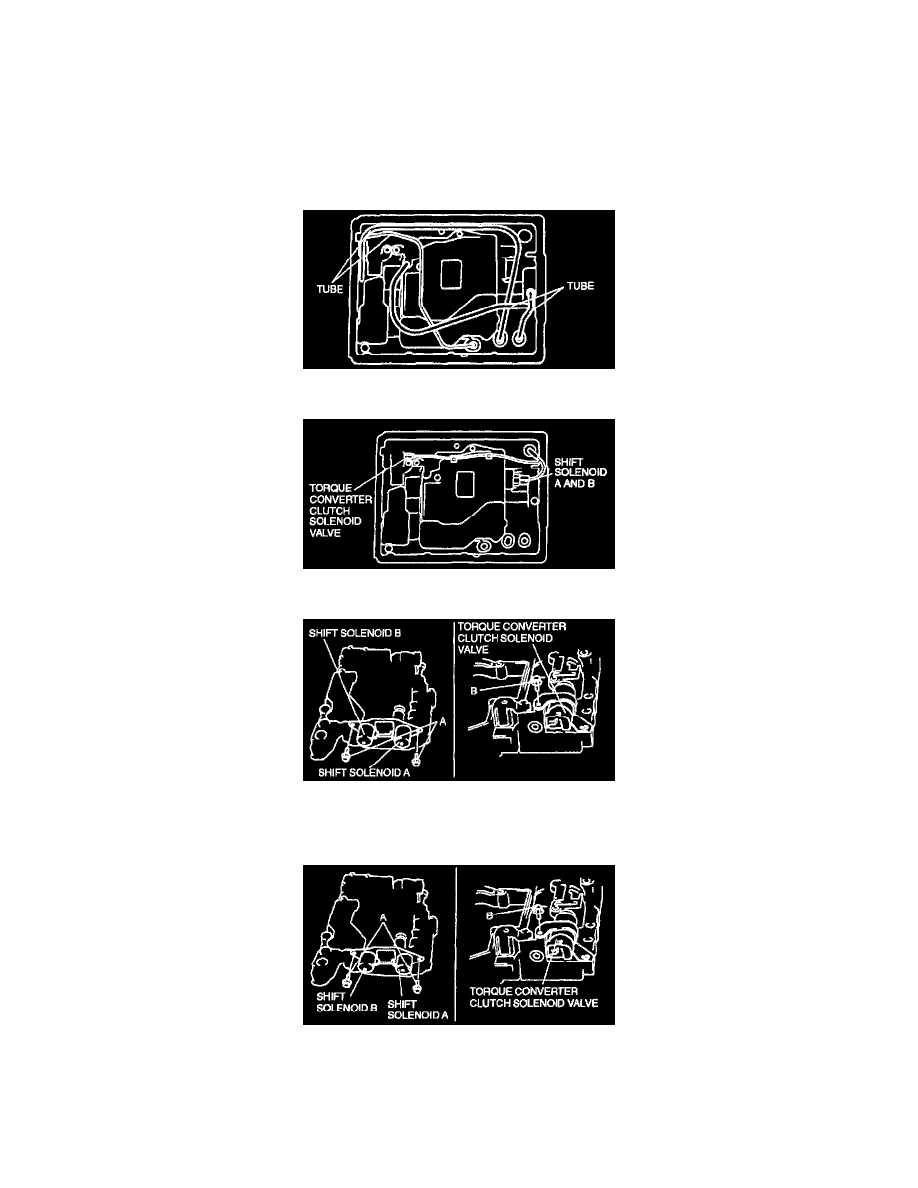
SOLENOID VALVES REMOVAL/INSTALLATION
1. Clean the transmission exterior thoroughly with a steam cleaner or cleaning solvents.
2. Disconnect the negative battery cable.
3. Drain the ATF.
4. Remove the oil pan and gasket.
Caution:
^
To prevent deformation of the tube, remove the tube by pulling both ends up.
5. Remove the tubes.
6. Disconnect the shift solenoids A, B and torque converter clutch solenoid valve connectors.
7. Remove the solenoid valve.
8. Apply ATF to a new O-ring.
9. Install the O-ring to the torque converter clutch solenoid valve.
10. Install a new gasket and solenoid valve to the control valve body.
Tightening torque
A: 7.9 - 11.7 Nm (80 - 120 kgf-cm, 70 - 104 inch lbs.)
B: 5.0 - 5.8 Nm (50 - 60 kgf-cm, 44 - 52 inch lbs.)
11. Connect shift solenoids A, B. and torque converter clutch solenoid valve connectors.
12. Install the tubes.