
MX-5 Miata Mazdaspeed L4-1.8L DOHC Turbo (2004)
NOTE: Perform the following test only when directed.
1. Complete the "BEFORE REPAIR PROCEDURE". (See BEFORE REPAIR PROCEDURE.)
2. Disconnect the negative battery cable.
3. Lift up the vehicle with safety stands.
4. Remove the fuel filter cover.
5. Verify that the quick release connector joint area is free of foreign material.
6. Clean if necessary.
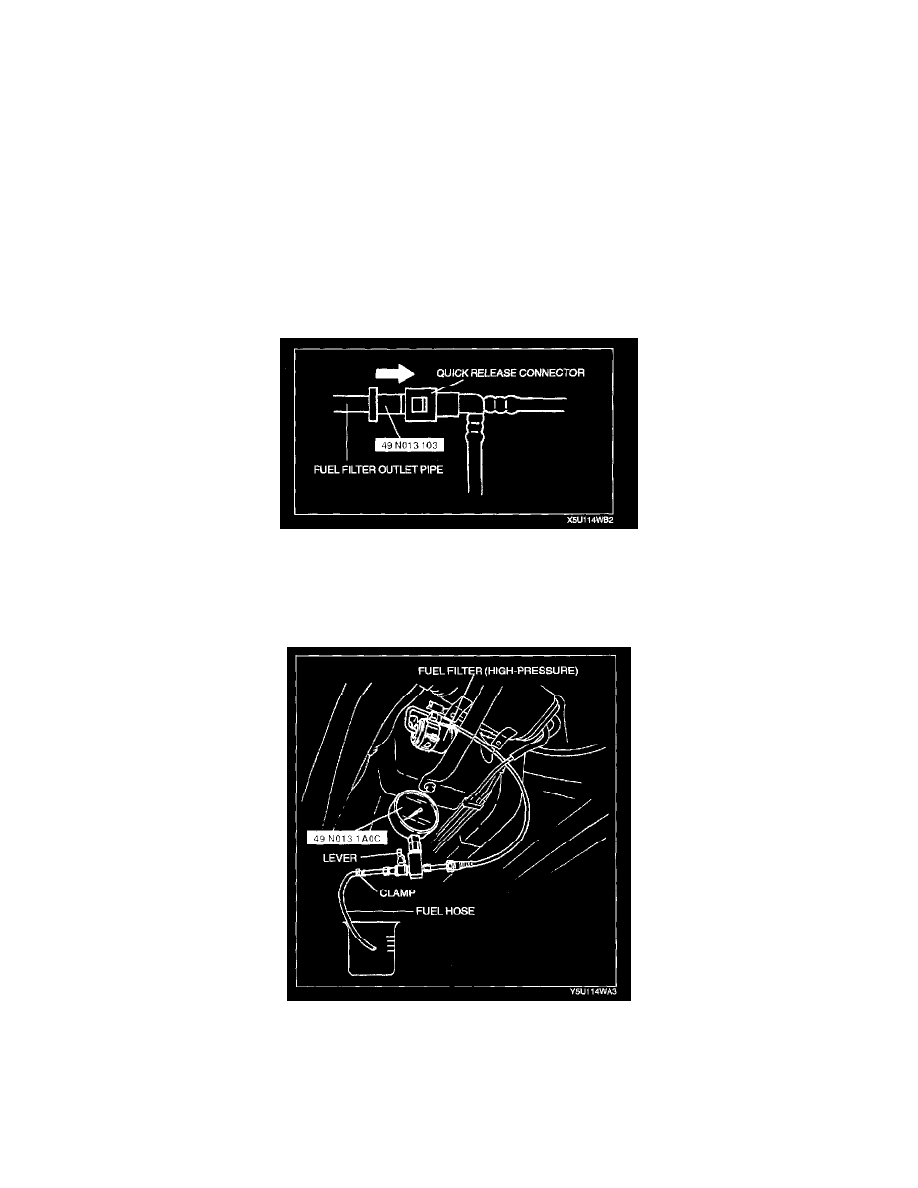
7. Set the SST to the fuel filter outlet pipe and push it into the quick release connector, and disconnect the fuel pipe.
-
If removal of the retainer is required, remove it by squeezing the tabs of the retainer.
CAUTION: Removing the retainer from the disconnected fuel pipe will reduce the effectiveness of the retainer. The retainer must be replaced
when any of the following applies:
1. Scratches or damage is observed on the retainer.
2. Fuel pipe has been replaced.
3. Fuel filter (high-pressure) has been replaced.
8. Cover the disconnected quick release connector and fuel filter outlet pipe to prevent them from being scratched or contaminated with foreign
material.
9. Turn the lever as shown to plug the SST outlet.
10. Push the SST into the fuel filter outlet pipe until a click is heard.
11. Connect a fuel hose and clamp to the SST outlet pipe.
12. Set the fuel hose into a container to avoid fuel spills.
13. Pull the quick release connector by hand and verify that it is installed securely.
14. Connect the negative battery cable.
CAUTION: Connecting to the wrong DLC terminals may cause a malfunction. Carefully connect only to the specified terminals.