
MX-6 L4-1991cc 2.0L DOHC (1993)
Control Arm: Service and Repair
Rear
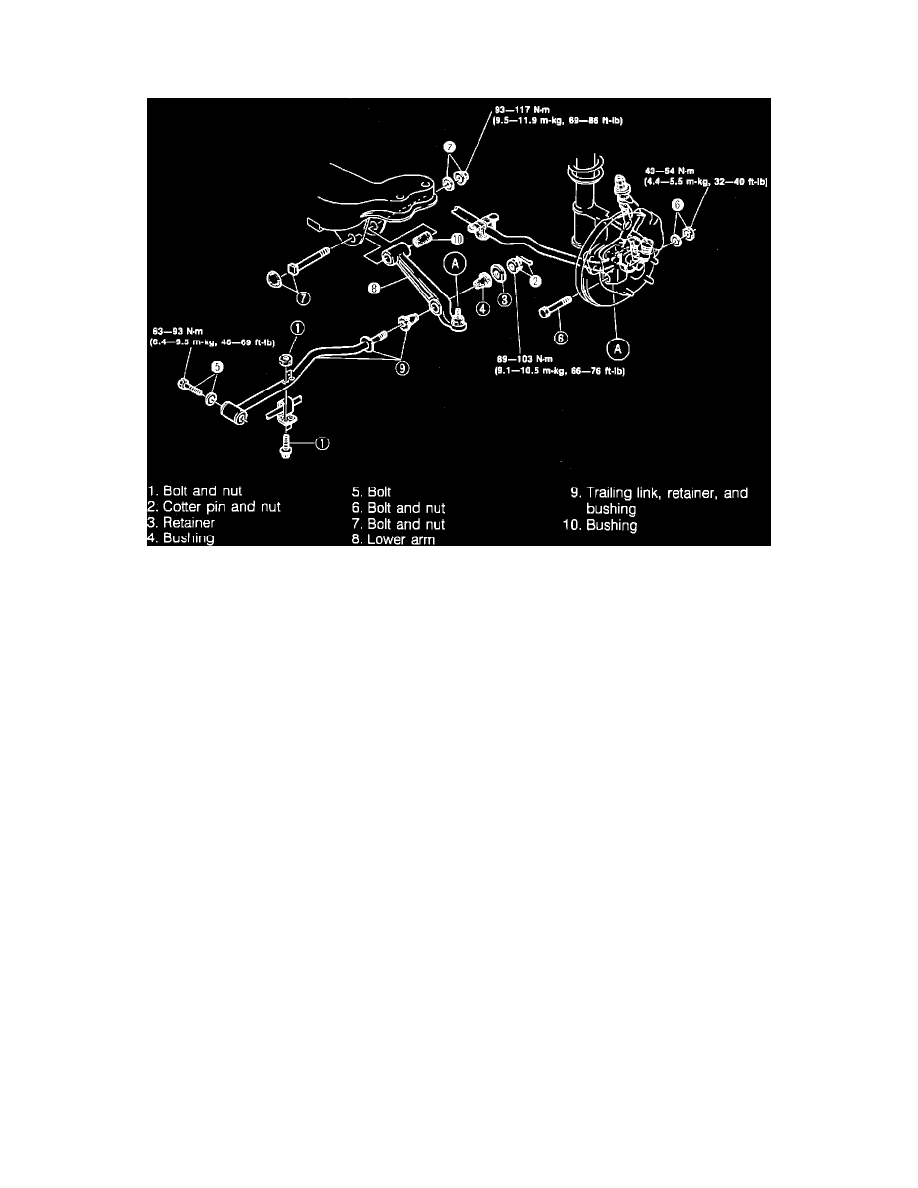
Fig. 10 Lower Trailer Arm & Trailing Link Replacement.
4 WHEEL STEERING
1.
Raise and support vehicle.
2.
Remove hose bracket from trailing link, Fig. 10.
3.
Remove cotter pin and trailing link to lower arm attaching bolt, then the retainer and bushing.
4.
Remove front trailing link attaching bolt, then the lower arm to knuckle spindle and lower arm to crossmember attaching bolts.
5.
Remove lower arm and the trailing link, retainer and bushing.
6.
Remove bushing from lower arm.
7.
Check for deformation or cracks in lower arm and trailing link and deformation or wear of bushing, replacing as necessary.
8.
Check rotation torque of ball joint as follows:
a. Attach tool 490180510B or equivalent to ball joint, then attach spring scale to tool.
b. Spring scale reading is should be 3.9-6.8 lbs.
c. If reading is not satisfactory, replace ball joint and lower arm assembly.
9.
Replace lower arm dust boot as follows:
a. Remove dust boot with chisel. Do not damage ball joint.
b. Apply suitable grease to inside of new dust boot.
c. Using pressing tool, press new dust boot onto ball joint.
10.
Replace lower arm bushing as follows:
a. Using pressing tool, press bushing out of lower arm.
b. Apply soapy water to new bushing.
c. Using pressing tool, press bushing into lower arm.
11.
Reverse procedure to install, noting the following:
a. Tighten lower arm to crossmember and knuckle arm, torquing cross member side and knuckle arm side specification. Lower vehicle and
check torque with vehicle unloaded.
b. Tighten trailing link to body and lower arm, torquing body side and the lower arm side to specification. Lower vehicle and check torque
with vehicle unloaded. If cotter pin was removed, do not reuse.