
MX-6 L4-1991cc 2.0L DOHC (1993)
11. Initially tighten the nut on the ball. Remove the shifter pin.
12. Rotate the SST until the socket can be installed on the nut. Tighten the manual valve detent lever ball stud nut to 11 - 13 Nm (97 - 115 inch lbs.).
13. Remove the pin and SST.
14. Install the manual control lever assembly and bolt to 24 - 30 Nm (18 - 22 ft. lbs.).
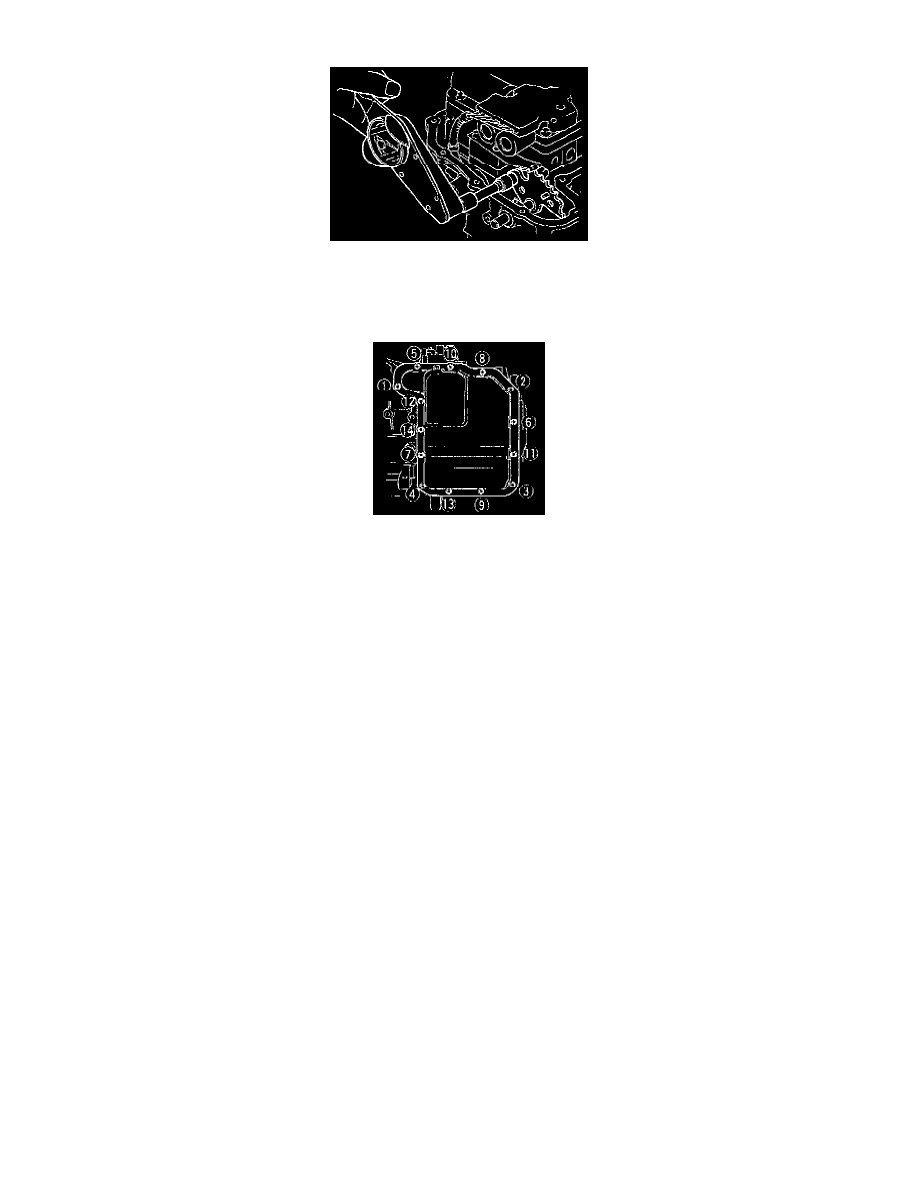
15. Install the control valve body cover gasket on the case. Attach the cover to the case.
16. Install the fourteen mounting bolts in the sequence shown to 14 - 18 Nm (124 - 159 inch lbs.).
CAUTION: If reusing the hose clamp, position it in the original location on the hose and squeeze the clamp lightly with large pliers to ensure a
tight fit.
17. Align the marks, and slide the oil cooler hose onto the oil cooler pipe until it is fully seated.
18. Install the hose clamp onto the hose at the center of the mark and at the angle shown.
19. Verify that the hose clamp does not interfere with any other parts.
20. Slide the radiator hose onto the radiator pipe until it is fully seated.
21. Install the hose clamp on the hose.
22. Squeeze it lightly with large pliers to ensure a good fit.
23. Connect the Transmission Range (TR) switch connector.
24. Connect the solenoid body connector.
25. Install the following items.
^
Battery
^
Battery carrier
^
Fresh air duct
^
Resonance chamber
26. Fill the transaxle with the specified ATF.
27. Check for leakage of ATF from the oil pan or the oil hose connecting points.
28. Carry out the mechanical system test.
29. Carry out the road test.