
MX-6 L4-1991cc 2.0L DOHC (1993)
INSTALLATION
-
Install in the reverse order of removal, referring to the following notes:
Selector Lever
1. Install the selector lever. Tighten to 16 - 22 Nm (12 - 16 ft. lbs.).
2. Verify the transaxle is in D range.
3. Install the selector cable to the selector lever.
4. Push the selector lever into the D range.
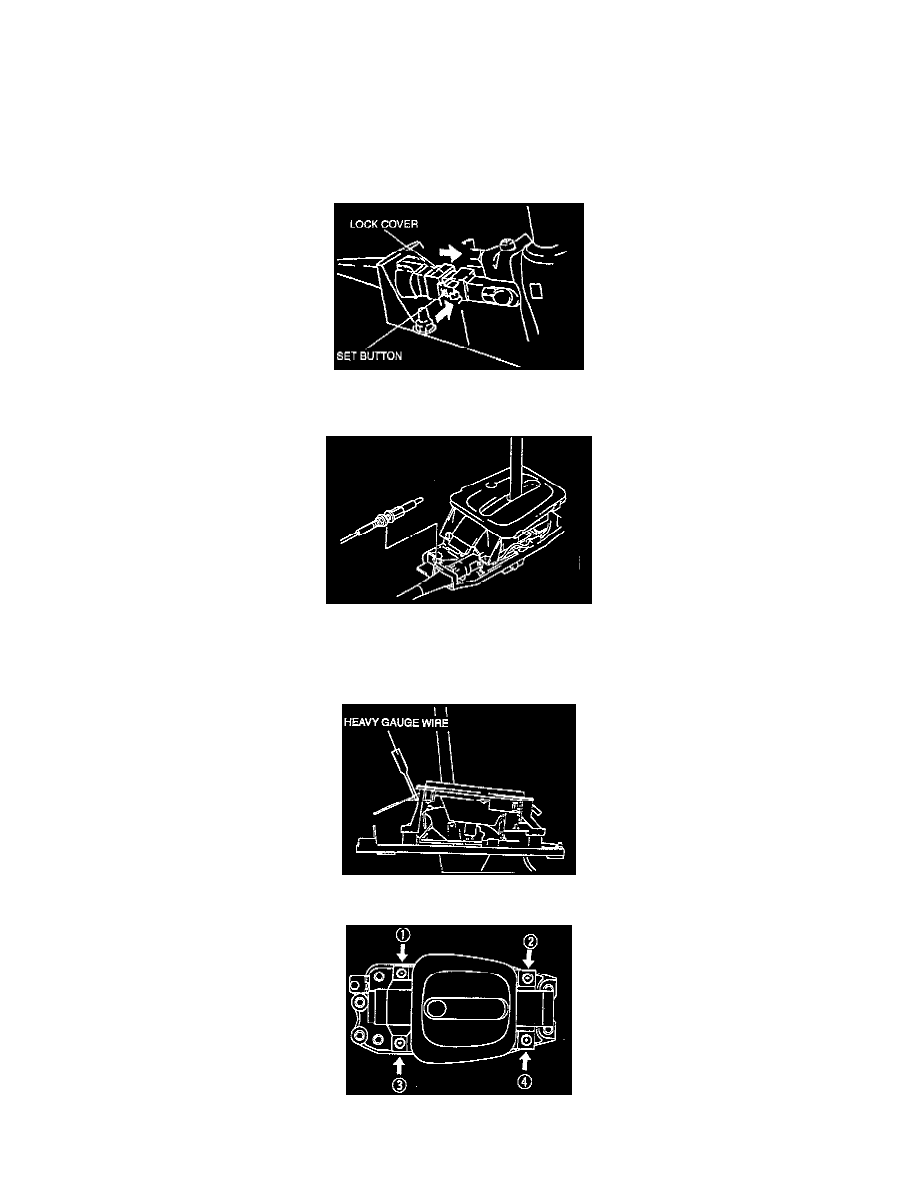
5. Connect the set button.
6. Slide the lock cover and lock the set button.
7. Install the interlock cable to the selector lever and tighten to 10 - 15 Nm (87 - 130 inch lbs.).
Indicator Panel
1. Shift the selector lever to P position.
2. Align the alignment screws in the slider with the holes in the indicator panel. Install heavy-gauge wire to hold the slider.
3. Tighten the indicator panel screws in the order shown in the illustration to 2.0 - 2.9 Nm (18 - 26 inch lbs.).
4. Remove the wire.