
MX-6 L4-1991cc 2.0L DOHC (1993)
Valve Body: Service and Repair
On-Vehicle Replacement
Removal
CAUTION: Clean the transaxle exterior thoroughly with a steam cleaner or cleaning solvents before removal.
1. Remove the following items.
^
Battery
^
Battery carrier
^
Fresh air duct
^
Resonance chamber
2. Disconnect the Transmission Range (TR) switch connector.
3. Disconnect the solenoid body connector.
4. Drain the ATF.
5. Remove the splash shield.
6. Remove the oil cooler hose.
7. Remove the control valve body cover.
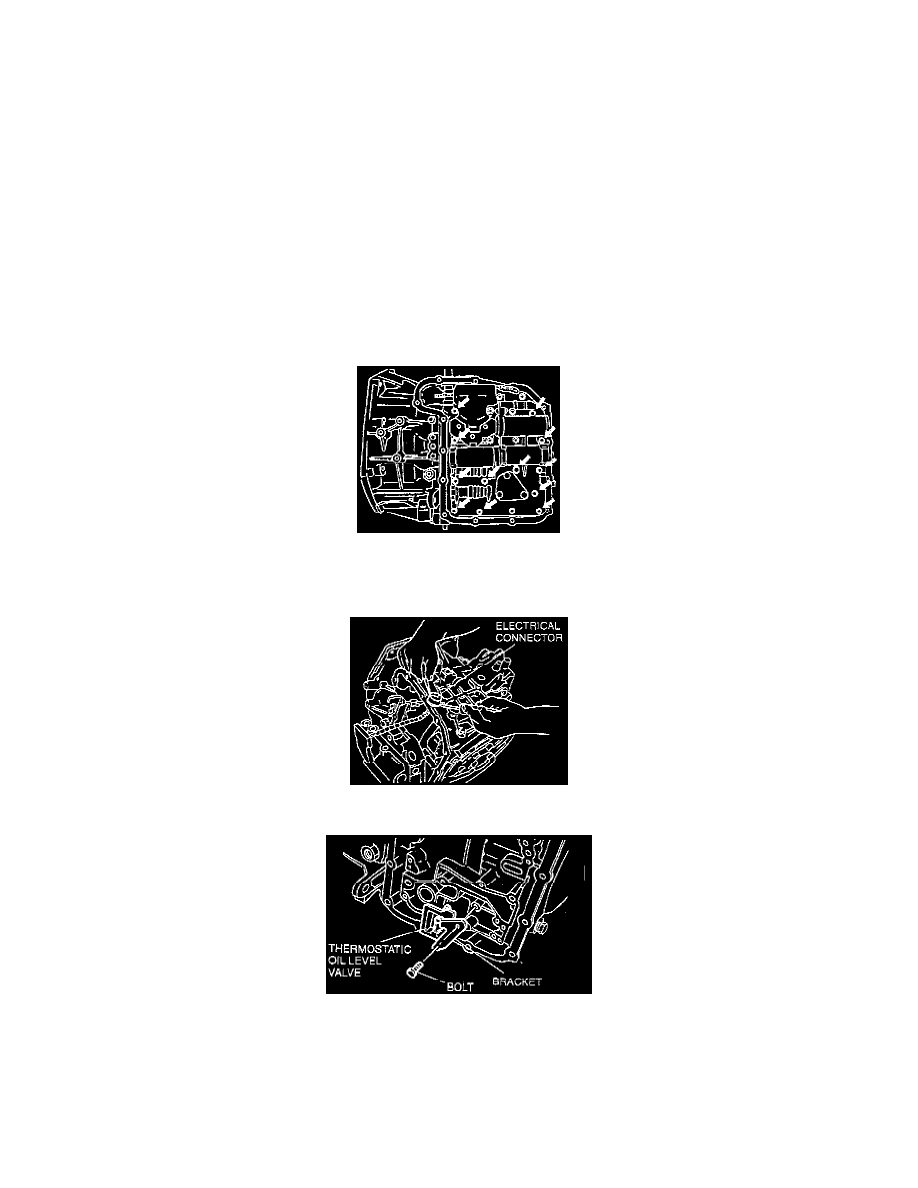
8. Remove the control valve body mounting bolts.
CAUTION: Do not pull on the connector wires or use a hammer on the connector.
9. Remove the control valve body assembly.
10. If the thermostatic oil level control valve must be removed, remove the bolt and the bracket. Pull the thermostatic oil level control valve straight out
of the transaxle case.
Installation
1. If the thermostatic oil level control valve was removed, insert it into the transaxle case and install the bracket and bolt. Tighten to 11 - 13 Nm (97 -
115 inch lbs.).
2. Install a new O-ring on the solenoid electrical connector and lightly coat the O-ring with petroleum jelly.