
MX-6 L4-1991cc 2.0L DOHC (1993)
CAUTION: Do not pull wires or damage connector body.
3. Place the control valve body slightly away from the transaxle case and push the solenoid body connector into its bore.
4. Align the Z-link in the manual valve.
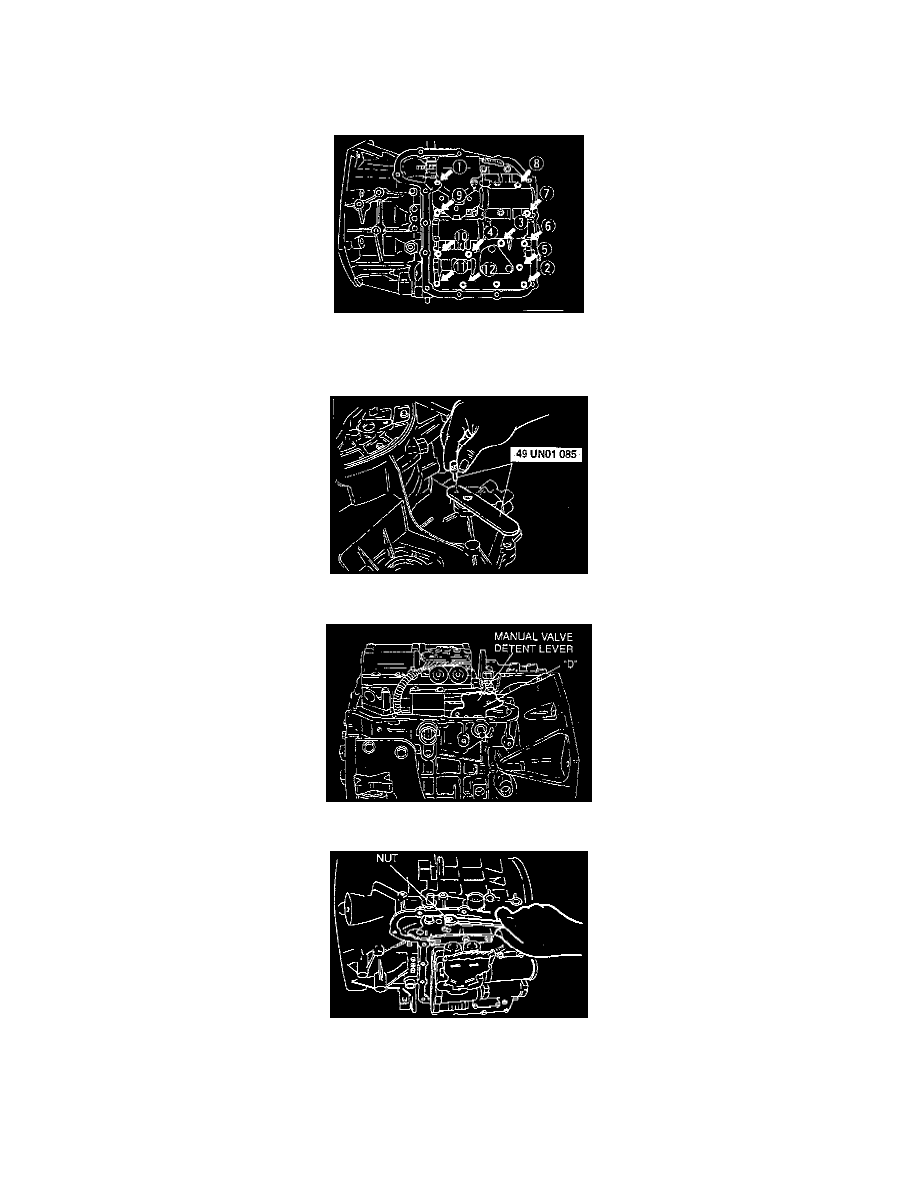
5. Install the 12 mounting bolts. Tighten the mounting bolts in the sequence shown to 9 - 11 Nm (80 - 97 inch lbs.).
6. Loosen the nut on the ball stud for the manual valve detent actuating rod.
7. Remove the manual lever control shaft outer lever.
8. Use the Special Service Tool (SST) to move the shaft to the D range position and install the pin to hold the tool in position.
9. Move the manual valve detent lever to the D range position.
10. Loosen the nut on the ball stud for the manual valve detent lever actuating rod assembly.
11. Initially tighten the nut on the ball. Remove the shifter pin.