
MX-6 L4-2184cc 22L Turbo F2 (1989) Instrument Panel Repair | Dashboard Component Information
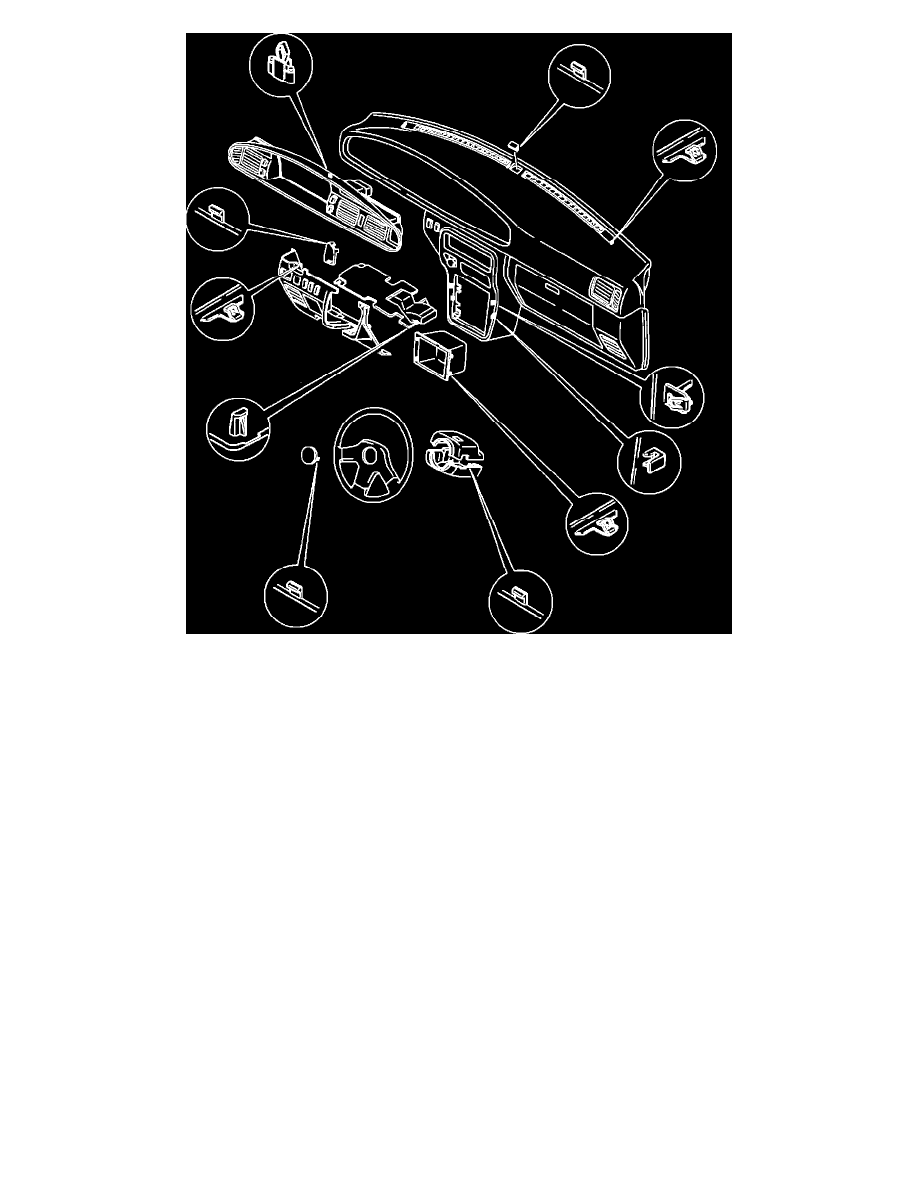
Fig. 9 Exploded View Of I/P (Part 2 Of 2)
For the following procedure, refer to Fig. 9 for assistance.
1.
Disconnect battery ground cable.
2.
Remove shift knob screws, if necessary, and remove shift knob.
3.
Remove rear console mounting screws, pull console rearward and remove.
4.
Remove front console mounting screws.
5.
Remove steering wheel, refer to Steering and Suspension/Steering/Steering Wheel/Service and Repair.
6.
Remove screws and steering column covers.
7.
Remove screws and undercover. Loosen nut and hood release lever.
8.
Remove screws and pull out meter hood, then disconnect connectors.
9.
Remove screws and pull out cluster. Disconnect speedometer and connectors, then remove meter assembly.
10.
Remove screws and pull switch panel outward, disconnect connectors and remove switch panel.
11.
Remove screws and glove box. Disconnect connector.
12.
Remove center panel. Remove screws and slide out heater control. Disconnect control wires at DEF, MAX, COLD and REC positions for lever
controls. For logicon type, disconnect connectors.
13.
Remove center cap and instrument panel mounting bolt.
14.
Remove instrument panel side mounting bolts.
15.
Remove instrument panel center bracket mounting bolts.
16.
Remove steering shaft mounting bolts.
17.
Disconnect dash harness connectors and remove instrument panel.
18.
Reverse procedure to install, noting the following:
a. Torque center mount bolt to 3.1-4.54 ft. lbs.
b. Torque all other instrument panel bolts to 6.5-10 ft. lbs.
c. Torque steering wheel retaining nut to 29-36 ft.lbs.
d. Ensure that heater control cable move freely and function normally.