
MX-6 L4-2184cc 2.2L SOHC Turbo F2 (1989)
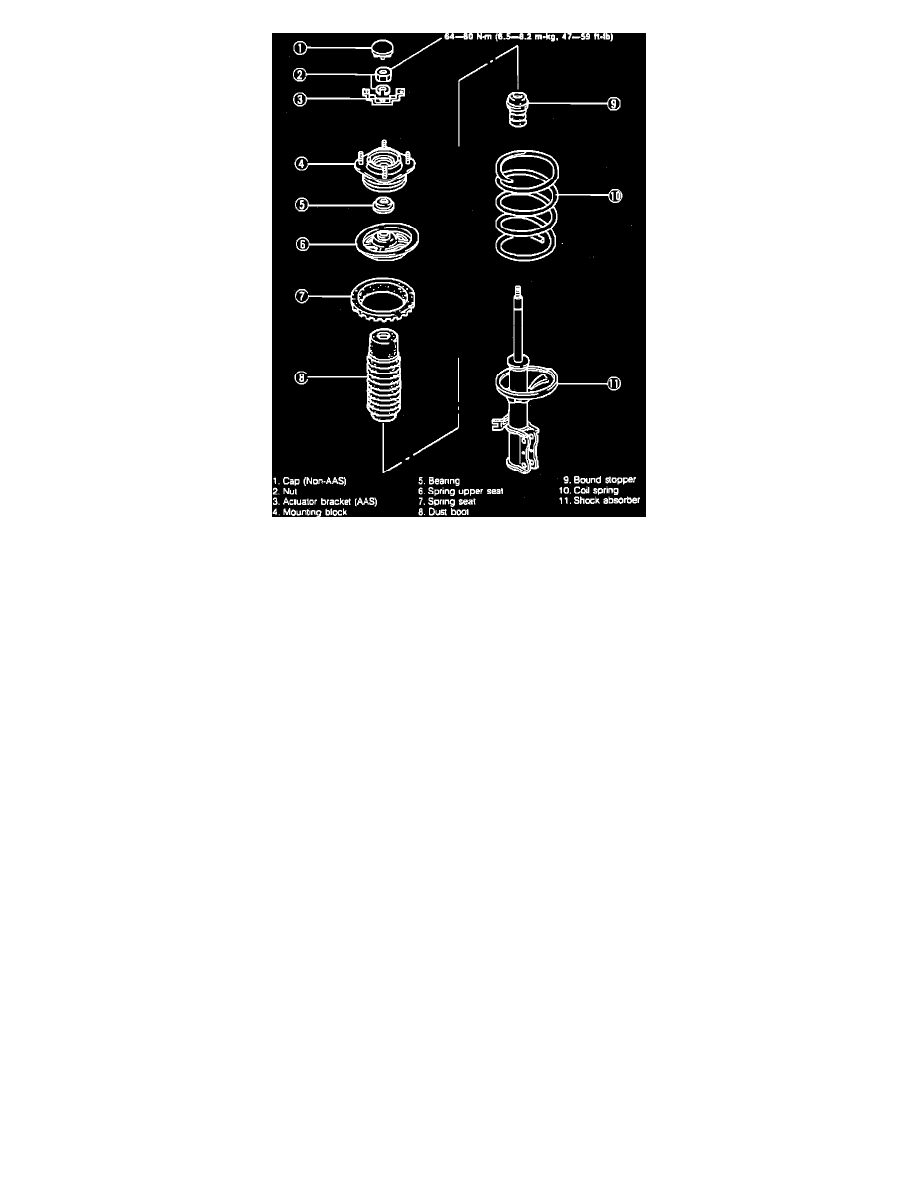
Fig. 2 Exploded View Of Coil Spring & Shock Absorber Assembly
1.
Raise and support front of vehicle and remove front wheel.
2.
Remove brake hose clip from shock absorber, Fig. 1.
3.
Remove anti-locking brake system harness and bracket.
4.
Remove rubber cap from top of shock absorber.
5.
Disconnect Auto Adjust Suspension (AAS) electrical connector and remove AAS actuator.
6.
Remove ignition coil bracket attaching bolts and nuts and the bracket.
7.
Remove lower shock absorber attaching bolts and nuts and the upper attaching nuts.
8.
Remove shock absorber assembly together with upper seat.
9.
Place shock absorber assembly in vise, then loosen piston rod upper nut several turns. Do not remove nut.
10.
Using a spring compressor, compress spring, then remove nut.
11.
Remove AAS actuator bracket, Fig. 2.
12.
Remove mounting block, bearing, spring upper seat, spring seat, dust boot, bound stopper and the coil spring.
13.
Reverse procedure to install, noting the following:
a. Torque piston rod upper nut to specification.
b. Ensure spring is well seated in upper and lower spring seats.
c. Install mounting block to suspension tower with white mark facing front inside direction, torquing to specification.
d. Torque shock absorber lower attaching bolts, anti-locking bracket system bracket attaching bolt, ignition coil bracket attaching bolts and nuts
and upper shock absorber attaching nuts to specification.