
MX-6 L4-2184cc 2.2L SOHC Turbo F2 (1989)
Trailing Arm: Service and Repair
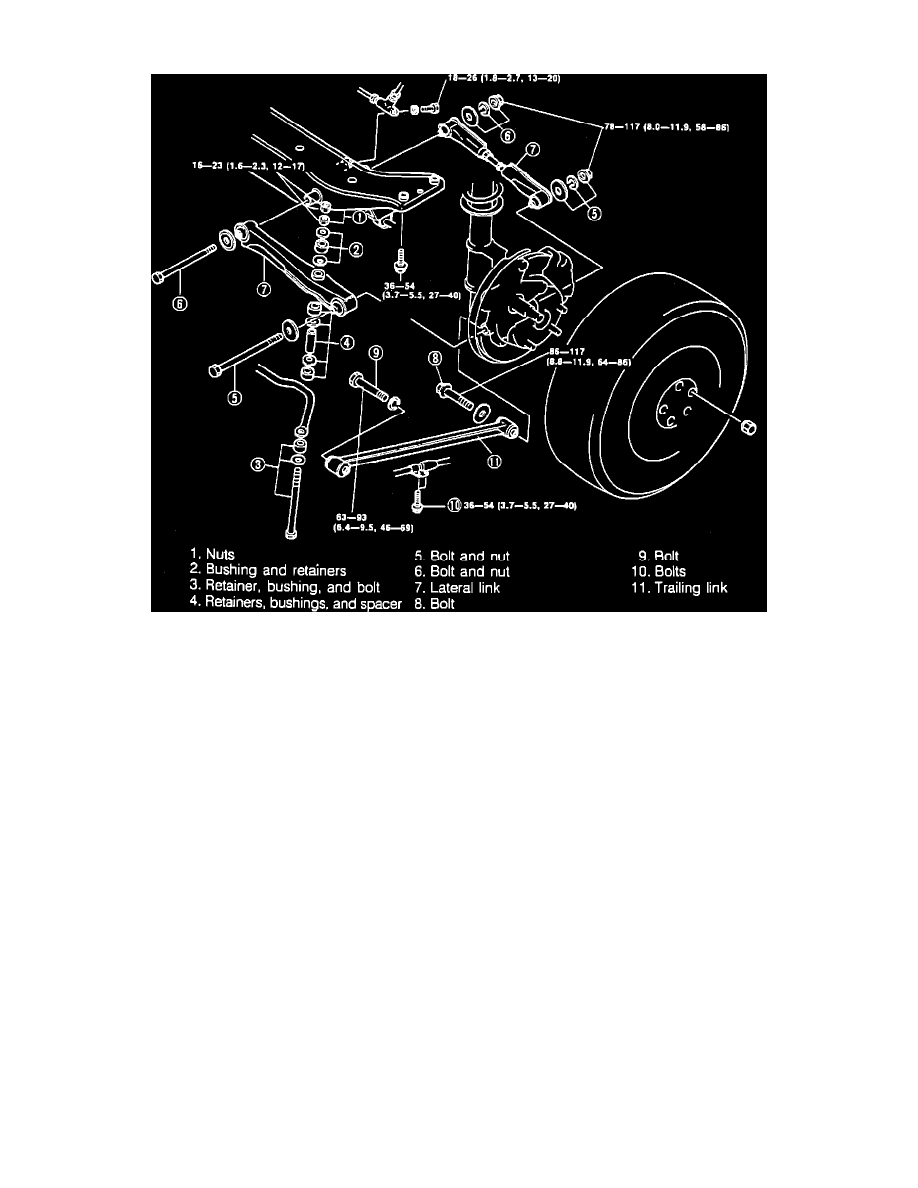
Fig. 11 Lateral Link & Trailing Link Replacement. Models w/2 Wheel Steering
2 WHEEL STEERING
1.
Raise and support vehicle with jack stands.
2.
Remove tire and wheel assembly.
3.
Remove front lateral link to crossmember retaining nuts, bushings and retainers, Fig. 11.
4.
Remove front lateral link retainers, bushings and retainers.
5.
Remove lateral links to knuckle spindle attaching bolts.
6.
Remove lateral links to crossmember attaching bolts, then the lateral links.
7.
Remove trailing link to knuckle spindle attaching bolt, then the front trailing link attaching bolt.
8.
Reverse procedure to install, noting the following:
a. If it is necessary to replace lateral link or trailing link bushings, the lateral link or trailing link containing the damaged bushing will need to be
replaced.
b. Loosely tighten mounting bolts of each lateral link, then lower vehicle from jack stands. Adjust toe-in to specifications, then torque bolts to
specification with vehicle unloaded.
c. Loosely tighten mounting bolts of trailing link, then lower vehicle from jack stands. Torque bolt to specification with vehicle unloaded.