
MX-6 V6-2496cc 2.5L DOHC (1996)
DO NOT squeegee the tab area.
6.
Carefully remove the pre-mask tape.
^
Grasp one end (front or rear).
^
Use a slow steady pulling motion.
^
Pull the pre-mask tape at approximately 180 degrees from the vehicle's surface.
CAUTION:
Confirm that the pin stripe is not lifting during pre-mask tape removal. Re-squeegee the pin stripe to assure that any loose edges adhere to the body.
7.
Remove any blisters or air bubbles.
^
Use a sharp needle to pierce the bubble.
^
Use your thumb to press the pin stripe firmly against the body panel and work the air or water toward the hole.
8.
Remove adhesive residue under the pre-mask area using isopropyl alcohol and a soft clean cloth.
Quarter Panels
1.
Follow steps 1 through 5 for door panel pin stripe.
2.
Position the alignment tab horizontally to the applied door pin stripe.
3.
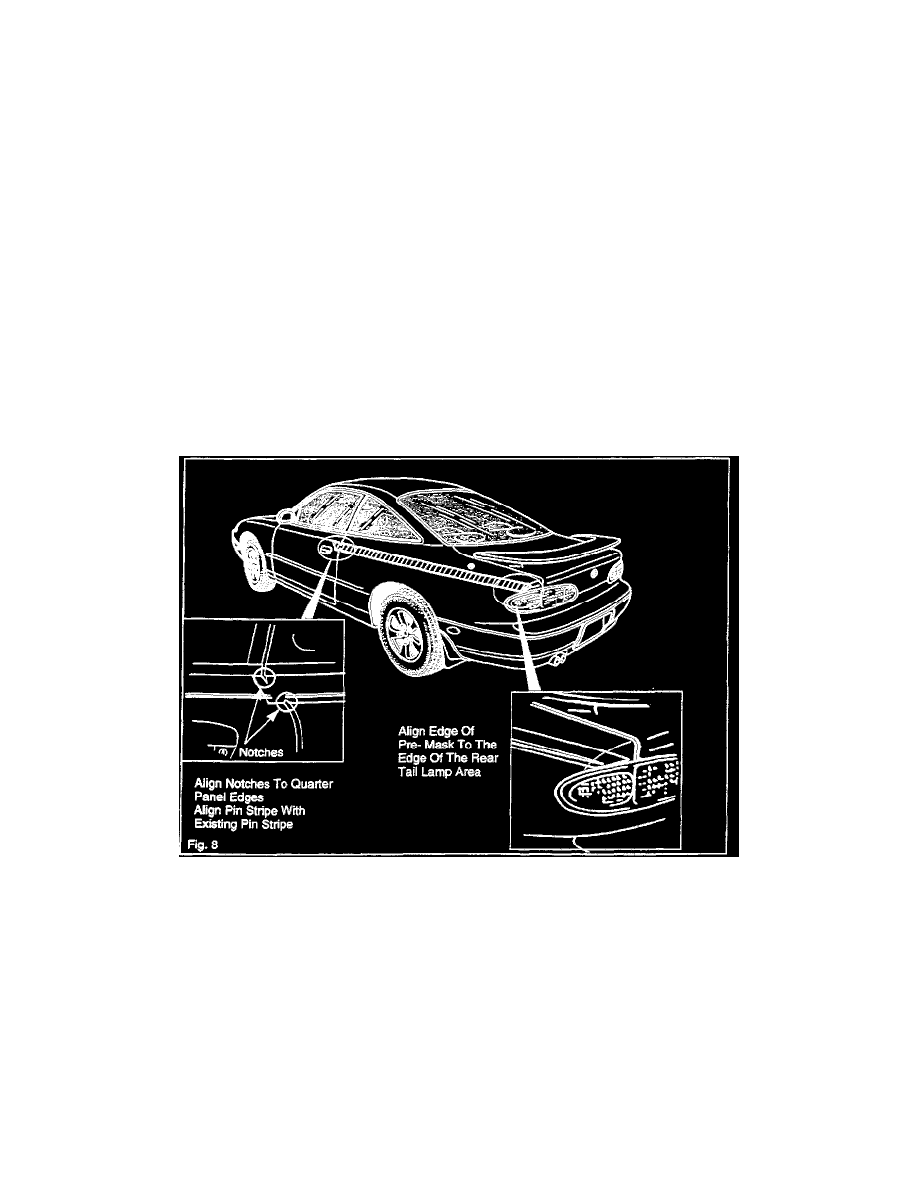
Align the vertical edge of the notches near the tab to the edge of the quarter panel.
4.
Align the pin stripe toward the rear of the vehicle (tail lamp area).
NOTE:
Visually confirm alignment with the existing fender or quarter panel pin stripes for optimal appearance.
5.
Use a squeegee to apply the pin stripe and remove any air bubbles or water, working toward the rear of the tail lamp area.
CAUTION:
DO NOT squeegee the tab area.
6.
Carefully remove the pre-mask tape.