
MX-6 V6-2496cc 2.5L DOHC (1996)
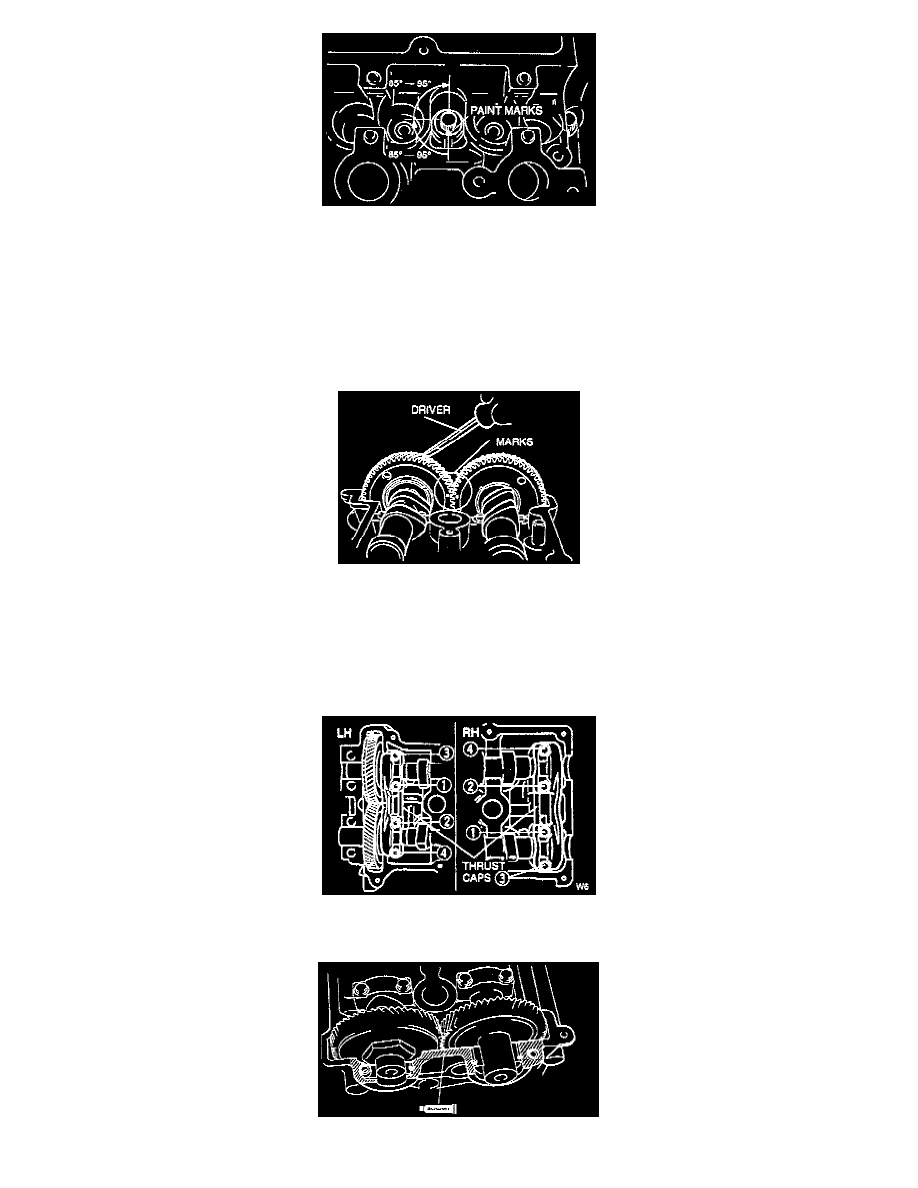
5. Using the marks as a reference, tighten the bolts by turning each 85° - 95° in the sequence shown.
6. Further tighten each bolt by turning another 85° - 95°.
CAMSHAFT ASSEMBLY NOTE
CAUTION: Camshafts must be assembled in the following procedure. Otherwise, camshaft can be broken or damaged because there is little camshaft
thrust clearance.
1. Apply clean engine oil to the camshaft journals, camshaft lobes, and camshaft gears.
Alignment Marks
2. Install the camshafts so that the intake camshaft gear mark and exhaust camshaft gear mark align.
3. Remove the oil, dirt from the mating surface between the front canshaft cap and the cylinder head, and degree.
CAUTION: Install the thrust caps (RH is 4 mark, LH is A mark) first. Otherwise, camshaft can be broken or damaged.
4. Install the thrust caps onto the cylinder heads. Hand tighten the bolts in five or six steps in the order shown, until the thrust caps are fully seated on
the cylinder heads.
5. Apply silicone sealant to the shaded areas as shown.