
MX-6 V6-2496cc 2.5L DOHC (1996)
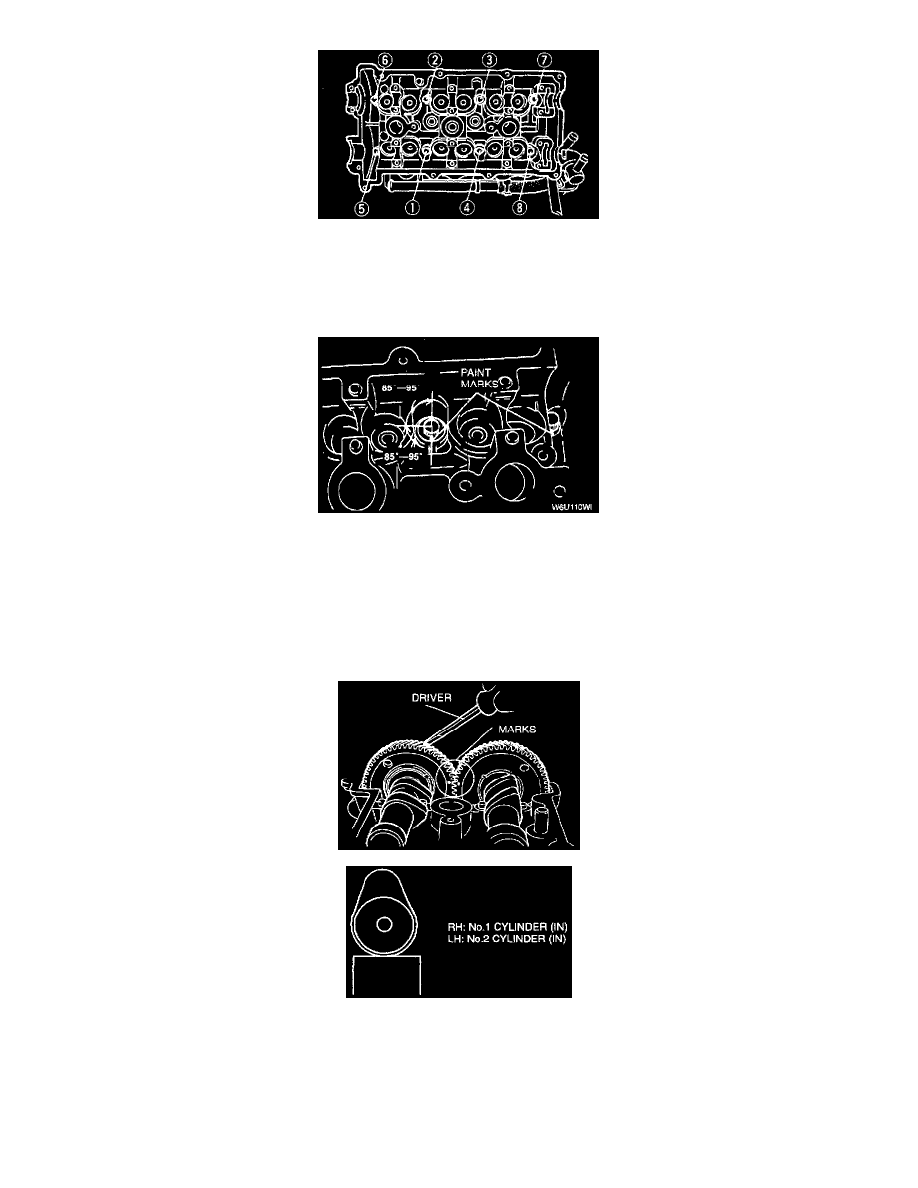
Head Torque Sequence
2. Tighten the bolts in two or three steps in the order shown.
Tightening torque: 23.1 - 25.9 Nm {2.35 - 2.65 kgf/m, 17 - 19.1 ft. lbs.}
3. Put a paint mark on each bolt head
4. Using the marks as a reference, tighten the bolts by turning each 85° - 95° in the sequence shown.
5. Further tighten each bolt by turning another 85° - 95° in the sequence shown.
6. Support the engine by using the chain block.
7. Remove the No.3 engine mount rubber.
Camshaft Installation Note
1. Apply clean engine oil to the camshaft journals, camshaft lobes, and camshaft gears.
2. Install the camshafts so that the intake camshaft gear mark and exhaust camshaft gear mark align. Adjust the friction gear position with a
screwdriver. (Intake side cam lobes of the No.1 cylinder (RH) and No.2 cylinder (LH) face straight up.)
CAUTION: Install the thrust caps (RH is 4 mark, LH is B mark) first. Otherwise, camshaft can be broken or damaged.