
MX-6 V6-2496cc 2.5L DOHC (1996)
2.
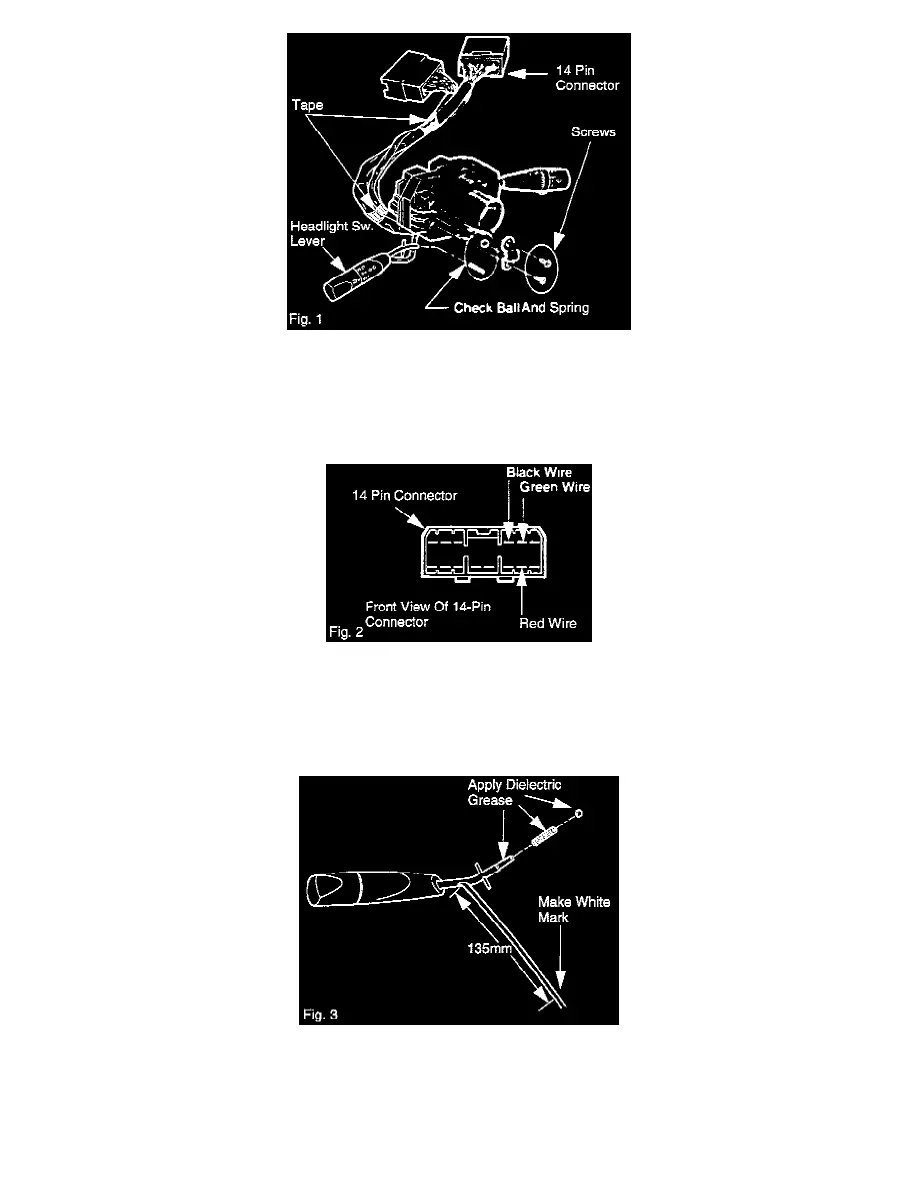
Remove the two (2) screws securing the headlight switch. Refer to Fig. 1.
NOTE:
Use care not to misplace the spring and check ball. These parts will be reused.
3.
Open both pin lock gates on the back of the 14 pin connector.
4.
Remove the black, red and green wires from the 14 pin connector using a suitable tool. Refer to Fig. 2
NOTE:
Mark wire location on connector prior to wire removal.
5.
Detach the headlight switch harness by removing the two (2) pieces of electrical tape and one tie-wrap.
6.
Place a white mark on the new headlight switch harness 135 mm from the point where the harness leaves the lever. Refer to Fig. 3
7.
Apply a small amount of dielectric grease (see Pants Information) to the following components. Refer to Fig. 3
^
End of new headlight switch lever